Entering / navigating / exiting, Setup menu – Anthem Audio AVM 50 User Manual
Page 23
15
3. SETUP MENU
For optimum performance and enjoyment, your AVM 50 should be properly set up. This may appear like a lot
of work, however, most settings do not need to be changed from the factory defaults.
The most important things are entering information about your display (menu 1) and speakers (menu 3) if the
defaults do not apply, the distance from each speaker to the listening area (menu 4), balancing output levels
to one another (menu 5), and input connections (menu 6). The rest is preference – the surround mode presets
in menu 7, for example, should be set up after you have played a variety of source material and have decided
which surround modes you like best.
For proper audio balance, menus that involve test signals must be set up in the order that they appear.
Illustrations throughout this section show the On-Screen display menus in that order. For ease of viewing,
use of the On-Screen display is recommended, although the Front Panel display shows similar information.
Alternatively, most of the setup can be done on your personal computer through RS-232 connection and a
program from our web site, called Setup Editor. This can also save your configuration as a backup file. Setup
Editor cannot play test signals – calibration still has to be done through the Setup Menu.
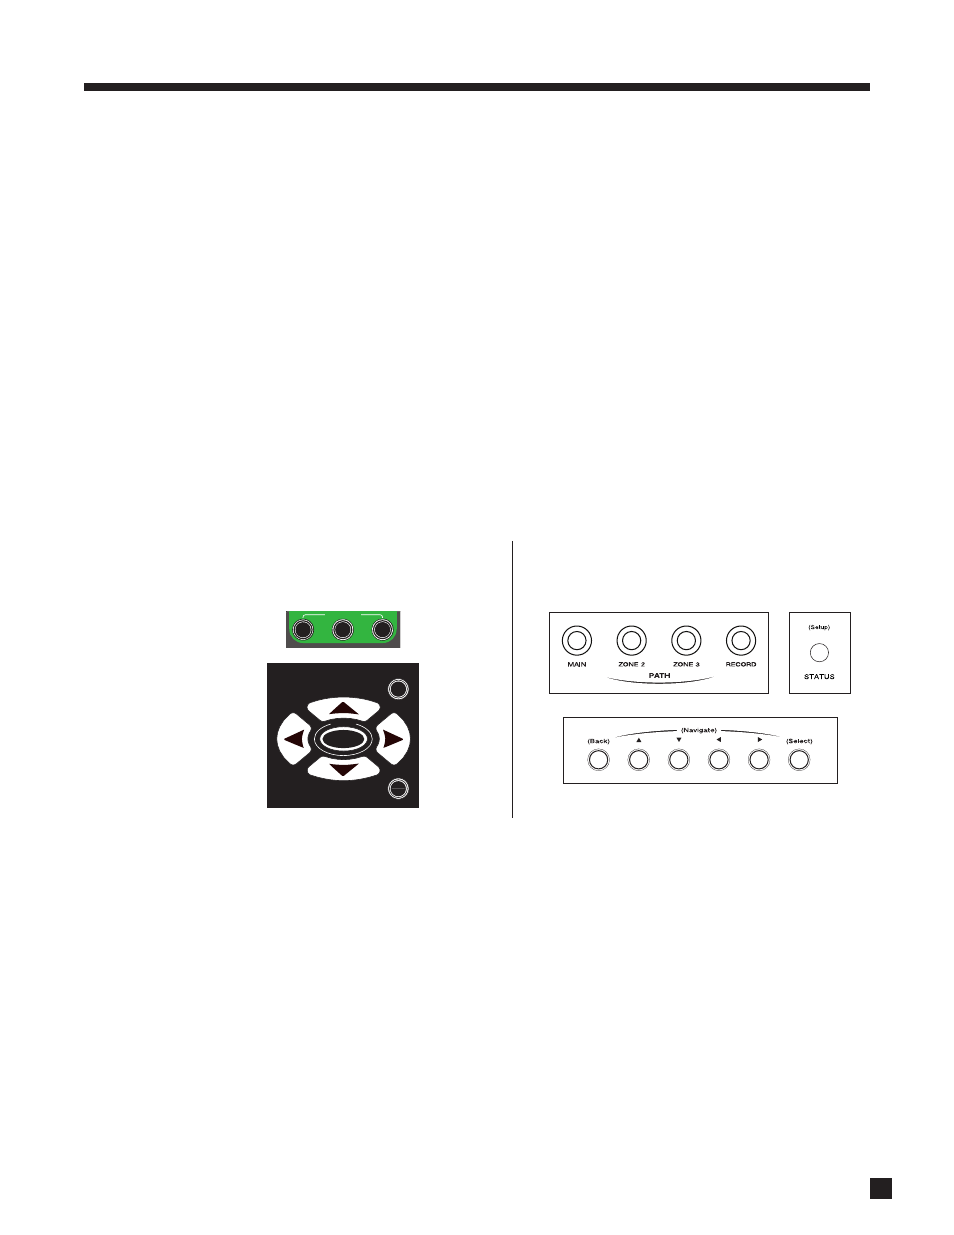
HOW TO ENTER THE SETUP MENU
The Setup Menu can be accessed from either MAIN or ZONE2. The On-Screen display shows only in that
Path (MAIN – any output except Composite, ZONE2 – S-Video only). Test signals only play from MAIN.
To enter the Setup Menu:
Remote Control
Front Panel
Make sure the appropriate control mode is set,
Make sure the appropriate Path is selected, then press
then press SUB/LFE (SETUP) for 3 seconds.
and hold STATUS (Setup) for 3 seconds.
HOW TO NAVIGATE IN THE SETUP MENU
• Use the
buttons to scroll through menus.
• Press SELECT to choose a menu item.
• Use the
and
buttons to change settings.
• Press BACK to return to previous item or menu.
HOW TO EXIT FROM THE SETUP MENU
Press BACK as many times as necessary. Each time BACK is pressed, the previous item or menu returns. The
Setup will exit by itself if not used for 5 minutes to prevent the potential of a burned-in On-Screen image.
SLEEP
INPUT
FRT
CTR
THX
TIMERS
STATUS
PIP
SWAP
MOVE
SSP SOURCE
COPY
AUX
TAPE
DVD
TV
SAT
VCR
CD
DVD
TV
SAT
VCR
BASS
TREBLE
BALA
NCE
2-Ch
CD
REC
MAIN
Z2
Z3
SSP PATH
DY
NAMICS
VOLUME
CH PRE-SET
FM/AM PRE-SETS
TUNE
SEEK
SOURCE SEEK
LEARN
ENTER
MUTE
7
8
0
9
SELECT
SUB
LFE
FM
AM
SUR
RR
SSP OFF
DISPLAY
TO
NE BYPASS
MODE
ON
SCREEN
INFO
GUIDE
BACK
SETUP
1
2
3
4
5
6
POWER
6-Ch
SS
P PATH
SSP OFF
LAST