Pop & Lock PL8510 User Manual
Tailgate lock, Instructions, Layout - rear view: parts included
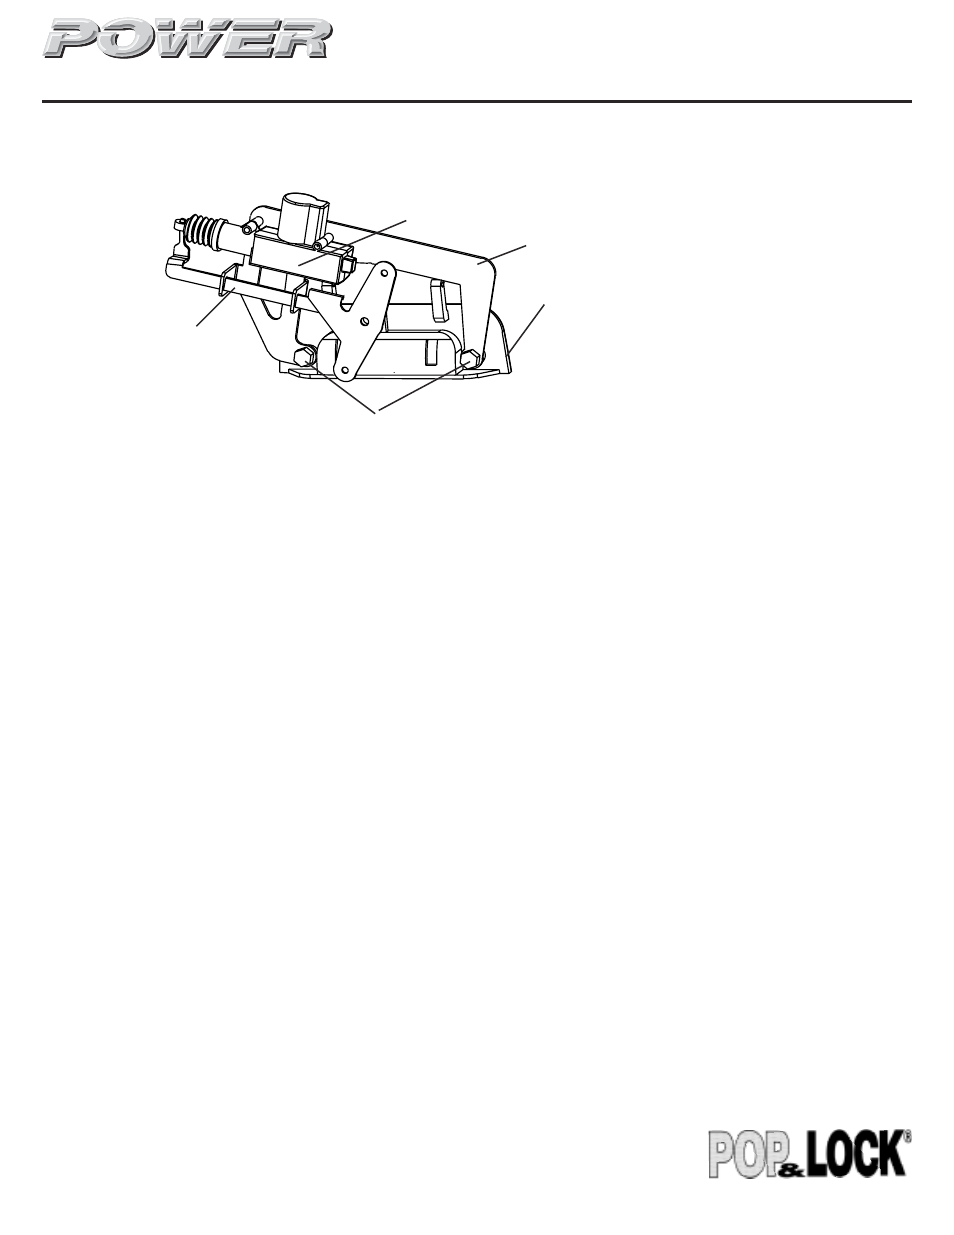
Layout - Rear View:
Parts Included:
Power Tailgate Lock Unit
Short Wiring Cable
Long Wiring Cable
Cable Ties
Blue Connector Taps
Tools Required:
10 MM Socket
Pliers
Installation:
TAILGATE LOCK
Model PL 8510 for TOYOTA TACOMA , 1995 to 2004
Instructions
Mounting Screws
Handle Bracket
For Tech Support call: 800 342 5911
Mounting Plate
Actuator
Lock Bolt
1. Lower the tailgate and remove the access panel.
2. Release the rod ends from the scissor links, remove the two 10 MM screws holding the handle and take it out.
3. Test the system by bolting the POWER LOCK to the handle, connect it to the short and the long wiring harness and
take it forward into the cab to test wire it.
4. Wiring: 2 door models - remove the kick panel and locate the wiring harness leading to the driver’s door. Locate the
BLUE wire and the BLUE/WHITE striped wire. Attach the two blue wire taps to them and squeeze them shut with a
pair of pliers. 4 door models - wire colors remain the same, however connection must be made in the driver’s side
rear door step plate and ‘B’ pillar.
5. Connect the long wiring harness to the blue wire taps and test the system. Lock and unlock the doors using the
power door lock switch. The locking bolt of the power tailgate lock should slide below the flange of the scissor link
and lock and unlock it. Reverse the wiring if the operation is out of phase. You can now unplug the wires from the blue
leads.
6. Reinstall all the components into the tailgate with the actuator on the passenger’s side. Connect the rod ends into the
scissor links.
7. Feed the round bullet connectors on the end of the short wiring cable into a drain hole at the bottom of the tailgate
and up the tailgate to the handle opening. Connect them to the wires of the power tailgate lock.
8. Route the end of the short cable from the tailgate between the bumper and the truck bed.
9. Connect the short wire harness to the long wire harness. Locate the connector so that you can reach it to remove the
tailgate. Coil and tie the extra length of the short wiring harness inside the tailgate. Don’t attach it to the truck.
10. Route the long wire harness along the frame rail and the existing wiring on the driver’s side of the truck. Use cable
ties to attach the harness to the existing wiring underneath the truck. Follow the existing wiring under the cab and up
the firewall to the grommet at the hood-release cable.
11. Pull the wires through the grommet and lead them to the blue connectors you attached to the wiring in Step 4. The
system is now fully installed. Perform a final check and reverse the wires if necessary.
For the latest instructions please visit www.popandlock.net
12-27-11