Pop & Lock PL8250 User Manual
Pl8250
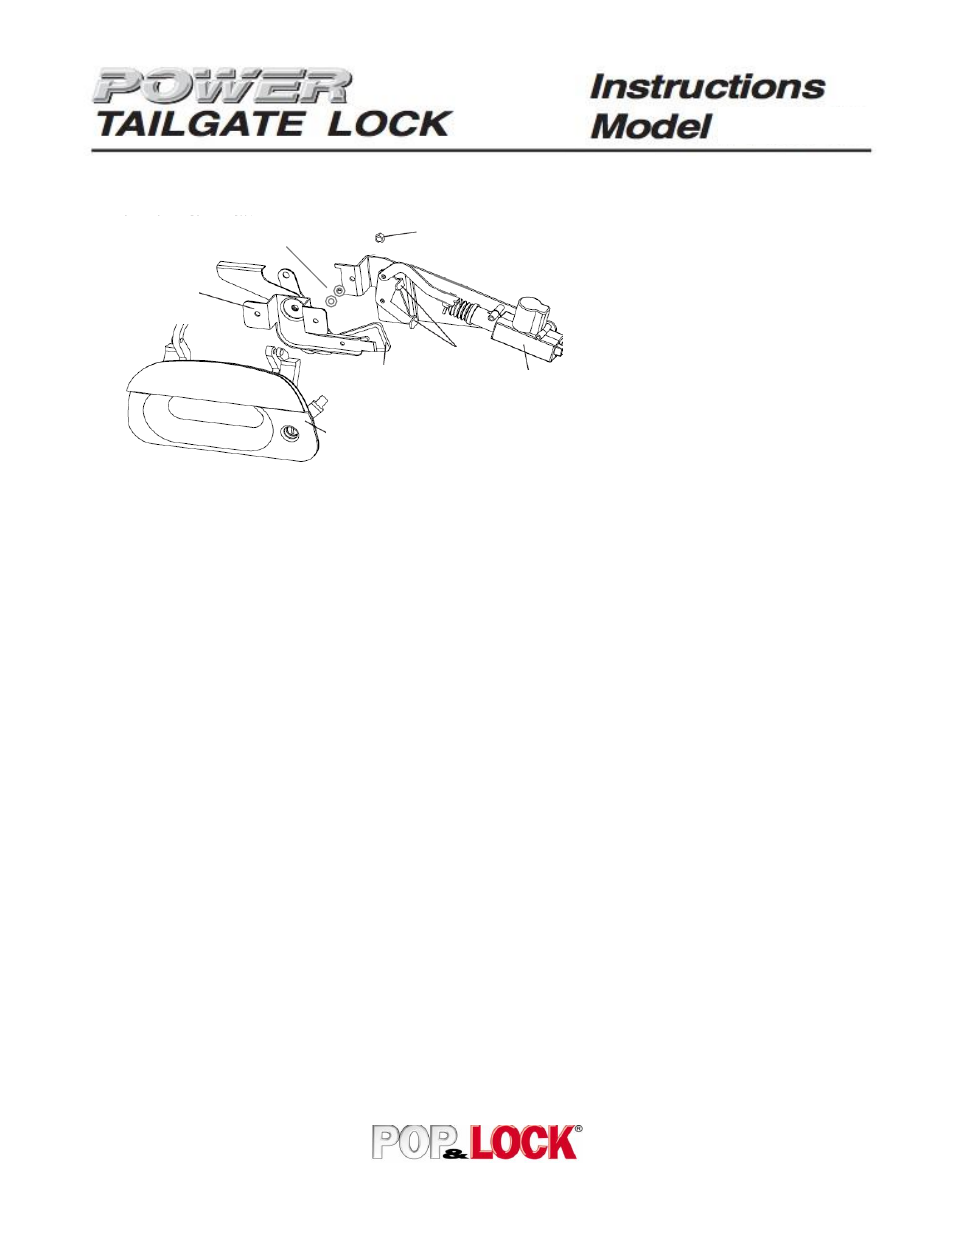
PL8250
Nut
Scissor Link
Bracket
Actuator
Crank
Arms
Toggle
Link
Handle Bracket
Layout – Rear View:
For Tech Support call: 800-342-5911 option 1
Installation:
1. Lower the tailgate and remove the access panel.
2. Release the passenger side rod end from the scissor link, remove the passenger side 10 MM nut holding the scissor link
bracket. Install the 2 flat washers included in the kit onto the stud and install the lock bracket. Reinstall the nut and
tighten. Make sure the two arms of the lock crank straddle the toggle link before you tighten the nut. Connect the rod end
onto the scissor link.
3. Locate the wires to connect to. If the truck has 2 doors or access cab then the wire will be in either side kick panel. If the
truck is a true 4 door (crew cab) then the wires can be located in the step plate.
a. 1997 – 2003 locate the Red/with Green stripe wire and the Pink(red)/with orange stripe wire.
b. 2004 – 2007 locate the Pink/with Black stripe wire and the Pink(red)/with orange stripe wire.
c.
2008 locate the Grey or Grey/with Tan stripe wire and the Purple or Purple/with Grey stripe wire.
d. 2009 and Up locate the Grey/with a Brown(tan) stripe wire and the Light Blue/with Green stripe wire on the
drivers side. For the passenger side locate the Grey/with a Brown(tan) stripe wire and the Purple/with Grey stripe
wire.
4. Feed the round bullet connectors on the end of the short wiring cable into a drain hole at the bottom of the tailgate and up
to the power tailgate lock. Connect them to the wires of the power tailgate lock.
5. Route the other end of the short cable to be located between the bumper and the truck bed.
6. Connect the short wire harness to the long wire harness. Locate the connector so that you can unplug the two if you need
to remove the tailgate. Coil and tie the extra length of the short wiring harness inside the tailgate. Don’t attach it to the
truck.
7. Route the long wire harness along the frame rail and the existing wiring on the driver’s side of the truck. Use cable ties to
attach the harness to the existing wiring underneath the truck. Follow the existing wiring under the cab and up the firewall
to the grommet at the hood-release cable.
8. Pull the wires through the grommet and lead them to the of the location of the wire found in Step 3.
9. Connect the long wiring harness wires to the factory wires using the tap connectors and test the system. Lock and unlock
the doors using the power door lock switch. The two crank arms should flip the toggle link up and down to lock and unlock
the scissor link. If the lock operates the oppisite of the doors, switch the two leads at the bullet connectors off the
actuator.
10. The sytem is now fully installed. Perform a final check and make sure lock functions properly. If everything works, reinstall
the access panel.
FORD F150, ’97 AND UP
FORD F250/350, ’99 AND UP
FORD EXPLORER SPORT TRAC, ’01 AND UP
Works only with factory lock
Parts included:
Power Tailgate Lock Unit
Short Wiring Cable
Long Wiring Cable
Cable ties
Tap Connectors
2 – ¼” Flat Washers
Tools Required:
T-30 Torx Driver
10MM Sockethead
Phillips Screwdriver
Pliers
¼” Washers