Connecting carchip fleet to your computer – DAVIS CarChip Fleet Installation (8240, 8244) User Manual
Page 3
Connecting CarChip Fleet to Your Computer
2.
Plug CarChip into the OBDII port checking to make sure the indicator light
blinks when first connected.
Note:
The indicator light will always blink when initially connected to a vehicle. Unless the
indicator has been enabled via the software, it will stop blinking once it has
established communications with the OBDII computer.
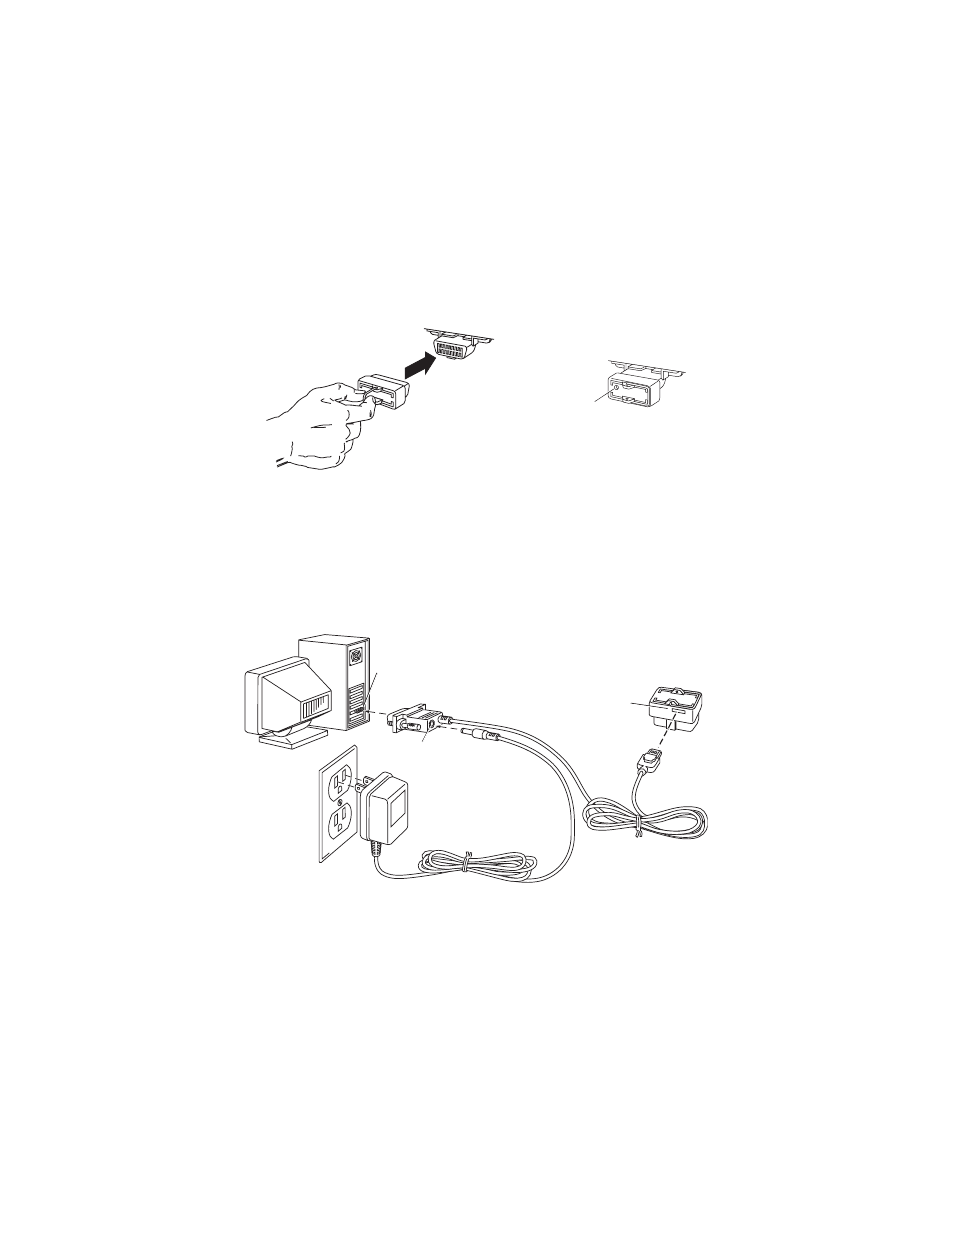
Connecting CarChip Fleet to Your Computer
Connect CarChip Fleet to a serial port on your computer using the hardware and
cables as shown below.
1.
Locate a free serial port on the back of your computer and insert the 9-pin
connector of the download cable into the port.
2.
Plug the power adapter cable into the power jack on the 9-pin connector.
3.
Plug the power adapter into an AC outlet.
4.
Plug the 8-pin microminiature connector into the port on the CarChip Fleet.
CarChip Fleet
OBD II Port
Indicator Light
Serial Port
9-Pin Connector
Power
Adapter
Power Adapter Cable
6' (1.8 m)
Download Cable
5' (1.5 m)
CarChip
Fleet
8-Pin
Microminiature
Connector
8-Pin
Microminiature
Port
Power Jack