Alternator test, Caution – Actron KAL4780 User Manual
Page 8
8
©2002
Printed in China
0002-000-2407
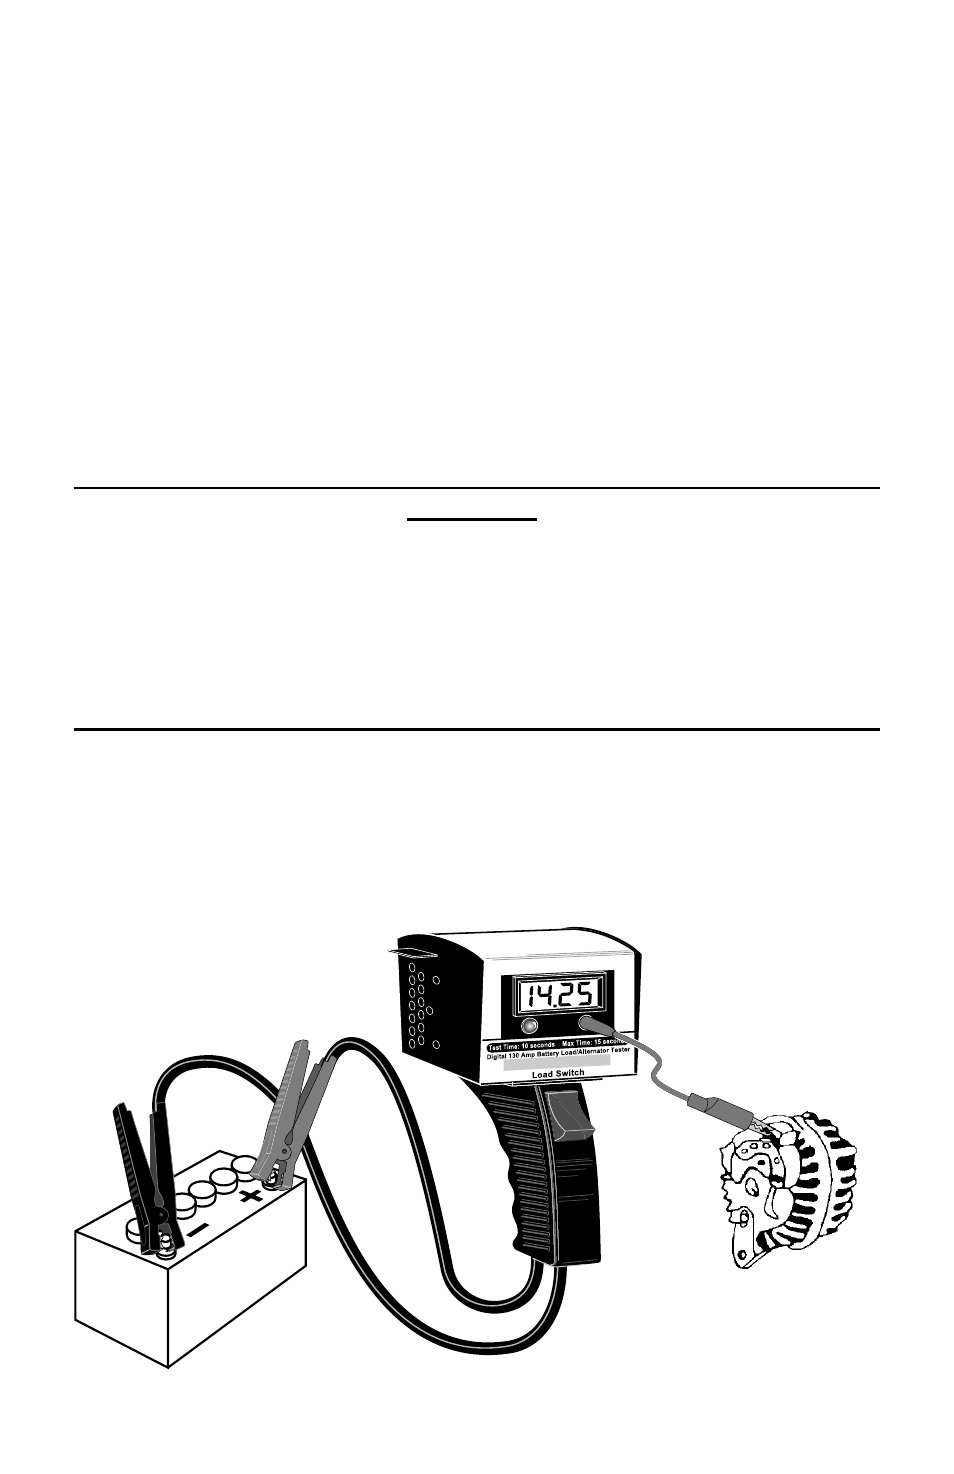
Figure 7 Alternator Test Setup
Alternator Test
This test identifies problems associated with the alternator.
1. As shown in Figure 7, connect the testers clamps to the vehicles battery
posts: Red to positive (+), Black to negative (-). Connect the test lead to the
tester and positive terminal on alternator. On GM alternators, attach the test
lead to terminal Nº 1 without disconnecting the plug.
2. Start engine and allow it to idle.
3. If a GM alternator is being tested, observe the testers Red LED and do not
press the LOAD SWITCH. Otherwise, continue with Step 4.
If the LED flashes On and goes OFF, or never comes ON, then the Diode
Trio is functioning properly.
If the LED stays ON, then the Diode Trio might be defective. The alternator
needs repair or replacement.
4. Rev the engine to a fast idle (1200-1500 RPM).
CAUTION!
The Battery Load Tester becomes hot when applying the load. Allow
tester to cool between discharges; about 2 minutes. In warm tem-
peratures, allow more time to cool. If overheating occurs, the LCD
might temporarily become dim. After cooling down, the testers LCD
will return to normal.
Do not activate and hold the load switch for more than 15 seconds. This
will overload the tester resulting in damage and void the warranty.
5. Press and hold LOAD SWITCH on tester for 5 seconds and observe the testers
Red LED. When done, turn engine OFF and disconnect the test leads.
If the LED flashes ON and then goes OFF, or never comes ON, then the
diodes (rectifiers) are functioning properly.
If the LED stays ON or flashes continuously, then one or more diodes (rec-
tifiers) are defective. Repair or replace the alternator and/or voltage regula-
tor.