Ridetech 11379103 User Manual
Page 4
5.
Make sure the axle brackets are parallel to the ground and snug the U-bolts around
the axle.
6.
Rotate the assembled sway bar up until the frame brackets contact the frame. Check
to make sure the frame brackets are centered on the frame rails and the dog bones
are somewhat at a 90 degree angle to the sway bar. Mark the frame and drill 7/16”
holes. Use supplied hardware kit # T1711 to attach the frame bracket to the frame.
Torque to 20 ft. lbs.
7.
Double check for clearance around the sway bar at all brackets on the axle. Check
that the “arms” on the sway bar are “close” to parallel to the ground.
8.
Torque the dog bone bolts to 30 – 40 ft. lbs. Torque the U-bolts to 30 – 40 ft. lbs.
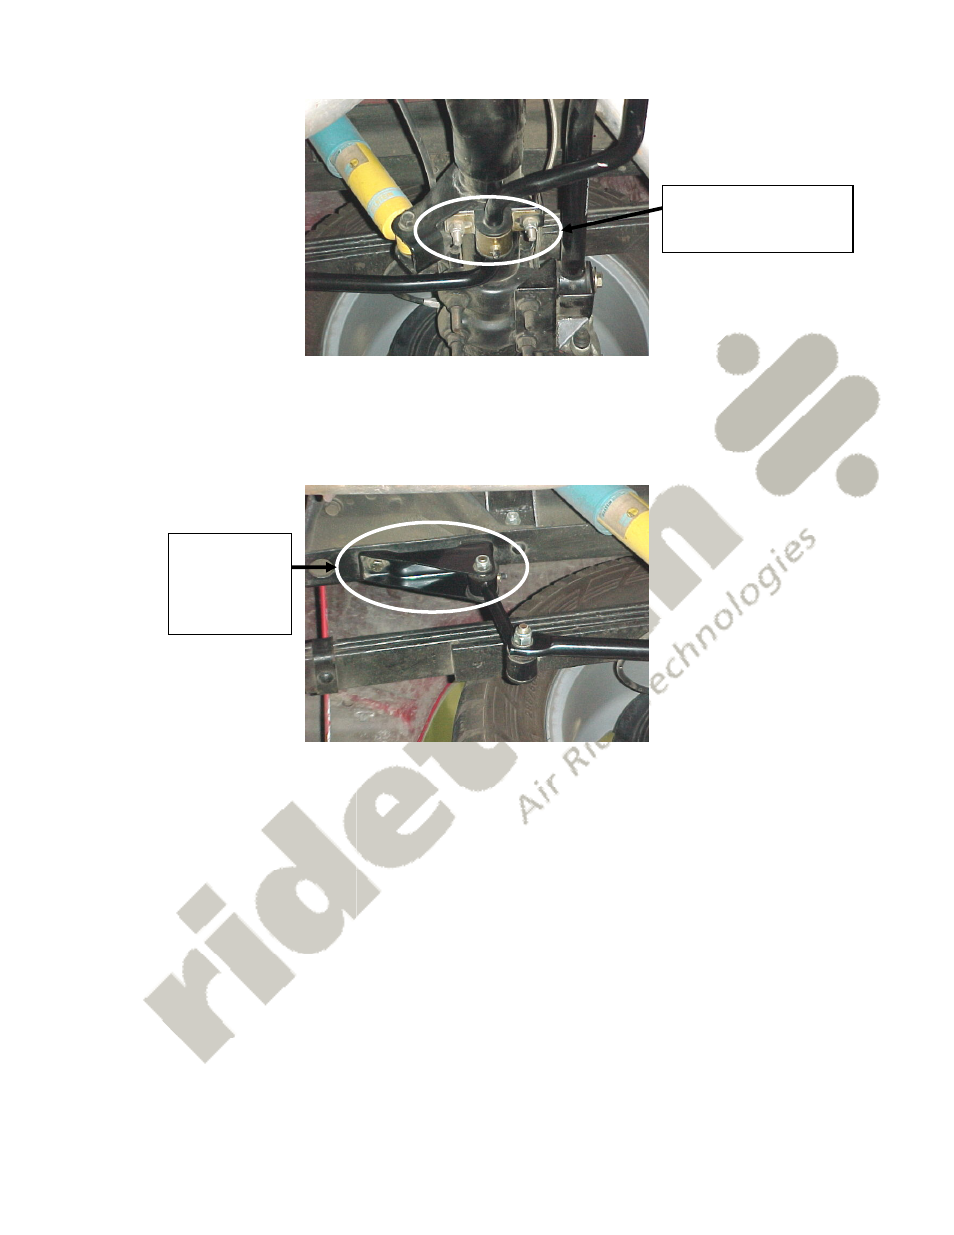
The frame
bracket
mounted to the
frame.
Make sure the axle
bracket is parallel to the
ground.
- 13076799 (5 pages)
- 13056799 (5 pages)
- 13027199 (8 pages)
- 13017199 (7 pages)
- 13006799 (4 pages)
- 12226799 (5 pages)
- 12186799 (5 pages)
- 12176799 (7 pages)
- 12167199 (6 pages)
- 12087199 (8 pages)
- 11456799 (9 pages)
- 11446799 (6 pages)
- 11436799 (6 pages)
- 11406799 (5 pages)
- 11396799 (5 pages)
- 11386799 (8 pages)
- 11376799 (6 pages)
- 11366799 (6 pages)
- 11267199 (7 pages)
- 11257199 (8 pages)
- 11177199 (8 pages)
- 11167199 (7 pages)
- 11167197 (7 pages)
- 11037199 (7 pages)
- 11027199 (7 pages)
- 19004901 (4 pages)
- 19004900 (4 pages)
- 19003005 (4 pages)
- 19003004 (4 pages)
- 19003003 (3 pages)
- 19003002 (4 pages)
- 19002005 (4 pages)
- 19002004 (4 pages)
- 19002003 (3 pages)
- 19002002 (4 pages)
- 12014099 (4 pages)
- 11014099 (4 pages)
- COIL-OVER Stud Top Assembly (1 page)
- COIL-OVER (2 pages)
- 12106509 (2 pages)
- 12103510 (4 pages)
- 12103509 (4 pages)
- 11326110 (6 pages)
- 11323510 (4 pages)
- 11323509 (4 pages)