Pypes Performance Exhaust XGX10 User Manual
Pypes Performance Exhaust For the car
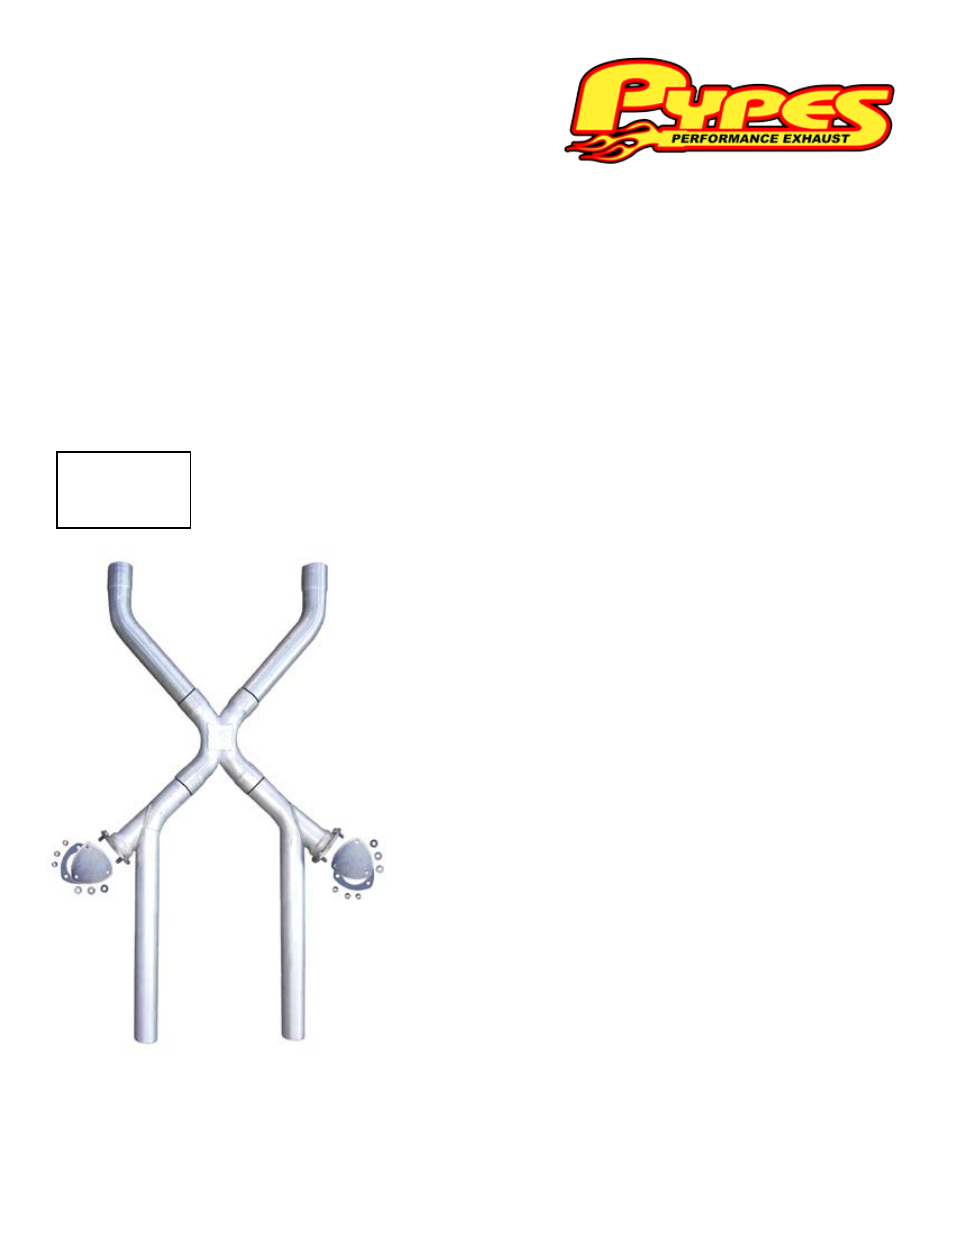
XVX10/ XVX13/ XGX10/ XGX13
409 Stainless Steel Universal X-CHANGE X-pipe Kits
“S” at the end of the part number denotes 304 polished stainless steel.
XVX10: 2-1/2” Universal fit
XVX13: 3” Universal fit
XGX10: 2-1/2” Tri-5 Chevy (wider front legs)
XGX13: 3” Tri-5 Chevy (wider front legs)
Pypes Performance Exhaust
2880 Bergey Road Unit O Hatfield, PA 19440
800-421-3890 (voice) 215-712-9968 (fax)
www.pypesexhaust.com
(A) Center X
(B) Front Legs
(C) Rear Legs
(D) Dump Plate Kit
Thanks again for purchasing your new 409 stainless steel Pypes Performance Exhaust Universal X-CHANGE X-pipe
kit. Please be sure to confirm all the components in the kit were received in your shipment before beginning installa-
tion. These kits will include your new 5 piece kit, dump plate kit (2 plates, 2 gaskets and the necessary mounting hard-
ware), and the necessary clamps. If you find any component missing, please contact our office at 800-421-3890 for
replacement. Installation of this kit will require a few simple hand tools and a cutting device. For a quicker and tighter
installation, welding of slip joints is recommended. Technical assistance is available both online at www.pypesexhaust.
com or 800-421-3890.
1. This five piece kit is a universal kit produced to fit
many applications. Measuring and cutting will be required.
The x-pipe is designed to connect after your collector reduc-
ers or down-pipes under the transmission cross-member.
2. Trimming of the tubing may be required for the opti-
mum fit. Install the rear legs into the mufflers first. You are
aiming to have the center “X” land approx 8-12 inches be-
hind the tail shaft of your transmission and centered under
the driveshaft. Also, the center plate on the “X” has an ar-
row stamp which must point forward. Trim the rear legs as
needed to put your “X” and mufflers in the proper location.
Quick tip: If the rear suspension is unloaded, you can push
the center “X” up until it just about touches the drive shaft as
it will not hit once the suspension is loaded. Slide the front
legs into the x-pipe. They should end somewhere close to
the humps in your transmission cross-member. Additional
tubing may be required to lengthen your collector reducers.
Some applications, the front “X” legs may not be centered in
the humps but line up to your headers or down-pipes. This
is fine as the system will not hang too low. Be extra careful
when measuring and cutting. A helpful tip: Line up the front
legs under the center “X” to mark your cut lines making sure
to line them up with you headers or down pipes. Some head-
er applications require custom collectors due to the header
not ending square and parallel to the car. For proper system
fit, your collectors must run parallel with your rocker panels.
3. Finish the x-pipe installation by making all your final
adjustments to position the legs. Now tighten all the clamps
(Warning: tightened clamps will leave marks in the tubing,
making removal or adjustments extremely difficult) or for
the best fit weld all the slip joints. The 409 stainless can be
welded with your standard mig welder, and is highly recom-
mended when possible. Cap the open ports with the provid-
ed dump plate kit or optional Electrical cutouts, p/n HVE10,
before you start the car!!!
(A)
(B)
(B)
(C)
(C)
(D)
(D)