Merit Medical VP-210 PD Catheter Implantation System User Manual
Page 5
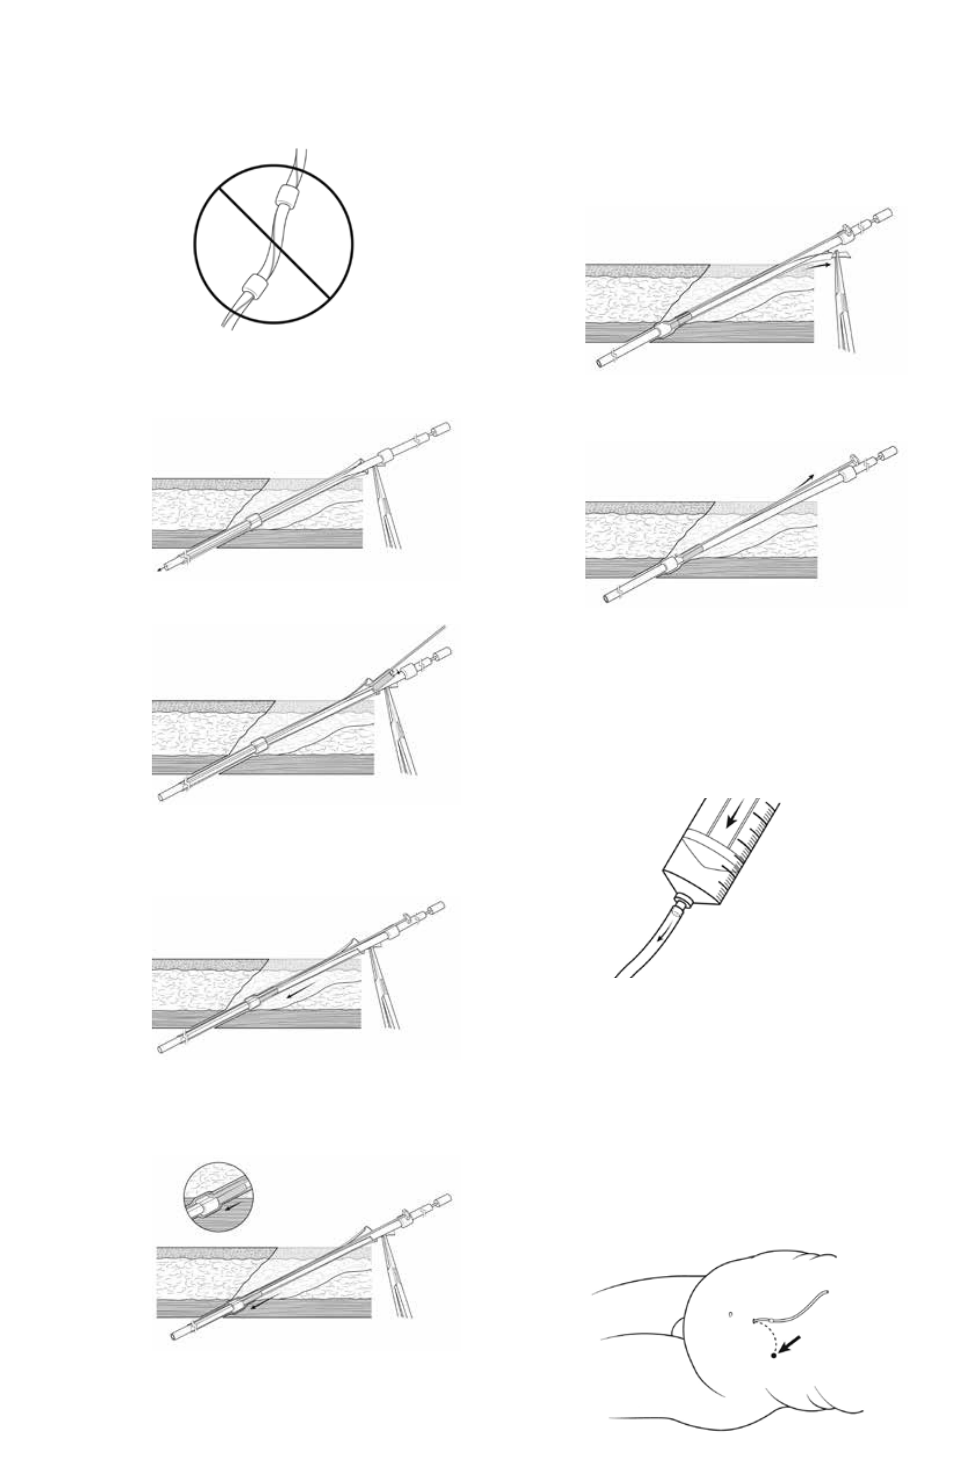
7. Use the radiopaque stripe as a guide to avoid
twisting the catheter. (Figure 24). For optimal catheter
placement, radiopaque stripe should be oriented
directly anterior or directly posterior in the patient.
CAUTION: make sure the catheter is not doubled on itself,
kinked, or twisted.
Figure 24
8. advance catheter until distal cuff reaches rectus sheath.
(There will be an increase in resistance to movement of
the catheter) (Figure 25).
Figure 25
9. Position the Cuff Implantor Tool parallel with and over
the catheter, between the two cuffs (Figure 26).
Figure 26
10. advance Cuff Implantor Tool to edge of distal cuff
(Figure 27).
NOTE: To improve visualization of the cuff, it is helpful to
retract incision site tissue.
Figure 27
11. advance catheter and Cuff Implantor Tool
simultaneously 1.0 cm to both dilate the rectus muscle
and advance the cuff into the rectus muscle while
holding the luke Guide stationary with the hemostat
(Figure 28).
Figure 28
REMOVING TOOLS
1. Verify cuff position visually or digitally.
NOTE: To improve visualization of the cuff, it is helpful to
retract incision site tissue.
2. Retract the luke Guide parallel with the catheter
(Figure 29).
NOTE: maintain pressure on cuff with the Cuff Implantor
Tool to hold it in position.
Figure 29
3. Retract Cuff Implantor Tool, parallel with the catheter,
without dislocating or moving the distal cuff (Figure 30).
Figure 30
4. Retract the catheter stylette.
5. allow any remaining air to exit.
ChECkING CAThETER PATENCY
1. Test catheter patency via infusion of 100-500 cc sterile
saline (Figure 31).
Figure 31
2. If catheter is functioning well, fluid will flow out in a
steady drip or flow when proximal end of the catheter is
lowered below the primary site when the syringe has
been removed.
3. The proximal end of the catheter can also be raised ap
proximately 12-15 cm above the patient’s abdomen.
Fluid will rise and fall within the catheter tube in
conjunction with respiration.
TUNNELING ThE CAThETER
1. locate the previously marked exit-site as determined by
the Implantation Stencil (Figure 32).
Figure 32