Merit Medical PD Percutaneous Kit IFU User Manual
Page 2
WARNING: Do NOT implant the catheter or place the
exit-site in the patient’s skin folds or beltline.
Patient Preparation:
1. Operating personnel should perform a surgical scrub,
and use sterile hat, mask, gown and gloves according to
hospital protocol.
2. The patient should also wear a mask.
3. Attach appropriate patient monitors and sedate pa-
tient.
4. Prepare abdomen and drape patient in standard sterile
manner.
5. Use ultrasound at the intended entrance site to identify
any exclusionary pathology. Duplex ultrasound may
also be useful to identify proper catheter placement site
and avoid injury to the inferior epigastic vessels prior to
needle placement.
6. Anesthetize the proposed tissue tract and primary
catheter insertion site with proper local anesthetic.
Percutaneous Insertion of Introducer Sheath:
7. Make a 2-3cm long horizontal skin incision at selected
catheter implantation site.
8. Use a blunt dissection and cautery device as necessary
to maintain hemostasis. See figure 4.
Figure 4
9. If appropriate, the implantation of the deep cuff into
the rectus abdominus muscle can be aided by creating
a small puncture or fasciotomy into the superficial
rectus fascia with a hemostat or scalpel prior to needle
placement.
10. At a 30-45 degree angle from horizontal, using
ultrasound guidance, advance the introducer needle
through the anterior rectus sheath, rectus muscle and
through the posterior rectus sheath.
Note: A non-vascular micropuncture set (sold separately
and available from Merit Medical) may be used to access
the peritoneum. If using a non-vascular micropuncture
set, assure the length is adequate for peritoneal access and
follow manufacturer’s instructions for use.
11. Once access to the peritoneal space is obtained, attach
a 10 mL syringe containing appropriate iodinated con-
trast material to the needle using flexible clear tubing
(sold separately).
12. Under fluoroscopy, verify needle placement into the
peritoneal space by identifying the free flow of contrast
outlining regional bowel loops. An amorphous, irreg-
ular or striated appearance of injected contrast may
indicate that the needle tip is inappropriately located in
the bowel mesentery, greater omentum, preperitoneal
space or rectus abdominus muscle.
Warning: Do not use barium-based contrast.
Note: Contrast media should outline bowel loops. Contrast
identified within a bowel loop may indicate bowel perfo-
ration.
Warning: If a bowel perforation is identified, the procedure
should be abandoned and the patient should be treated
with antibiotics for an appropriate duration before at-
tempting a repeat catheter placement.
13. Once proper access to the peritoneal space is achieved
and confirmed via contrast, remove syringe from intro-
ducer needle and insert the flexible end of the guide
wire through the introducer needle. Direct the wire into
the caudal and posterior position. Advance the wire
as appropriate under fluoroscopy into the peritoneum.
The guide wire should advance easily into the peritone-
al space.
Note: Optional: A hydrophilic, Amplatz or super-stiff guide
wire (sold separately) can also be used. Normal saline may
also be infused, when necessary, in order to increase the
space between the abdominal wall and the bowel loops.
1
Warning: Saline infusion is not recommended in the
presence of ascites.
1
Warning: Forcible advancement of the guide wire against
resistance can result in internal organ injury and should be
avoided.
14. Withdraw the introducer needle, leaving the guide wire
positioned in the peritoneum.
15. Further advance the guide wire to the optimal position
in the pelvic gutter.
16. To accommodate catheter passage into the peritoneal
cavity, dilate the rectus muscle with the 12 French and
14 French dilators respectively, under fluoroscopic
guidance.
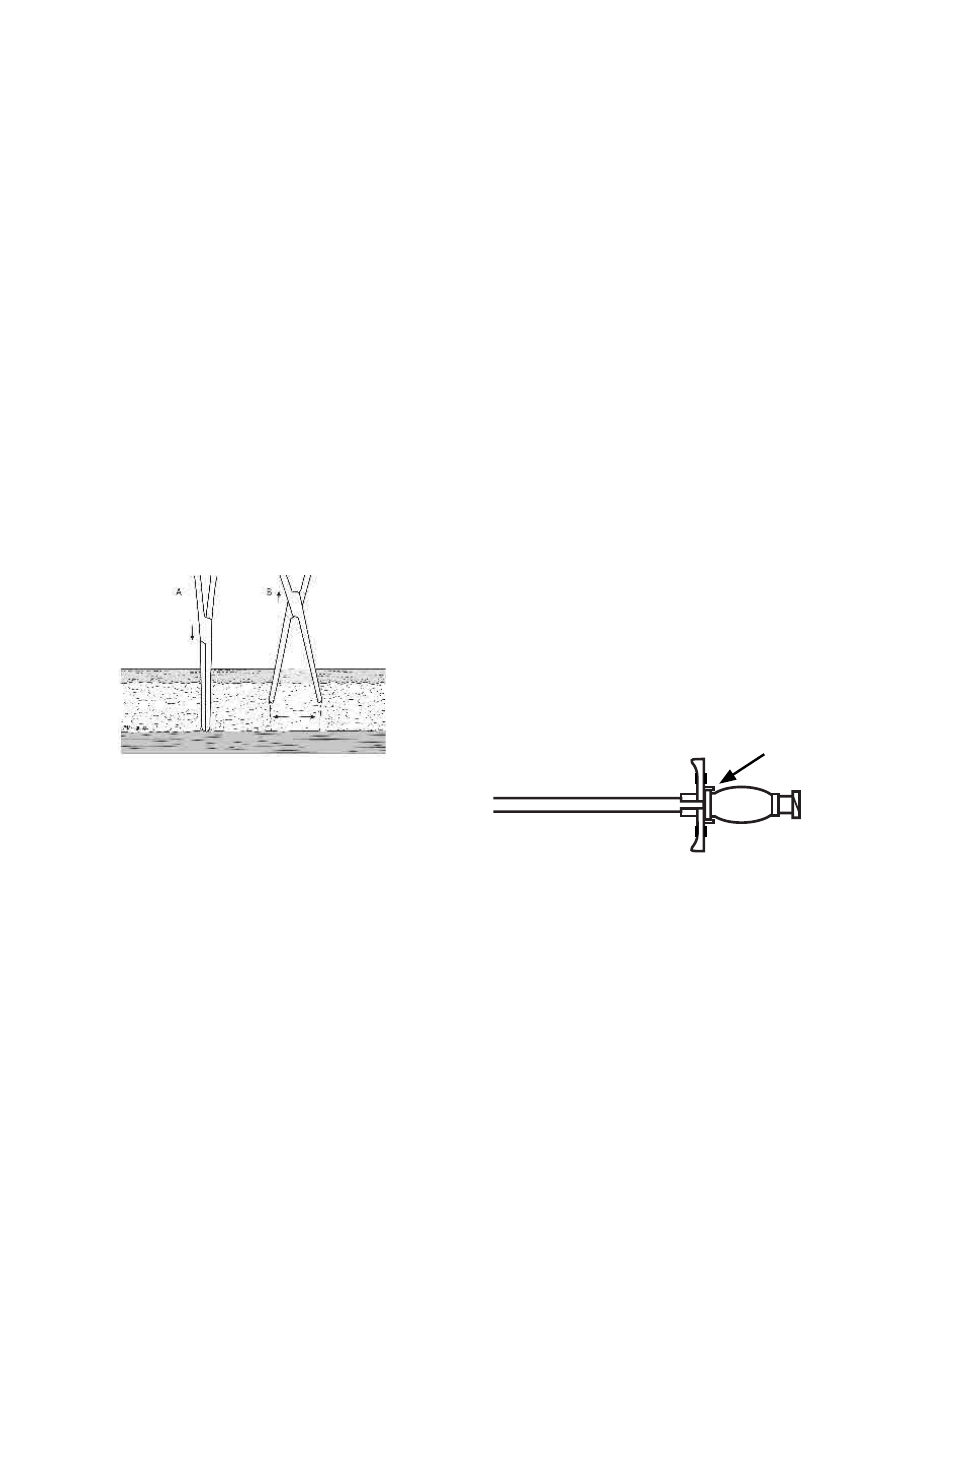
17. Verify that the dilator and introducer sheath are locked
together to prevent separation during insertion.
Figure 5
18. Under fluoroscopy, advance the 18 French peelable
introducer sheath over the guide wire, gently twisting
it back and forth to assist with passage through the
tissue.
Warning: In order to avoid internal injury, care should be
taken to avoid advancing the introducer or dilators beyond
the tip of the guide wire.
Warning: Care should be taken to avoid creating a kink into
the guide wire with the introducer.
19. Once the sheath is in place, gently remove the dilator
from the peelable introducer sheath. If using the
“Implantation Stylette Technique” as noted below, the
peelable sheath and wire can be removed simultane-
ously.
Caution: Do not force the introducer into the peritone-
um. Take care not to insert further than necessary for the
patient’s size and access site.
Preparing the catheter
20. Prepare the catheter by soaking it in sterile saline,
and squeeze the air out of the cuffs by rotating the
submerged cuffs between fingers. See Figure 6.