Installation instructions – JELD-WEN JII015 Vinyl Patio Doors without Nailing Fin User Manual
Page 2
INSTALLATION INSTRUCTIONS
for Vinyl Patio Doors without Nailing Fin (JII015)
2
SAFETY
• Read and fully understand ALL manufacturers’ instructions before
beginning. Failure to follow proper installation instructions
may result in the denial of warranty claims for operational or
performance problems.
• Do not work alone. Two or more people are required. Use safe
lifting techniques.
• Use caution when handling glass. Broken or cracked glass can cause
serious injury.
• Wear protective gear (e.g. safety glasses, gloves, ear protection, etc.).
• Operate hand/power tools safely and follow manufacturer’s
operating instructions.
• Use caution when working at elevated heights.
• If disturbing existing paint, take proper precautions if lead paint is
suspected (commonly used before 1979). Your regional EPA
(www.epa.gov/lead) or Consumer Product Safety Commission offices
provide information regarding regulations and lead protection.
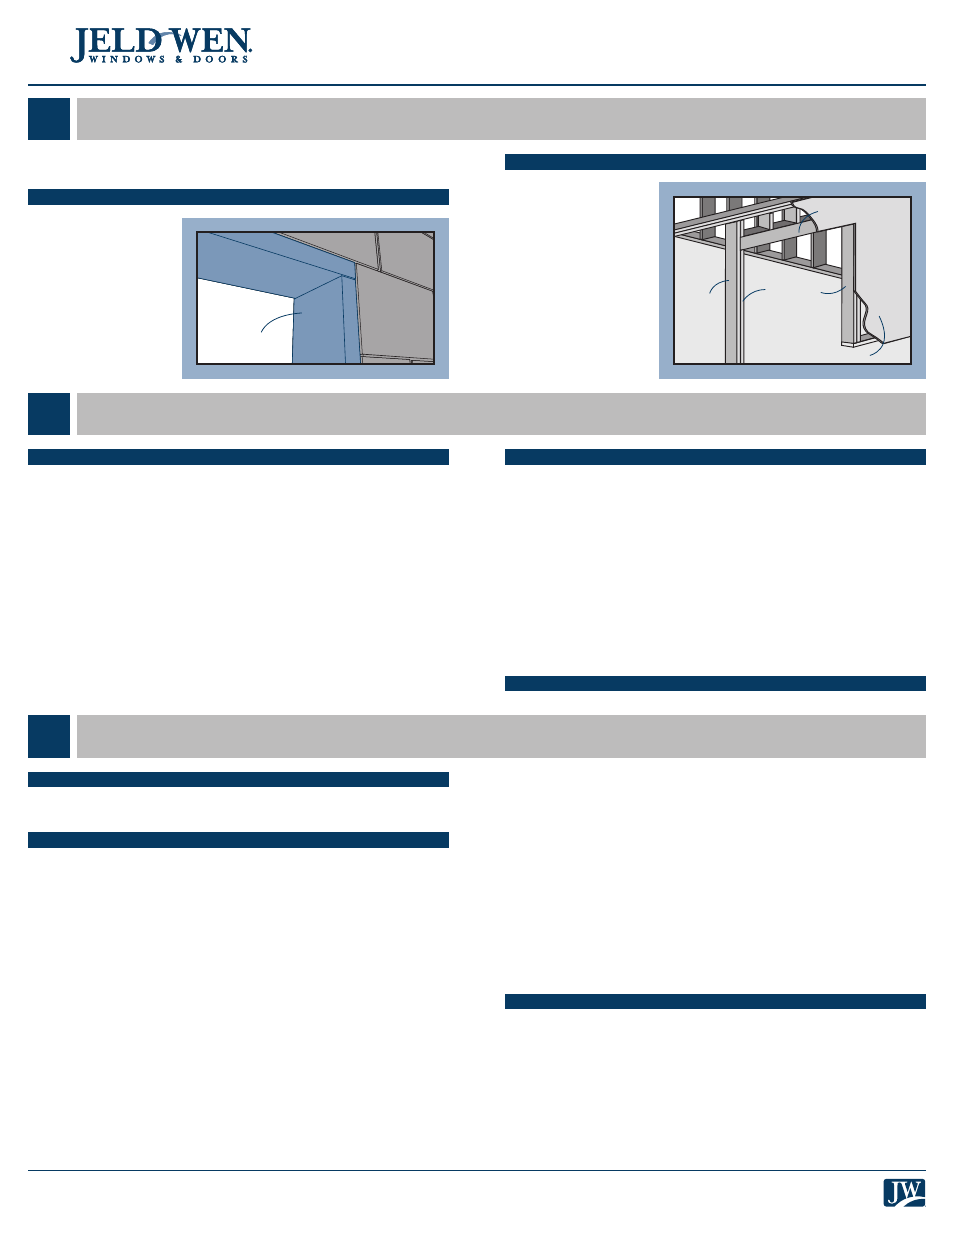
FULLY SHEATHED / OPEN-STUD WALL CONSTRUCTION
Fully sheathed wall
framing is covered
by sheathing. This
installation assumes
building wrap is
properly installed
prior to patio
door installation.
Open-Stud walls are not
covered by sheathing.
MATERIALS AND PATIO DOOR HANDLING
• Make sure the operating panel is secured prior to installation.
• Heed material manufacturers’ handling and application instructions.
• Protect adhesive surfaces from dirt, moisture, direct sunlight and
folding over onto themselves.
• Handle in vertical position; do not drag.
• Do not put stress on joints, corners or frames.
• Store patio door in dry, well-ventilated area in vertical, leaning
position to allow air circulation; do not stack horizontally.
• Protect from exposure to direct sunlight during storage.
• Install only into vertical walls and when conditions and sheathing
are dry.
• Never use solvent-based sealants on vinyl products.
IF INJURY OCCURS, IMMEDIATELY SEEK MEDICAL ATTENTION!
This installation guide specifically addresses masonry/block wall,
sheathed wall and open-stud construction.
MASONRY/BLOCK WALL CONSTRUCTION
This installation
assumes that a
framework of 2x studs
(often called a buck)
has already been
properly fastened and
sealed to the concrete/
masonry wall by a
building professional.
PROVIDED MATERIALS
• 4 - #10 x 2 1/2" screws (to secure the strike plate).
• Vinyl caps to cover screw holes.
NEEDED MATERIALS
Note!
Follow all material manufacturers’ instructions for proper use
and compatibility. When using flashing, spray adhesive/primer, sealant
and foam products, we recommend using the same manufacturer and
verifying compatibility. It is the End User’s responsibility to determine if
dissimilar materials are compatible to the substrates in the application.
• #8 x 1 1/4" (minimum) washer head or pan head corrosion-resistant
screws (stainless steel recommended). Fasteners must penetrate at
least 1" into framing.
• 3/16" x 2 1/2" self-tapping concrete screws (if required to secure the
sill into concrete/masonry).
• Non compressible or water degradable shims.
• Sill pan: It is best practice to use a pre-formed, rigid, positively sloped,
pvc pan that provides continuous support. We recommend using SureSill
™
Sloped Sill Pan
™
, manufactured by SureSill
™
, Ltd. An alternative would
be a non-sloped pre-formed sill pan or one can be fabricated on site
from metal or vinyl sheet material with the proper tools.
• Sealant: We recommend OSI
®
QUAD
®
Max Sealant or equivalent. This
can be used in any application and can be painted or ordered in a
color matched product, if desired.
• Backer rod 1/8" larger than the widest portion of the gap (used in
conjunction with sealant bead).
• Polyurethane low expansion Window and Door foam: We recommend
OSI
®
QUAD
®
Foam or equivalent.
• 4", 6", or 9" (as required by local code and window configuration)
wide self-adhesive flashing: We recommend OSI
®
Butyl Flash Tape
or equivalent.
• Drip cap if required because of door location and exposure. Doors with
an adequate overhang (see our Appropriate Protection document at
www.jeld-wen.com) may not need a drip cap. In addition to sill pans,
SureSill
™
also offers types of head flashing.
For installations into a Buck:
• Liquid applied flashing (Protecto Wrap LWM 200 or equivalent).
NEEDED TOOLS
• Hacksaw (SureSill sill pan)
Cutting shears (fabricated
sill pan)
• Tape measure
• Utility knife
• Level (4' minimum
recommended)
• J-roller
• Caulking gun
• Drill with bits
• Clean rags
• Screwdrivers
ROUGH OPENINGS
SAFETY AND HANDLING
MATERIALS AND TOOLS
Buck
Trimmer
studs
Header
Sheathing
Sill area
King
stud