Assembly and installation instructions, Install frame, Install panels – JELD-WEN JII020 Premium Aluminum (A-500) and Premium Atlantic Aluminum Sliding Patio Doors User Manual
Page 6
ASSEMBLY AND INSTALLATION INSTRUCTIONS
for Premium Aluminum (A-500) and Premium Atlantic Aluminum Sliding Patio Doors (JII020)
6
1. Working from the
outside, place the
slot of the panel
head over the
interior guide leg of
the frame head.
2. Raise the panel and
swing the bottom
in so the wheels are
properly located
over the interior
track.
3. After installing an
interior operating
panel, move the
panel to a closed
position.
4. Locate one or more
adhesive weather
strip pads with peel
off backs in the
enclosed hardware
pack. Peel off
backing and place
into the frame head
where any panel
interlocks will meet.
5. If weatherstrip is
not already pre-
installed at the
bottom of each
interlock, apply a
second weatherstrip
pad on the sill
below the panel.
INSTALL FRAME
5
Caution!
A minimum of two (2) people are needed for installation.
Note!
These steps apply to all landing types.
1. Tilt patio door frame into the rough opening. Make sure the back of
the sill makes solid contact with the sealant on the sill pan back dam.
Hold door frame in place until fully fastened.
2. Pre-drill fastener holes, if applicable, using the following patterns
(some products have holes already pre-drilled):
• Premium Aluminum (A-500) Patio doors will be fastened 4" from
each corner and every 24" on center.
• Premium Atlantic Aluminum doors are fastened according to the
Florida approval by visiting www.floridabuilding.org.
3. Pre-drill installation holes in floor and fill with sealant prior to
anchoring screws into sill.
4. Shim at each pre-drilled hole (next to hole in the header) until
the frame is square, level and plumb. Shims must be 1" narrower
than the frame jamb to allow 1/4" backer rod and sealant to be
installed later. Use sealant if necessary to secure shims in place while
anchoring.
5. Fasten patio door frame with appropriate screws (see Materials
section above) through every pre-drilled jamb, head and sill hole, and
through any needed shims.
6. Inspect frame for square, level, and plumb (remove and reinstall if
necessary).
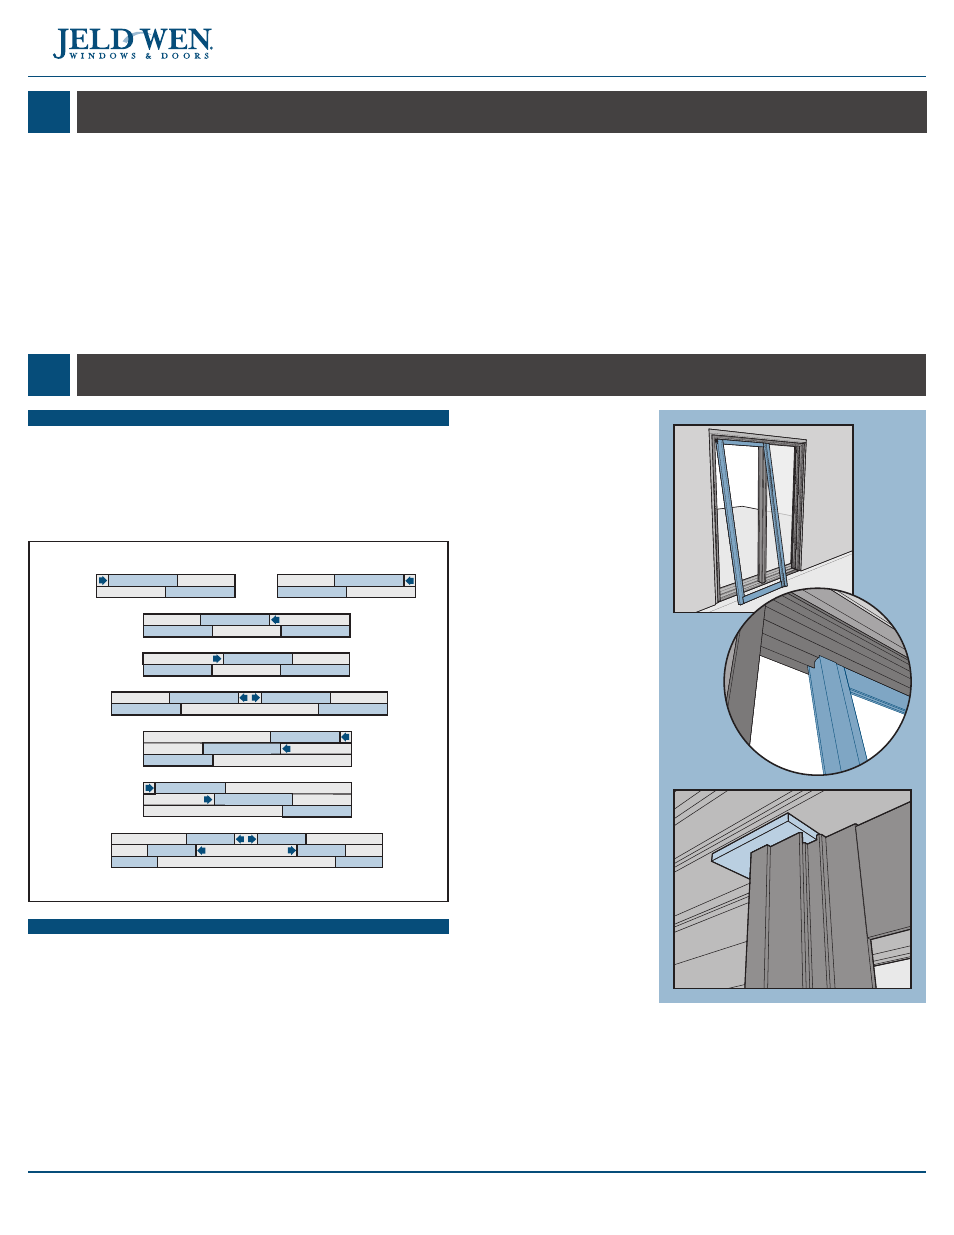
DETERMINE DOOR CONFIGURATION
Each panel will be labeled with a number indicating the order of
installation into the frame. Refer to the sections below for detailed
instructions on installing each interior and exterior panel into the
frame. After all panels are installed, follow the instructions for adjusting
the rollers and fixing the stationary panels in place.
Note!
Panels are not reversible or interchangeable.
INSTALL PANELS
6
INTERIOR
X - 1
XO
O - 2
OX
X - 1
O - 2
X - 1
O - 3
OXO - RH
O - 2
X - 2
X - 1
OXXO
O - 4
O - 3
X - 1
OXO - LH
O - 2
O - 3
OXX
EXTERIOR
X - 1
X - 2
O - 3
XXO
OXXXXO
X - 1
X - 2
O - 3
X - 2
X - 1
X - 4
X - 3
O - 6
O - 5
INSTALL INTERIOR PANEL(S)
Interior panels must be installed first. Using the configuration diagram
above, install each interior panel. All panels are marked numerically, in
order of installation. Make sure the panel interlock (when present) is
facing the exterior. Two panel doors are shown, but also apply to three
or more panels.