ididit Floor Mount: Adjustable Floor Mount with Trim Kit User Manual
ididit For the car
PROPERTY OF
ididi
T, inc
PROPERTY OF
ididi
T, inc
PROPERTY OF
ididi
T, inc
PROPERTY OF
ididi
T, inc
PROPERTY OF
ididi
T, inc
PROPERTY OF
ididi
T, inc
ididit inc. 610 S. Maumee St. 49286 Tecumseh, MI PH: 517-424-0577 FAX: 517-424-7293
www.ididitinc.com
Adjustable Floor Mount/Trim Kit Installation Instructions
For Part Number’s 2400800010, 2401800010, 2402800010
Instruction #: 8000010202
REV 12/12
1. The steering column must be out of the vehicle to
put floor mount assembly on the first time.
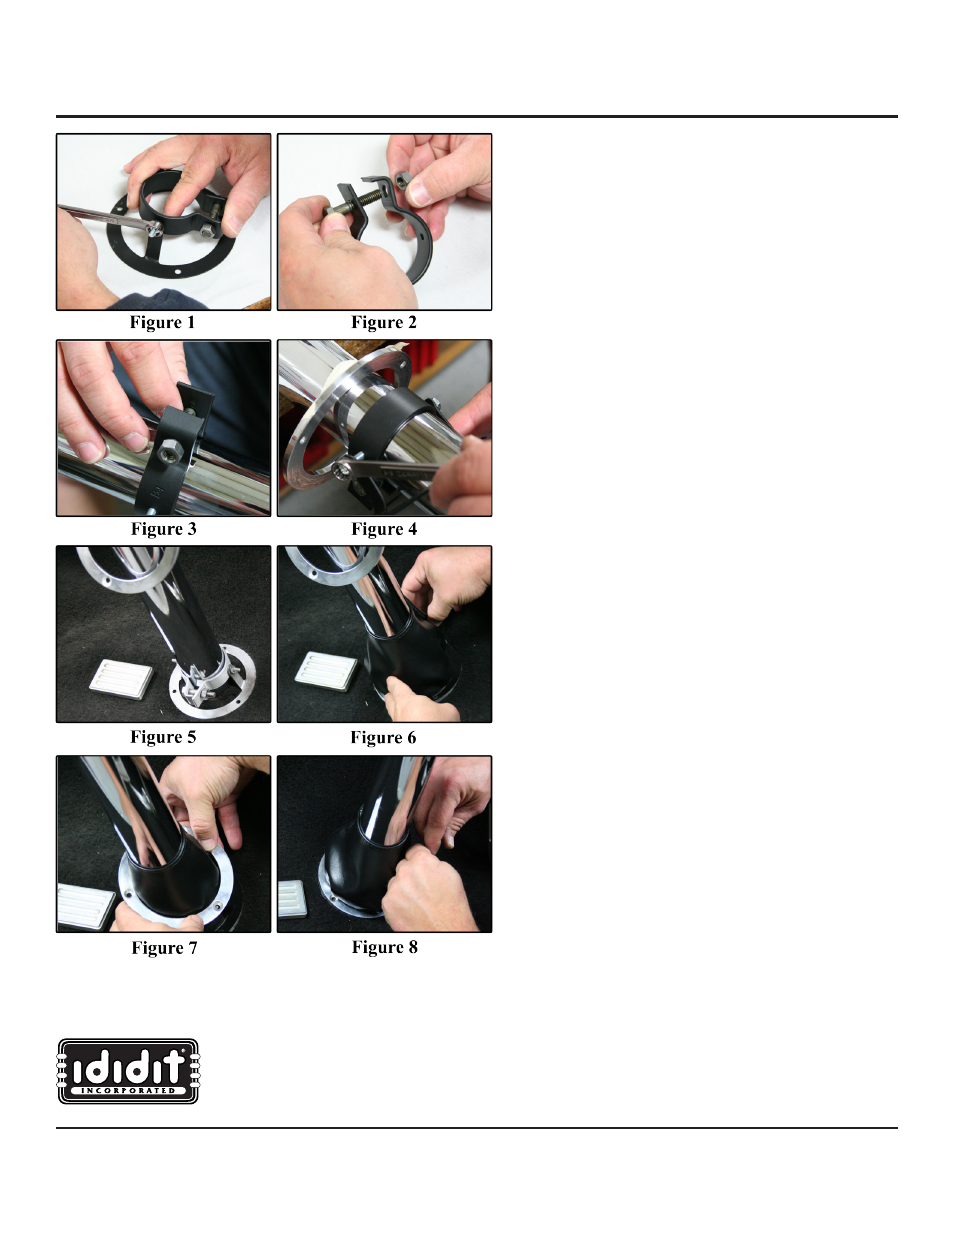
2. Remove the clamp from the plate by taking the
nut washers off of the screws using a 3/8” wrench.
(Figure 1)
3. Remove large bolt from clamps and spread open
enough to fit over the steering column.
(Figure 2)
4. Install the clamp onto the column. The bolt will then
need to be fed through and loosely tightened do not
tighten it completely
(Figure 3)
5. Place the aluminum ring, with the polished side
facing the top of the column, over the tube and
secure it with tape or a small wire to keep it out of
the way.
(Figure 4)
6. Install the black ring with tabs. Spread the tabs to
fit over the pins on the clamp. Install the small nut
washers with a 3/8” wrench.
(Figure 4)
7. Now install your column drop or other method of
attaching the column to the dash.
8. Slide the floor mount down the column until it hits
the floor and drill 3 holes through the floor (3/16”
hole) using the floor mount as your template.
(Figure 5)
9. Lay the carpet down and cut the carpet so that it goes
around the column. A 3” hole would be suitable.
10. Install the vinyl boot so that the seam of the Velcro
is up and facing dash/firewall.
(Figure 6)
11. Lower the aluminum polished ring and punch holes
through the material to match the three holes you
drilled in step #8 through the boot base and carpet.
(Figure 7)
12. Install the three screws (10-38x5/8 flat head) and nut
washers provided with the kit (1/8” Allen wrench
and 3/8” wrench) and tighten.
(Figure 8)
NOTE: You may shorten the three (10-32x5/8) flat head
screws that hold unit to the floor if needed. The
two smaller screws on the side of the clamp may
also be shortened if necessary to clear the polished
aluminum ring.
*PLEASE NOTE: The enclosed floor mount has a “hot dip” black
oxide finish. It would be important to put a permanent finish on it
before you install this floor mount.