Completing the installation – HP StoreEver Rack-mount Kits User Manual
Page 17
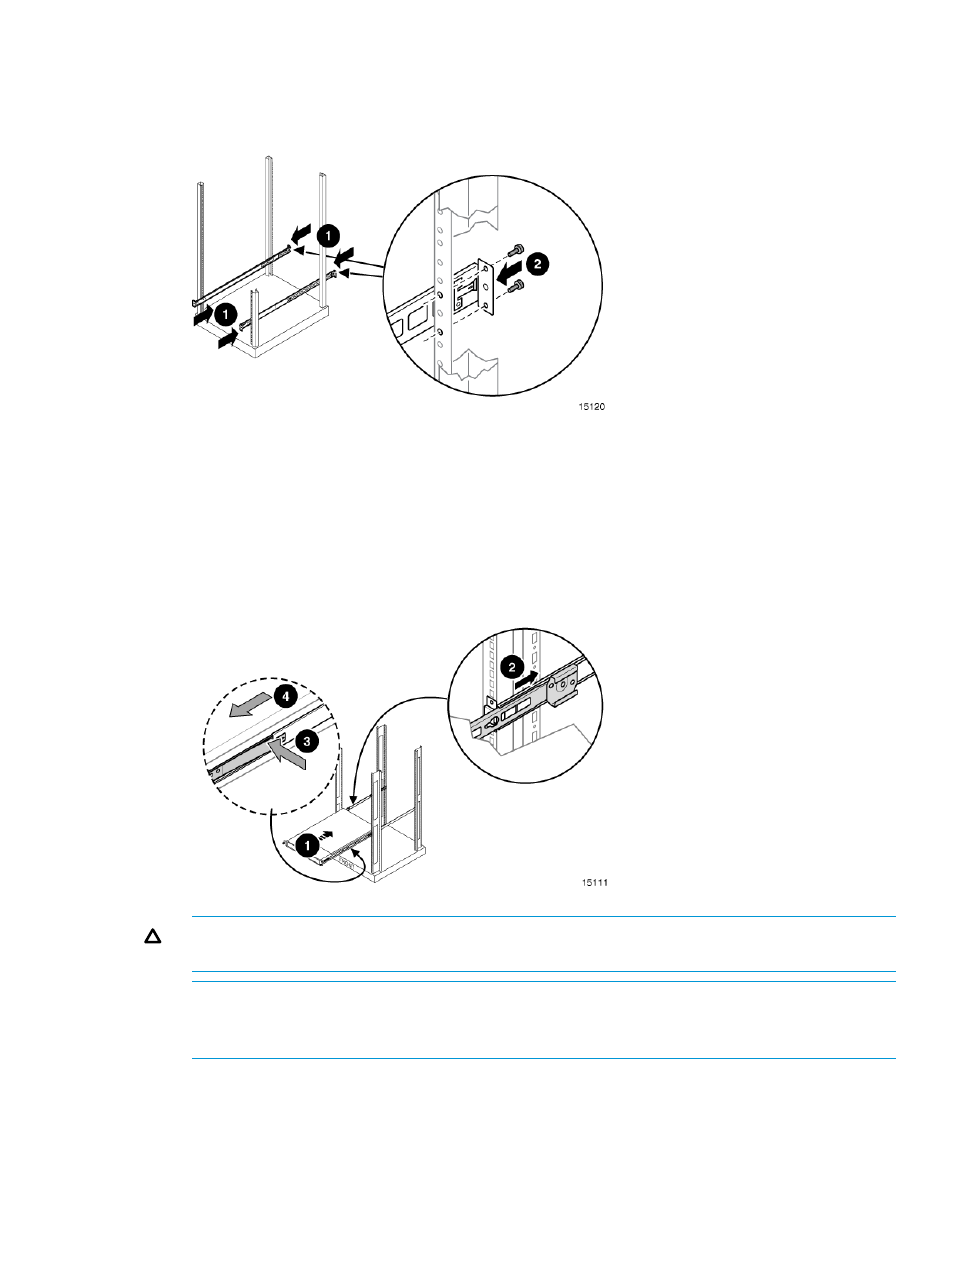
3.
Extend the rack rails past the rear vertical mounting columns and attach the back mounting
plate of each outer rail to the rack using four 10-32 screws in the previously marked holes.
Figure 22 Attaching the back mounting plate
Completing the Installation
1.
Ensure all rack safety precautions stated in
have been implemented.
2.
Extend the left and right rack rails from the front of the rack.
3.
Align the rear of the component rails on the enclosure with the front ends of the rack rails,
then slide the unit fully into the rack.
Figure 23 Sliding the unit into the rack
CAUTION:
Be sure to keep the enclosure parallel to the floor when sliding the component
rails into the rack rails. Tilting the enclosure up or down could damage the rails.
NOTE:
To remove the enclosure from the rack, disconnect the cables from the back of the
unit. Press the latches on each side 3 and pull the enclosure from the rack 4. See Figure for
the location of the latches.
4.
Tighten the front panel thumbscrews.
5.
Retract the stabilizing feet of the rack.
6.
Plug the data cable from the server into the data connectors on the rear panel of the enclosure.
7.
Plug the AC power cord into the power cord connector, then into a grounded outlet.
Installing the 1U Rack-mount Enclosure in a Rack
17