LG HR925S User Manual
Page 16
Connecting
16
C
onnecting
2
4. Select an item using W/S. If you know the
programmed [LNB Frequency], [22kHz Tone],
[DiSEqC], [LNB Power], [Transponder] and
[Motor], use A/D to select the desired.
If you select [DiSEqC 1.2], you can set Motor
Driving Mode, Motor Move and Set Limit,
and if you select [USALS], you can set the
longitude and latitude and use S to select
[Go to position]; then motor will move to your
selelected satellite as calculating its position.
If you use USALS, you should know lines of
longitude and latitude at your location.
,
Note
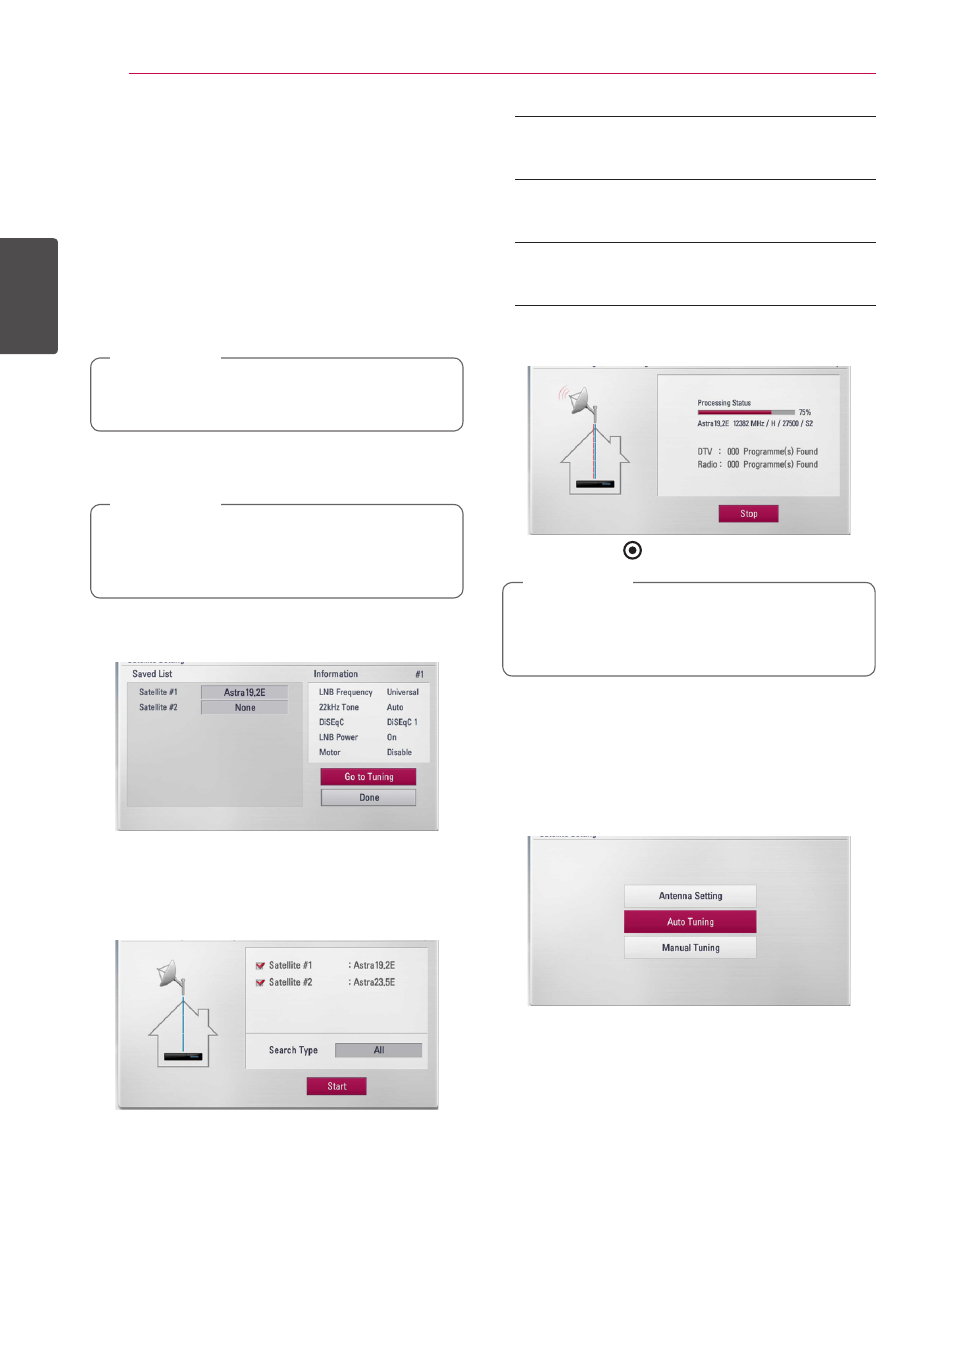
5. Use W/S to select the [Save] and press ENTER
(b) to display the [Saved List] menu.
If there isn’t LNB Frequency what you want in
[LNB Frequency], input LNB Frequency with
numerical buttons.
,
Note
6. Use W/S/A/D to select the [Go To Tuning]
and press ENTER (b).
7. Select [Start] and press ENTER (b) to begin the
channel search.
Use
W/S to select a satellite check box and
press ENTER (b) to select or deselect it.
You can search All, FREE, CAS channels
individually. Press W, you can select Search Type
with A/D.
[All]
All channels the satellite searches.
[FREE]
Free of charge channels.
[CAS](Conditional Access System)
Pay channels.
Select [Stop] and press ENTER (b) to stop the
channel search.
8. Press ENTER ( ).
Please refer to the manuals of your TV, Stereo
System or other devices as necessary to make
the best connections.
,
Note
Auto Tuning
All available satellite TV or radio programmes are
searched.
1. Use W/S to select the [Auto Tuning] and
press ENTER (b).
2. Follow the steps 7-8 from “Antenna Setting” on
page 15-16.