Canon imagePROGRAF iPF9400S User Manual
Page 6
6
8
9
6
7
8
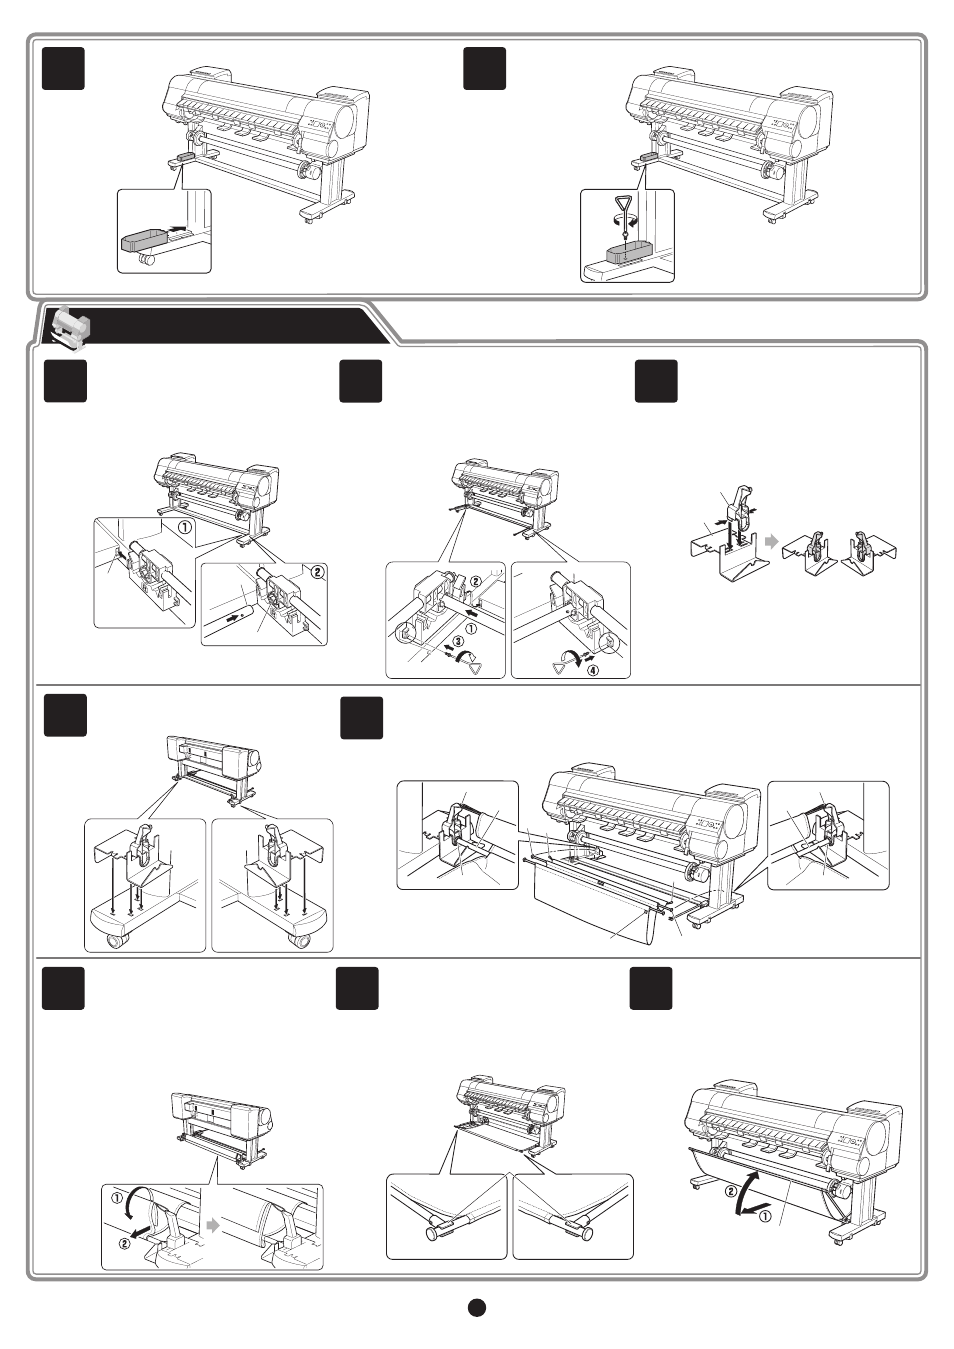
Attach the Output Stacker
1
2
3
4
5
a
b
a
b
c
a
a
a
c
b
b
c
d
d
e
e
c
c
Use the Allen Wrench to securely affix the M4 Hex Screws.
Attach the Accessory Pocket to the Left Stand Leg.
(BU-01 option)
Insert the Basket Arm R in the hole (a)
on the right side of the Bottom Stand
Stay . Insert the right side (b) of the middle
Basket Rod in the hole (c) of the Basket
Arm R .
Insert the Rod Holder Adapter into each
hole on the back of each Stand Leg.
After inserting the Basket Arm L in the
left side of the middle Basket Rod , push
in the arm fully into the hole on the left
side of the Bottom Stand Stay . Use one
M4 hex screw on the left and right sides
to firmly secure the Basket Arm R and
Basket Arm L .
While squeezing the Rod Holder in the
position indicated (a) with both hands,
push the holder into the Rod Holder
Adapter (b) until the holder clicks into
place. Attach the other Rod Holder to
the other Rod Holder Adapter the same
way.
Spread out the Output Stacker with white tag (a) of the Basket Cloth at the front on the right
side and the black cord (b) in the back.
Insert the Basket Rod (c) (in the middle of the Basket Cloth ) in the hole (d) on the bottom of
the Rod Holder , and thread the black cord from the back through the hook (e) on the top of the
Rod Holder .
Check how the Basket Cloth is arranged.
Attach the Basket Rod (at the front of
the Output Stacker ) to the tips (a) of the
Basket Arm L and Basket Arm R .
Pull out the Basket Cloth with the
edge facing out. Bringing the edge of
the Basket Cloth inside may prevent
paper ejection.
If the Basket Cloth is inside as shown,
pull the cloth outside. Check the cloth
on each side.
(2)
(1)
Pull the Basket Rod (a) (at the front of
the Output Stacker) all the way out and
lift the rod to lock the rod in place.