Add a camera, Display the [cameras] tab, Add cameras one at a time – Canon VB-M600D User Manual
Page 36: Add a camera -8, Display the [cameras] tab -8, Add cameras one at a time -8, P. 3-8), See “add cameras one at a time
3
-8
You can add a camera to be used for displaying images
or recording to a Storage Server.
Note
You can add up to four cameras.
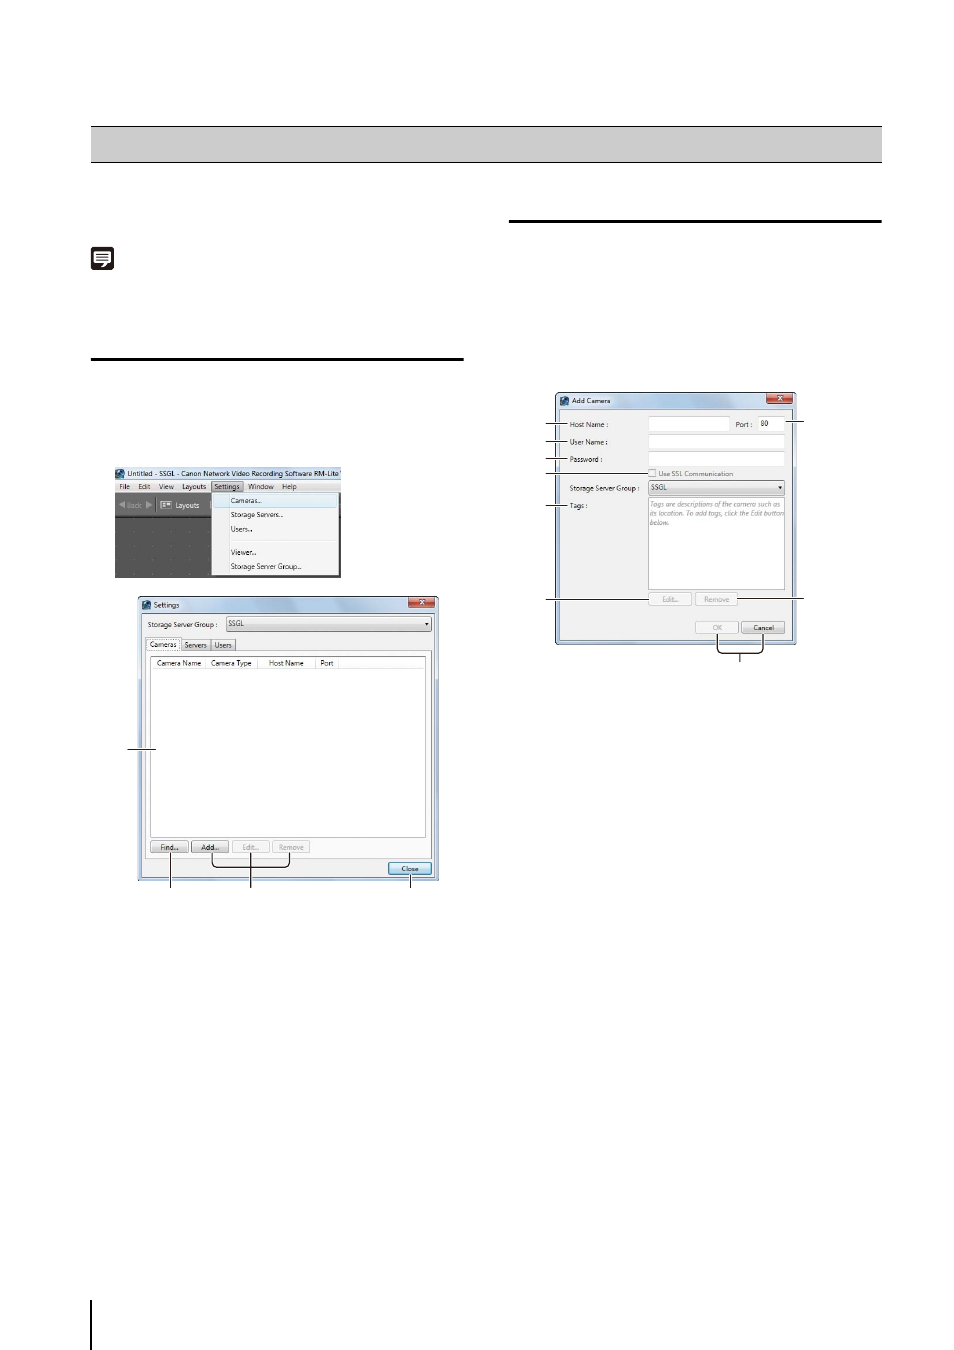
Display the [Cameras] Tab
Display the [Cameras] tab in the [Settings] dialog box to
start adding a camera.
➀ List of cameras
Displays a list of already added cameras.
➁ [Find]
Search for cameras on the network.
➂ [Add], [Edit], and [Remove]
Add, edit or remove a camera.
➃ [Close]
Closes the dialog box.
Add Cameras One at a Time
Add cameras one at a time to the list of cameras on the
[Cameras] tab.
➀ [Host Name]
Enter the host name or IP address of the camera.
➁ [Port]
Enter the port number for communicating with the
camera. Typically, leave [80] unchanged.
➂ [User Name]
Enter the user name for the camera.
➃ [Password]
Enter the password for the user specified in
➂.
➄ [Use SSL Communication]
This cannot be used with RM-Lite.
➅ [Tags]
This cannot be used with RM-Lite.
➆ [Edit]
This cannot be used with RM-Lite.
➇ [Remove]
This cannot be used with RM-Lite.
➈ [OK] and [Cancel]
Close the dialog box.
The camera is added in the list of cameras on the
[Cameras] tab.
Add a Camera
1
Click [Settings] > [Cameras].
➀
➂
➁
➃
1
Click [Add] to display the [Add Camera] dialog box.
2
Enter the information required to add the camera.
3
Click [OK] to close the dialog box.
➀
➆
➈
➂
➃
➄
➅
➁
➇