Installation temporarily using a network cable, Step 2, Installing the printer driver – Brother HL-5280DW User Manual
Page 24: Windows
Installing the Printer Driver
22
STEP 2
Window
s
®
Wi
re
le
ss
Ne
tw
or
k
Windows
®
Installation temporarily using a network cable
Improper Setup
If you have previously configured the wireless
settings of the printer, you must reset the
NETWORK menu settings before you can
configure the wireless settings again.
1
Press the + or - button to choose
NETWORK
. Press Set.
2
Press the + or - button to choose
FACTORY RESET
. Press Set.
3
Press Set again.
1
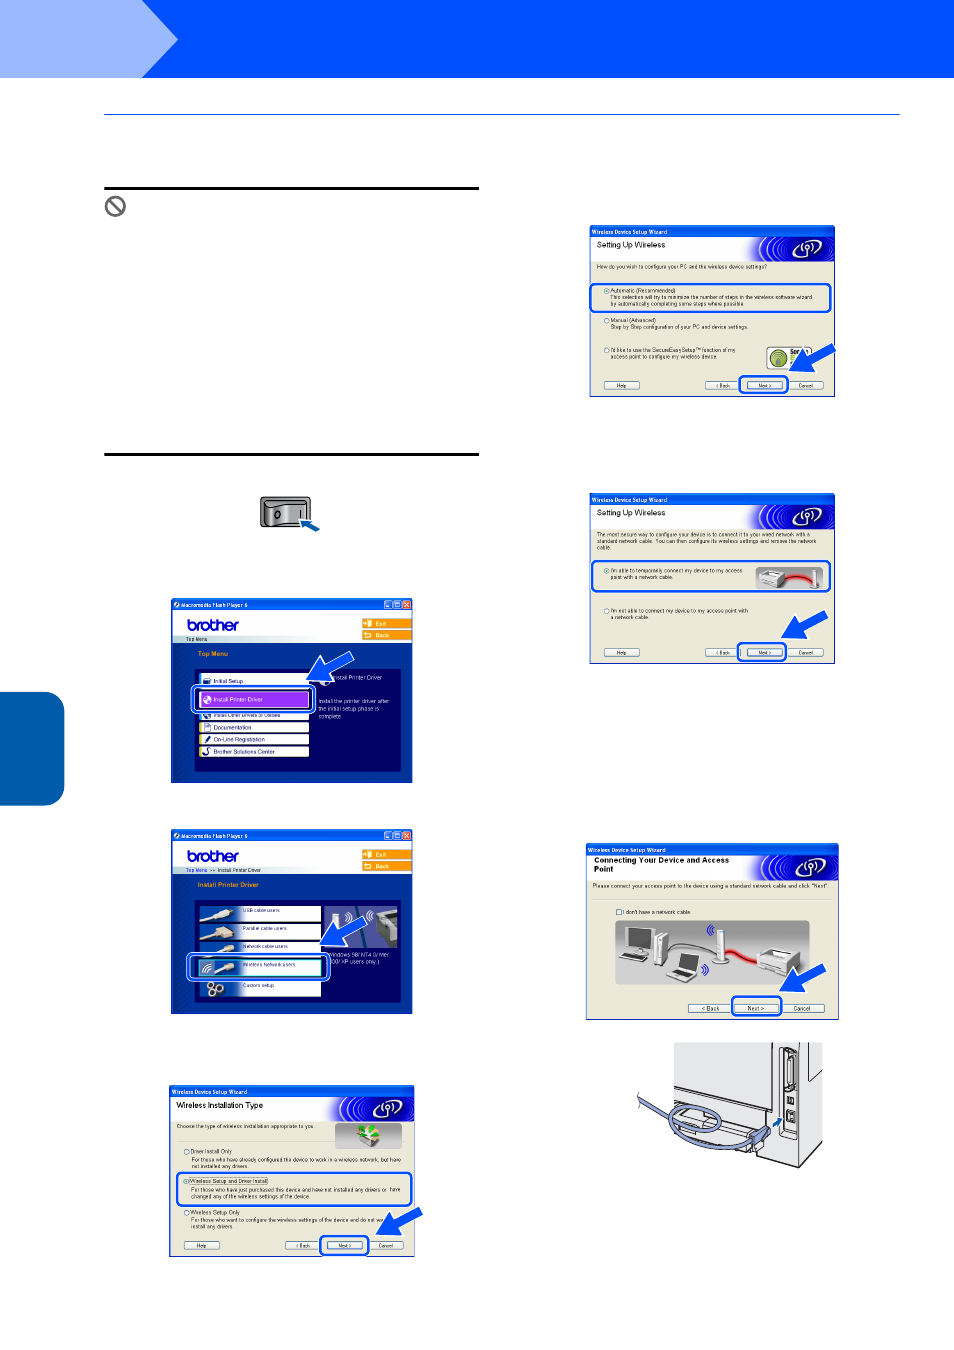
Make sure that the printer power switch is on.
2
Click Install Printer Driver on the menu
screen.
3
Click Wireless Network users.
4
Choose Wireless Setup and Driver Install,
and then click Next.
5
Choose Automatic (Recommended) and
then click Next.
6
Choose I’m able to temporarily connect my
device to my access point with a network
cable and then click Next.
7
For configuration, you must temporarily
connect your Brother wireless device (your
printer) directly to a free port on your access
point, hub or router using a network cable.
When the following screen appears, insert the
network cable to the access point and then to
the printer. Click Next.