For administrators – Brother HL-8050N User Manual
Page 38
37
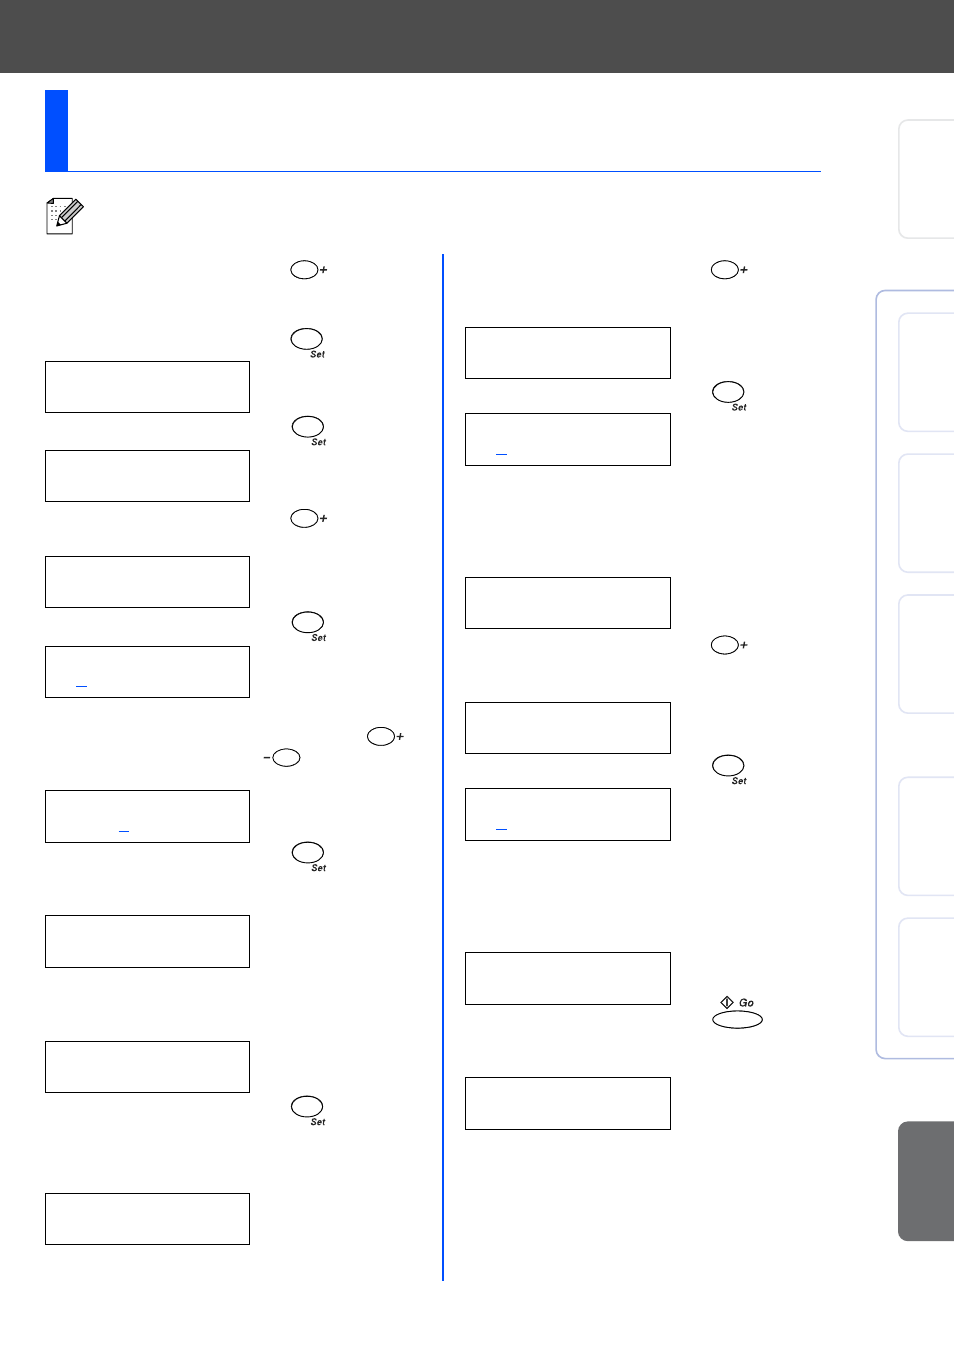
■ For Administrators
1
Press
until
NETWORK=
is
displayed.
2
Press
.
3
Press
again
.
4
Press
until
IP
ADDRESS=
is displayed.
5
Press
.
6
Enter the IP address for
this printer using
or .
(for example 192)
7
Press and
move
the cursor to the next
value.
8
Repeat Steps
6
and
7
to finish setting the IP
address.
9
Press
to
complete
the IP address.
An asterisk mark (*)
appears on the LCD
.
0
Press
until
SUBNET MASK=
is
displayed.
A
Press .
B
Set your subnet mask in
the same way as the IP
address.
An asterisk mark (*)
appears on the LCD.
C
Press
until
GATEWAY=
is
displayed.
D
Press .
E
Set your gateway
address in the same way
as the IP address.
An asterisk mark (*)
appears on the LCD.
F
Press
to put the
printer back into its
READY
.
Setting your IP Address, Subnet Mask and
Gateway (Using the Control panel)
Your printer is configured to receive an IP address, Subnet mask and Gateway address from a DHCP
server. If you do not use a DHCP server follow the steps below.
-MENU-
NETWORK
NETWORK
TCP/IP
TCP/IP
IP ADDRESS=
IP ADDRESS=
0. 0. 0. 0*
IP ADDRESS=
192. 0. 0. 0
IP ADDRESS=
192. 0. 0. 0
IP ADDRESS=
192.168.001.100
IP ADDRESS=
192.168.001.100*
TCP/IP
SUBNET MASK=
SUBNET MASK=
0. 0. 0. 0*
SUBNET MASK=
255.255.255.000*
TCP/IP
GATEWAY=
GATEWAY=
0. 0. 0. 0*
GATEWAY=
192.168.001.254*
READY
Se
tt
in
g Up
Your
Pr
in
te
r
W
in
dows
®
USB
W
indows
®
Par
a
llel
W
indows
®
Net
w
or
k
Ma
c
in
to
s
h
®
USB
M
a
ci
nt
osh
®
Ne
tw
or
k
For
Admi
n
is
tr
a
to
rs
In
s
tal
ling t
he Dr
iv
er