Threading the upper looper – Brother 4234D User Manual
Page 20
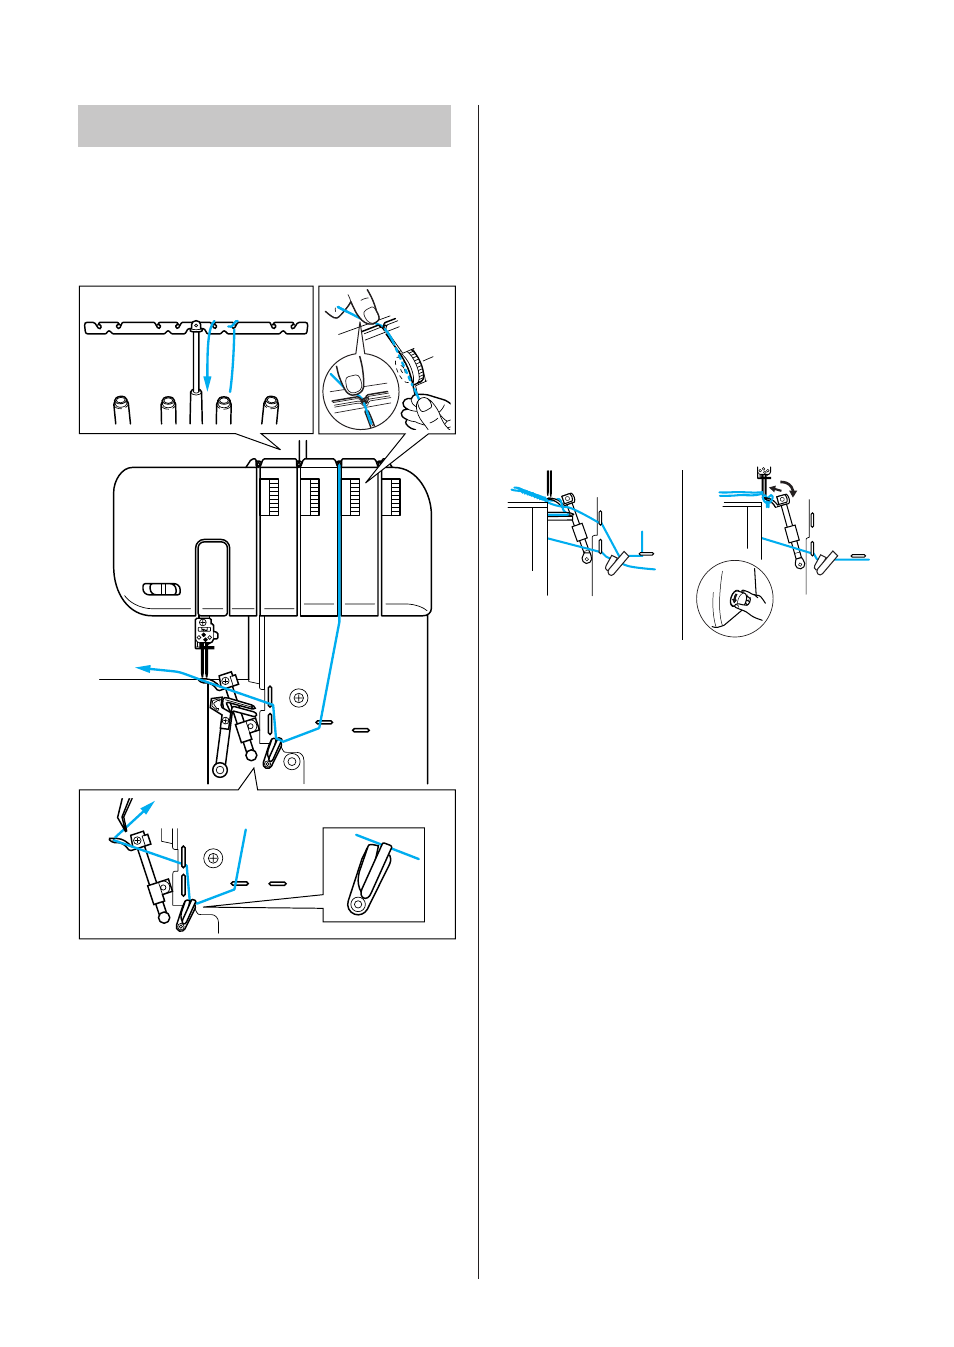
16
5. Guide the thread down the channel and pass
the thread through the threading points
5678
next to the pink color marks following
the numerical order in the accompanying
illustration.
NOTE:
Make sure to thread only through the upper thread
take up
7
.
6. Pass the thread through the eye of the upper
looper 9.
NOTE:
If the upper looper thread breaks during sewing:
This may be caused by the lower looper thread getting
caught on the upper looper. If this happens, lower the
upperlooper by turning the hand wheel, remove the
lower looper thread from the upper looper, and re-thread
the upper looper from at least the tension disc.
Threading the upper looper
Run the thread in the sequence illustrated,
following the pink color and the numbers next to
each threading point.
2
1
3
4
3
4
5
6
8
9
7
7
6
8
9
1. Open the front cover by sliding to the right and
guiding the top toward you.
2. Pull the thread off the spool and directly up
through the thread holder 1 and the thread
holder 2 on the thread tree from back to front.
3. Pass the thread through the thread guide 3 on
the top of machine.
4. Pass the thread through the tension disc 4
which is in the channel next to the pink tension
adjustment dial.