Needle, Removing/installing the needle, Needle description – Brother 4234D User Manual
Page 15: How to check the needle
11
English
Needle
This machine uses a standard home sewing
machine needle.
The recommended needle is SCHMETZ 130/705H
(#80 or #90).
Needle description
1
Back (flat side) 2 Front 3 Groove
1
2
3
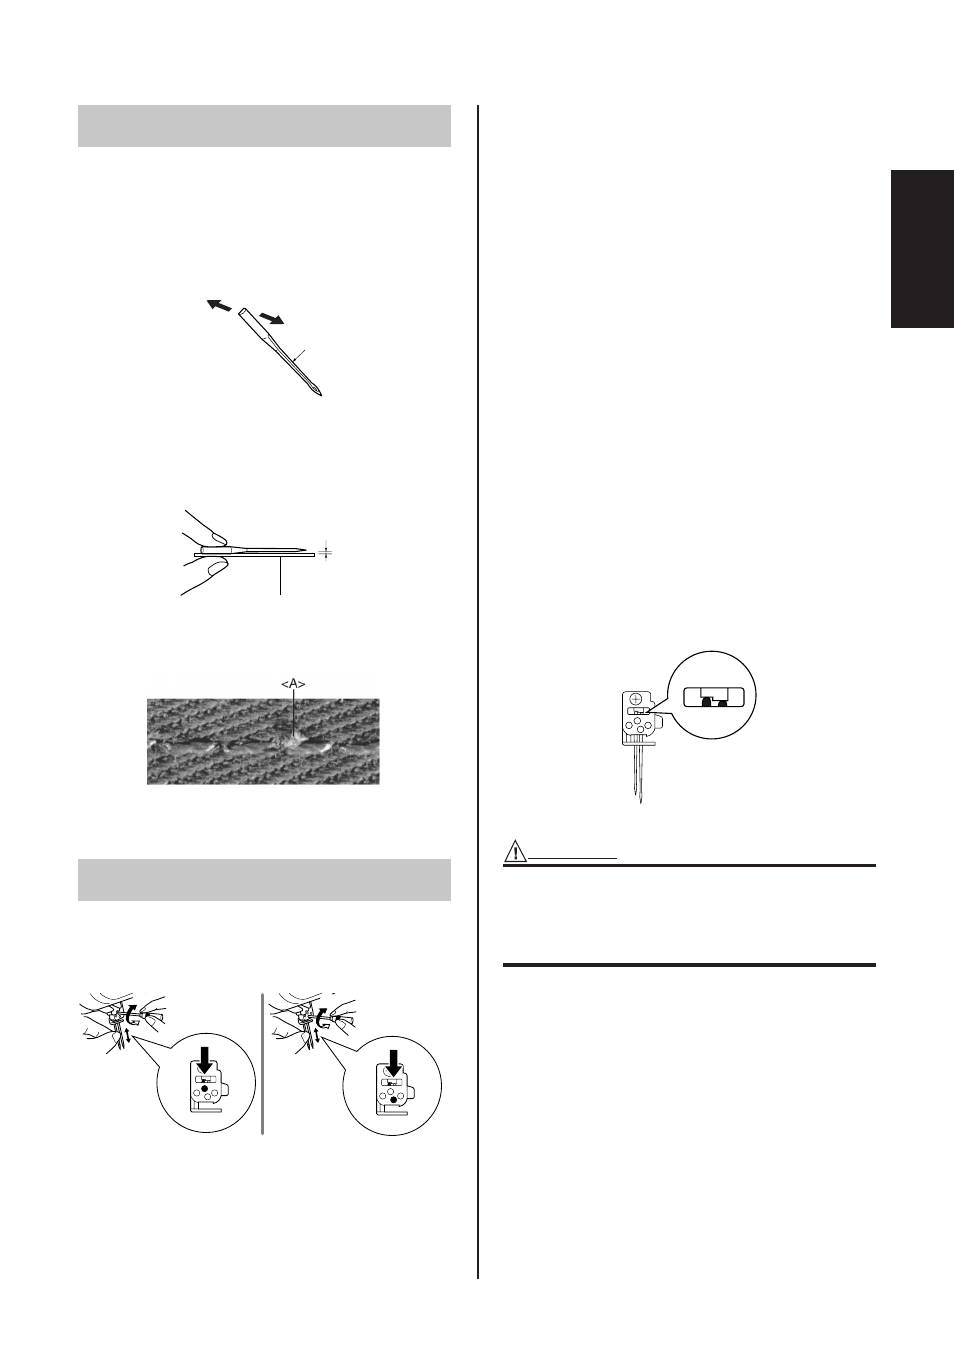
How to check the needle
4
Flat surface
5
Place the needle on its flat side and check to see if the
space is parallel.
4
5
NOTE:
Countermeasures for material breakage .
It can reduce the occurrence of material breakage by
using SCHIMETZ 130/705H SUK (#90) BALL POINT.
Removing/Installing the needle
Removing/ installing the left needle
Removing/ installing the right needle
2
1
2
1
1
Tighten
2
Loosen
To remove:
1. Turn the main power and light switch to the
OFF position.
2. Turn the hand wheel so that the mark on the
hand wheel is aligned to the line on the
machine. (See CHAPTER 1 "Turning direction
of hand wheel".)
3. Loosen the corresponding needle set screw
with turning the included hexagonal driver
toward 2 in the figure, and remove the needle.
To install:
1. Turn the main power and light switch to the
OFF position.
2. Turn the hand wheel so that the line on the
hand wheel is aligned to the line on the
machine.
3. Hold the needle with its flat side away from you
and insert it up as far as it will go.
4. Tighten the needle set screw securely with
turning the included hexagonal driver toward
1
in the figure.
NOTE:
Make sure to insert the needles to the highest point in
the needle chamber.
If the needles have been inserted correctly, the right
needle should be set slightly lower than the left one.
CAUTION
Always be sure to turn off the power before
removing/ inserting the needle.
Do not drop the needle and needle set screw in
the machine, otherwise it may be damaged.