Single pipe with room-air intake illustrations, Installation installation manual – State GTS-240-NIH User Manual
Page 17
17
Page
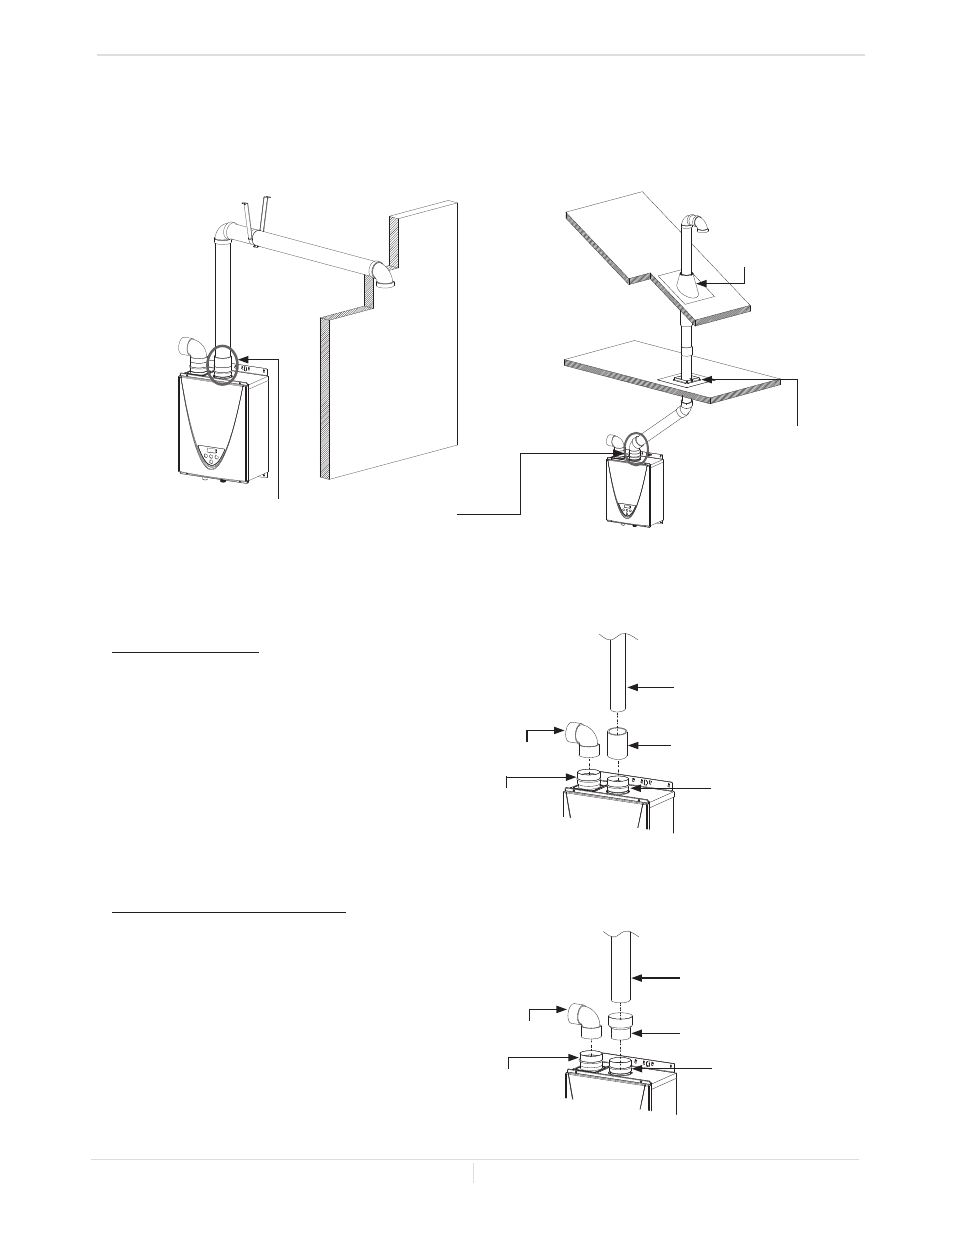
-Single pipe with room-air intake illustrations-
For details of the optional items, refer to the Installation manual for each Optional item.
3" vent connection
From 3" to 4" vent connection
Installation
Installation Manual
1. Connect a 3" elbow directly
on the intake vent collar of the
water heater.
2. Connect a 3" coupling directly
on the exhaust vent collar of the
water heater.
3. Connect a 3” straight pipe to
the coupling.
Typical installations using PVC, ABS, or polypropylene vent
1. Connect a 3" elbow directly
on the intake vent collar of the
water heater.
2. Connect a 3"x4" increaser directly
on the exhaust vent collar of the
water heater.
3. Connect a 4” straight pipe to the
increaser.
3” coupling
3” straight pipe
Exhaust vent collar
(Female)
3” elbow with
bird screen
Intake vent collar
(Female)
4” straight pipe
3"x4" increaser
Exhaust vent collar
(Female)
3” elbow with
bird screen
Intake vent collar
(Female)
Horizontal Installation
Vertical Installation
Roof
Fire stop
Connect between exhaust vent collar and piping.
See the instructions below.
Roof
flashing
Elbow
Elbow
Wall