Standard test conditions, Pump test, Tee test – Badger Meter High Temperature Fluid Meter User Manual
Page 12: Standard test conditions pump test tee test
Standard Test Conditions
1 . Install the Test Kit as described in one of the following test procedures:
a . Pump Test
b . Tee Test
c . Relief Valves in Separate Housings
d . Relief Valves
5 . Open the loading valve fully by turning the handle counterclockwise .
6 . Start the pump and adjust it to rated speed .
7 . Open the Test Kit loading valve fully and proceed with the required test procedure .
8 . The Test Kit will indicate flow and pressure .
Pump Test
See
.
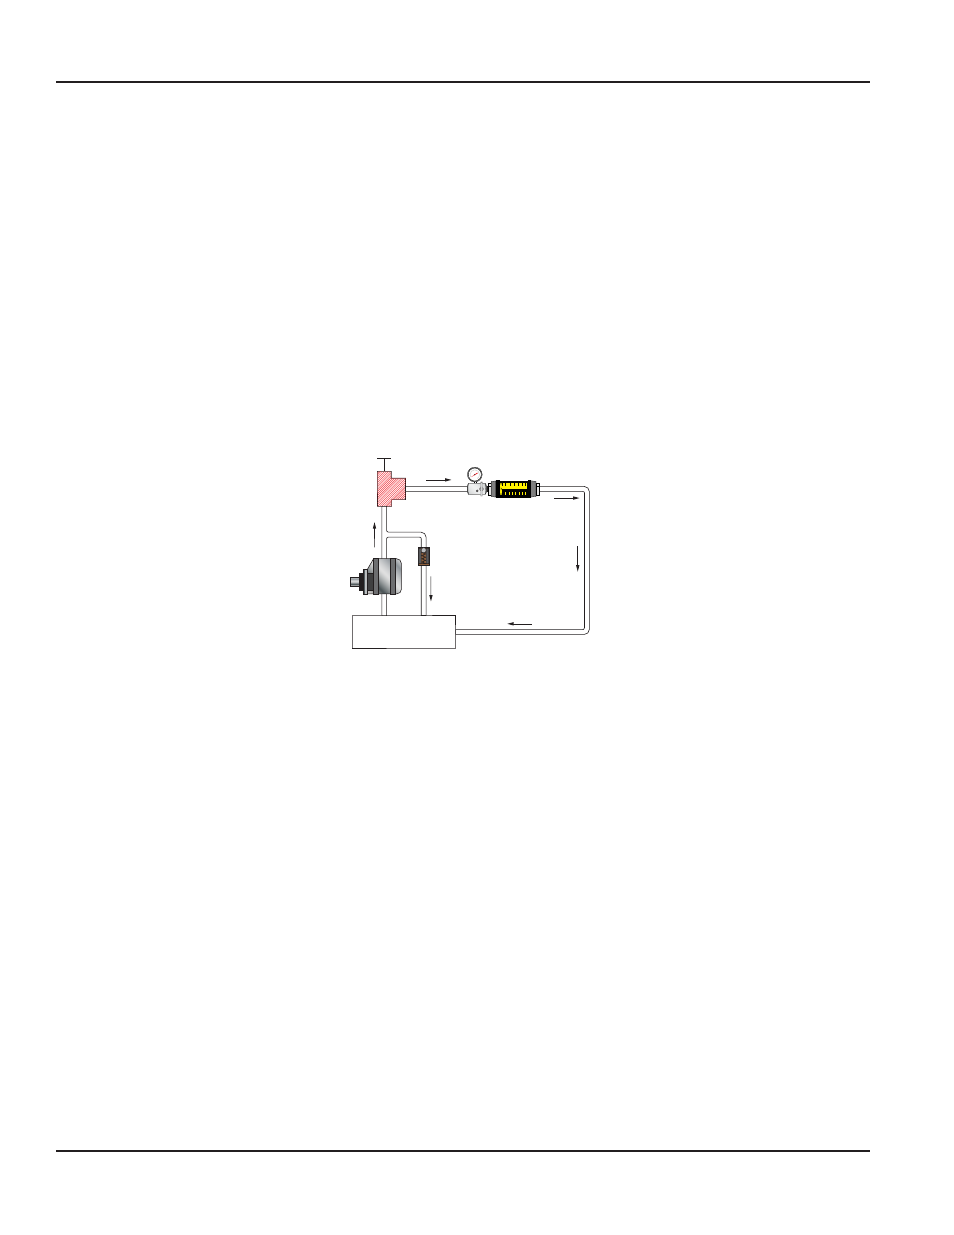
A tee must be installed between the pump discharge port and the return line to the tank . Be sure the fluid path is only
through the pump, the hydraulic test unit, and back to the tank .
OUT
IN
TEE
PUMP
RELIEF
TANK
Figure 6: Pump test
1 . Plug the line to the control valve .
2 . Open the Test Kit loading valve fully to read maximum pump flow at zero pressure .
3 . Close the loading valve to increase pressure from zero pressure to rated or maximum pump pressure to determine
pump condition .
4 . The pump flow at rated pressure can now be checked against the pump manufacturer’s specifications . A decrease in flow
from zero pressure to maximum pressure indicates the pump condition . A pump that delivers a constant low flow at zero
pressure and at maximum pressure suggests suction problems .
Tee Test
See
.
A tee must be installed between the pump and control valve and connected to the inlet of the Test Kit . The outlet port of the
Test Kit is connected to the tank . Pumps and relief valves can be isolated from the system and checked with the Tee Test .
1 . Pump Test
a . Plug the line to the control valve .
Inline Liquid Flow Meter
Page 12
November 2013