Thermo Fisher Scientific CyberScan TB 1000 Turbidimeter User Manual
Page 8
CyberScan TB1000
5
To index a calibration standard perform the following steps:
1.
Slowly rotate the calibration standard one complete revolution (360°).
2.
While rotating the standard, observe the CyberScan TB1000 and locate the cuvette position with the
lowest turbidity reading.
3.
With the calibration standard positioned at the location having the lowest turbidity reading, install the
Indexing Ring over the black light shield on the standard so that the pointer of the Ring aligns with the
Indexing Pin.
5.2 Calibration
Procedure
Even though it is possible to calibrate the CyberScan
TB1000 using any sequence of the prescribed calibration
standards, to achieve the stated accuracy you must use
the procedure below to calibrate instrument.
1.
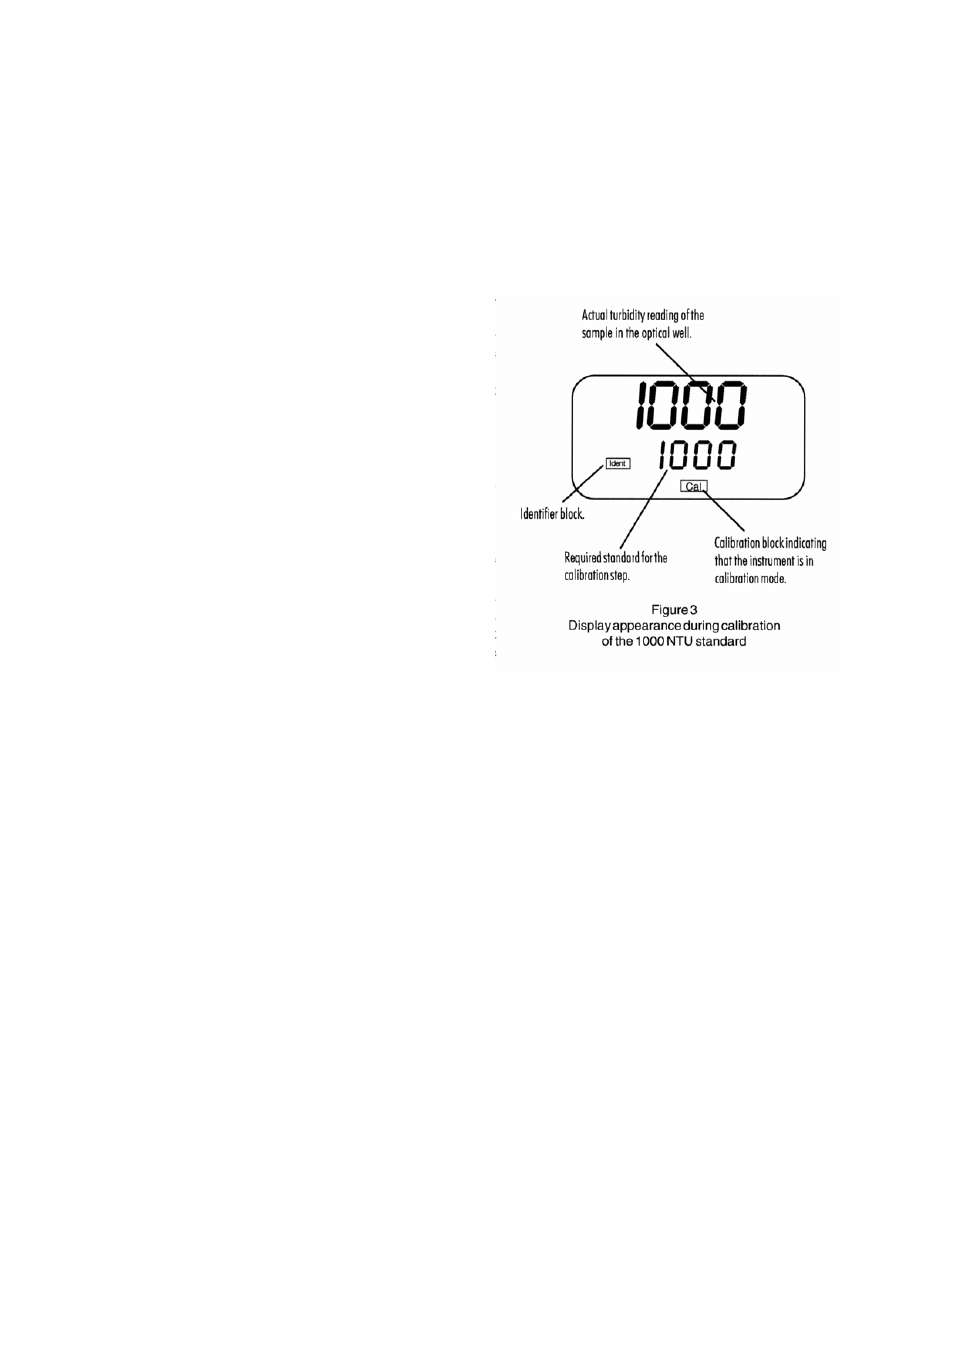
Press CAL key. Once this key is pushed the
“Ident” block and the “Cal” block will illuminate on
the display.
2.
The turbidity value displayed in the lower row of
the display should read 1000 NTU. This is the
first standard that must be used in calibration.
Insert the 1000 NTU calibration standard into the
sample well (see figure 3) by aligning the notch
and the indexing pin (see section 5.1 if you have
not already indexed the standard) and wait for the
reading to stabilize.
3. Press
ENTER key when the standard is in
position. After the enter key has been pressed,
the instrument will calibrate on the 1000 NTU level
(the “Store” block will flash) and the upper row of
the display should display 1000 NTU. The lower
row of the display now shows that the 10.0 NTU
calibration standard should be placed in the sample well for continuing calibration sequence.
4.
Insert the indexed 10.0 NTU calibration standard into the sample well by aligning the notch and the
indexing pin (see section 5.1 if you have not already indexed the standard) and wait for the reading to
stabilize.
5. Press
ENTER key when the standard is in position. After the enter key has been pressed, the instrument
will calibrate on the 10.0 NTU level (the “Store” block will flash) and the upper row of the display should
display 10.0 NTU. The lower row of the display now shows that the 0.02 NTU calibration standard should
be placed in the sample well for continuing the calibration sequence and wait for the reading to stabilize.
6.
Insert the indexed 0.02 NTU calibration standard into the sample well by aligning the notch and the
indexing pin (see section 5.1 if you have not already indexed the standard).
7. Press
ENTER key when the standard is in position. After the ENTER key has been pressed, the
instrument will calibrate on the 0.02 NTU level. The instrument automatically exits out of the calibration
mode and then returns to the normal automatic mode. The display should read 0.02 NTU since this is the
turbidity level of the standard that is still in the sample well. At this point, you have calibrated the
instrument so that it measures accurately across the full range of the instrument.
8.
Proceed to use the instrument normally.
NOTE: During calibration, the CyberScan TB1000 will perform some system self-diagnostics. Several error
messages may be displayed. If there is an error, one of the four error messages E01, E02, E03, and E04 will be
displayed in the lower row of the display (see section 7.2).
NOTE: At any point in time during calibration, you can cycle through the required calibration points (0.02 NTU,
10 NTU, and 1000 NTU) by pressing either ▲ or ▼ keys to individually calibrate with a particular calibration
standard. If you wish to exit the calibration mode you may do so at any time by simply pressing the CAL key.
However, exiting the calibration process without completing the steps for calibration may cause the accuracy of
the instrument to be diminished.