Operation – KROHNE OPTISENS CL 1100 EN User Manual
Page 31
OPERATION
5
31
OPTISENS CL 1100
www.krohne.com
01/2012 - 4001834501 - MA OPTISENS CL 1100 R01 en
After activating the manual hold function and the preparative measures, you can get access to
the calibration procedure from the measuring mode in two different ways. Either you go via the
main menu setup
setup
setup
setup (Step 3a) or via the main menu quick setup
quick setup
quick setup
quick setup (Step 3b):
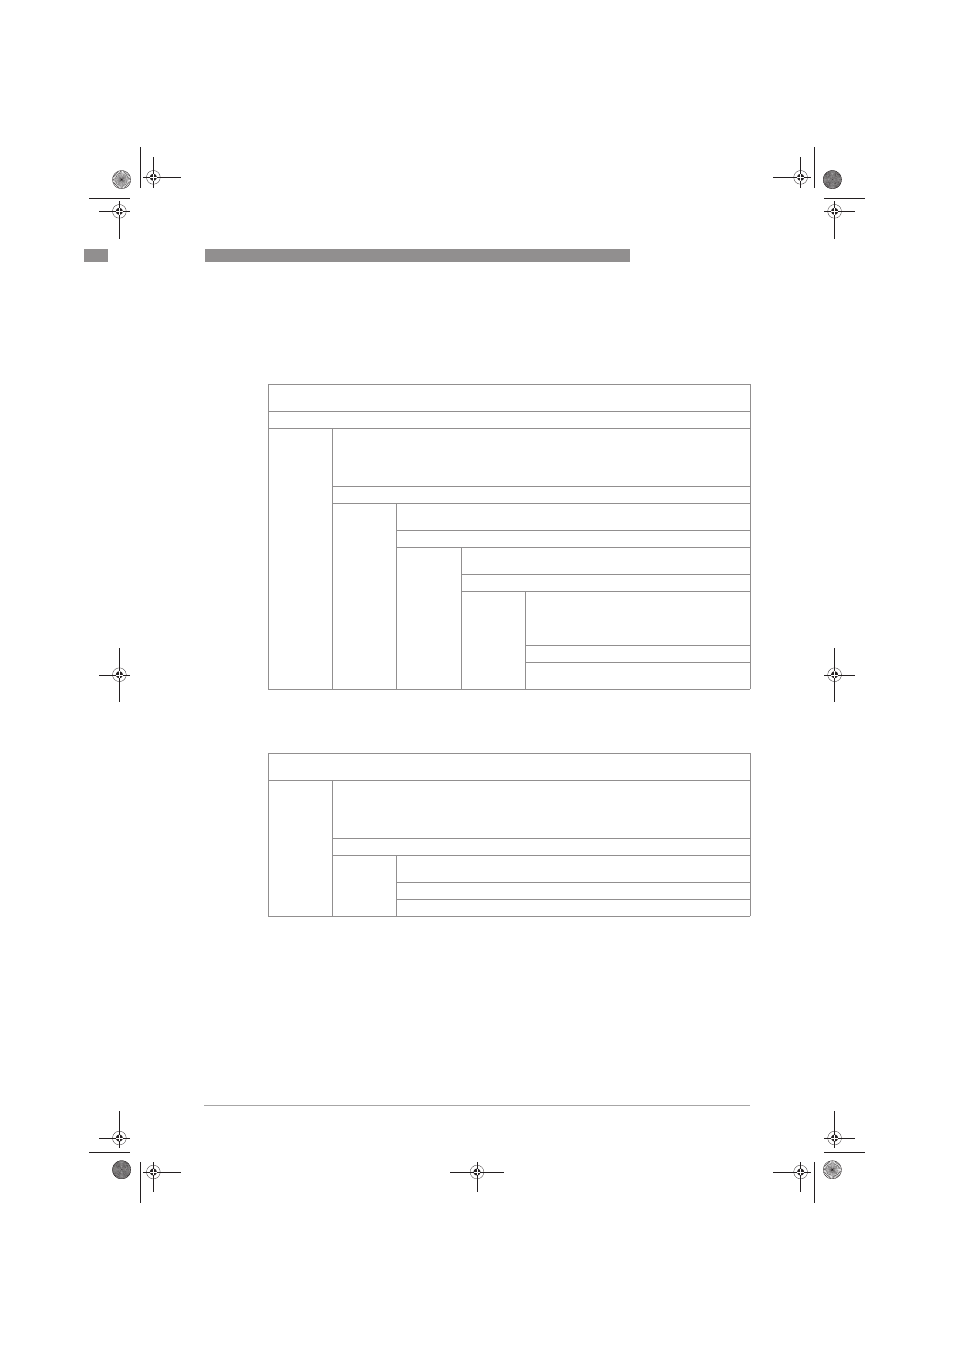
Step 3a: accessing the calibration menu via the main menu "setup"
You can start the calibration procedure now as described in "Step 4".
Step 3b: accessing the calibration menu via the main menu "quick setup"
You can start the calibration procedure now as described in "Step 4".
Press >>>> for more than 2.5 seconds, then release the button. You are on the main menu level. In the upper
line of the display "A" appears, beneath the main menu quick setup
quick setup
quick setup
quick setup is highlighted.
Press
or
until the main menu setup
setup
setup
setup is highlighted.
MAIN MENU
A quick setup
B test
> C setup
> C setup
> C setup
> C setup
D service
Press >>>> to enter the chosen menu.
You are on the first submenu level. In the upper line of the display "setup"
and "C1" appears, beneath the submenu process input A
process input A
process input A
process input A is highlighted.
Press >
>>> to enter the chosen menu.
You are on the second submenu level. The submenu
parameter
parameter
parameter
parameter is highlighted.
Press >
>>> to enter the chosen menu.
Press
or
to select Cl
Cl
Cl
Cl
2
22
2
for calibrating the
free chlorine measurement, ClO
ClO
ClO
ClO
2
22
2
for calibrating
the chlorine dioxide measurement or O
O
O
O
3
33
3
for
calibrating the ozon measurement.
Press ^
^
^
^ to confirm the entered value.
Press
or
until the submenu product cal.
product cal.
product cal.
product cal. is
highlighted.
Press >>>> for more than 2.5 seconds, then release the button. You are on the main menu level. In the upper
line of the display "A" appears, beneath the main menu quick setup
quick setup
quick setup
quick setup is highlighted.
MAIN MENU
> A quick setup
> A quick setup
> A quick setup
> A quick setup
B test
C setup
D service
Press >>>> to enter the chosen menu.
You are on the first submenu level. In the upper line of the display "quick
setup" and "A" appears, beneath the submenu language
language
language
language is highlighted.
Press
or
until the submenu product cal. A
product cal. A
product cal. A
product cal. A is highlighted.
Press >
>>> to enter the chosen menu.
.book Page 31 Wednesday, February 1, 2012 11:58 AM