Figure 14 auto span sequence - oxygen – Detcon DM-200 User Manual
Page 21
Model DM-200
DM-200 Instruction Manual
Rev. 2.0
Page 17 of 40
d)
From the programming menu scroll to the calibration level listing. The menu item appears as: “Set
Span Level”. Enter the menu by holding the programming magnet stationary over “PGM 1” for 3
seconds until the display reads “Auto Span Level / ##PPM/%”, then withdraw the magnet. Use the
programming magnet to make an adjustment using “PGM 1” to increase or “PGM 2” to decrease the
display reading until the reading is equal to the desired calibration span gas concentration. To
accept/retain the newly entered value, hold the programming magnet over “PGM1” for 3 seconds.
e)
Exit back to normal operation by holding the programming magnet over “PGM 2” for 3 seconds, or
automatically return to normal operation in 30 seconds.
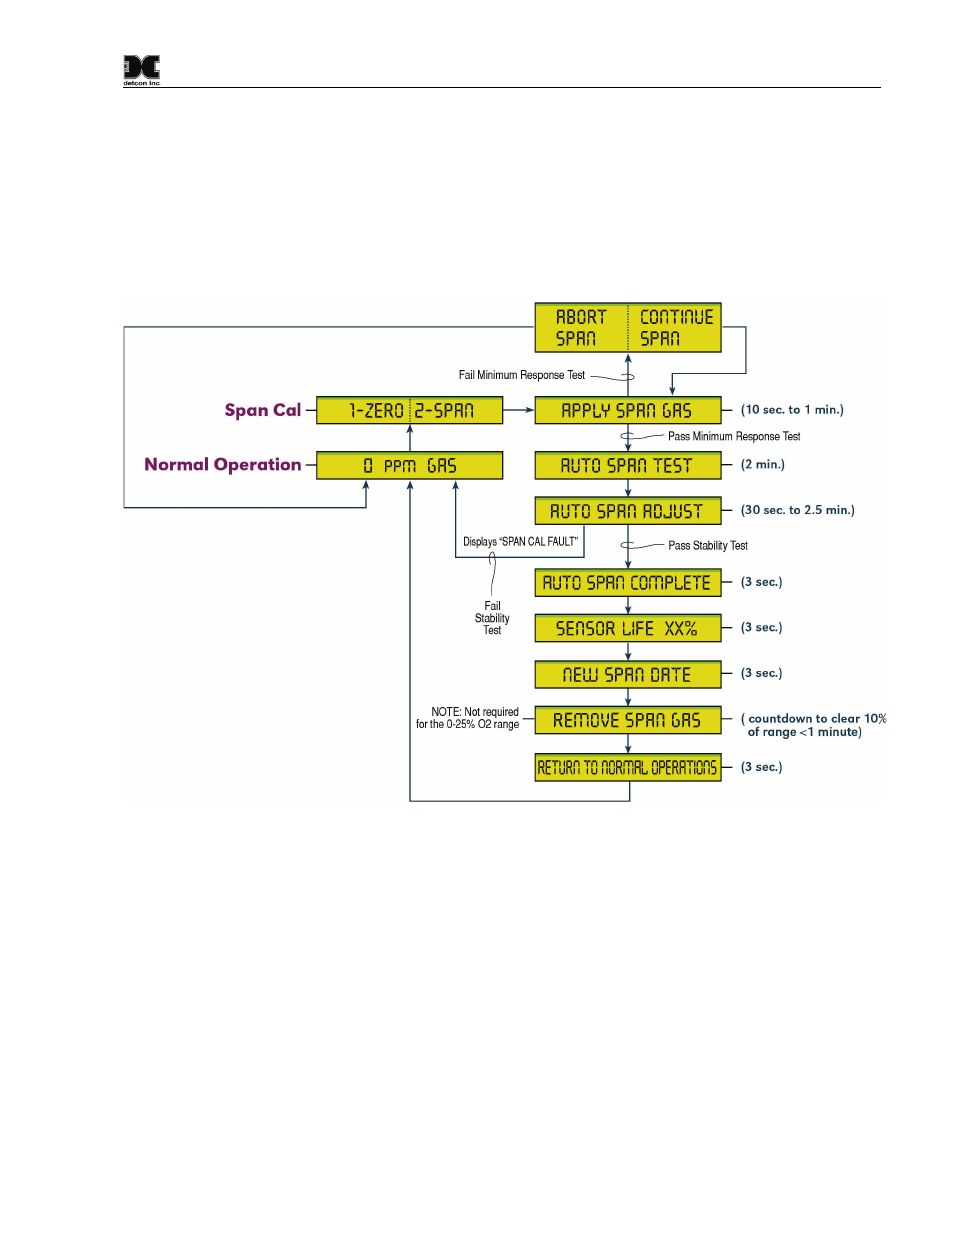
Figure 14 Auto Span Sequence - Oxygen
f)
From the calibration menu “1-Zero Cal 2-Span Cal” (section 3.4.1) proceed into the span adjust
function by holding the programming magnet stationary over “PGM 2” for 3 seconds then withdraw
the programming magnet. At this point the display will ask for the application of the target gas and
concentration. The display reads “Apply xxPPM/% Span Gas”. The ‘xx’ here will indicate the
concentration requested.
g)
Apply the calibration test gas at a flow rate of 200 milliliters per minute. When the sensor response
exceeds 10% of the applied test gas, the display will change to “Auto Span Test” for a period of 2
minutes.
If sensor response does not exceed 10% of applied gas after 1 minute, the menu “1-Abort Span / 2-Continue
Span” appears. This gives the user an opportunity to verify proper span gas delivery and concentration before
continuing forward. If it is desirable to “Abort Span” and try again, then that choice may be exercised.