Step 1, Step 2, Slide out cutting board assembly - part 1 – Catskill Craftsmen 1480DOR User Manual
Page 6: Slide out cutting board assembly - part 2
2 1/2” #8 Screws
1 3/4” #8 Screws
glide holes toward
the outside and
off center up
Counter Sink Up
Cutting Board Front
Tip: Dip screw tips in cooking oil
to ease turning into hardwood.
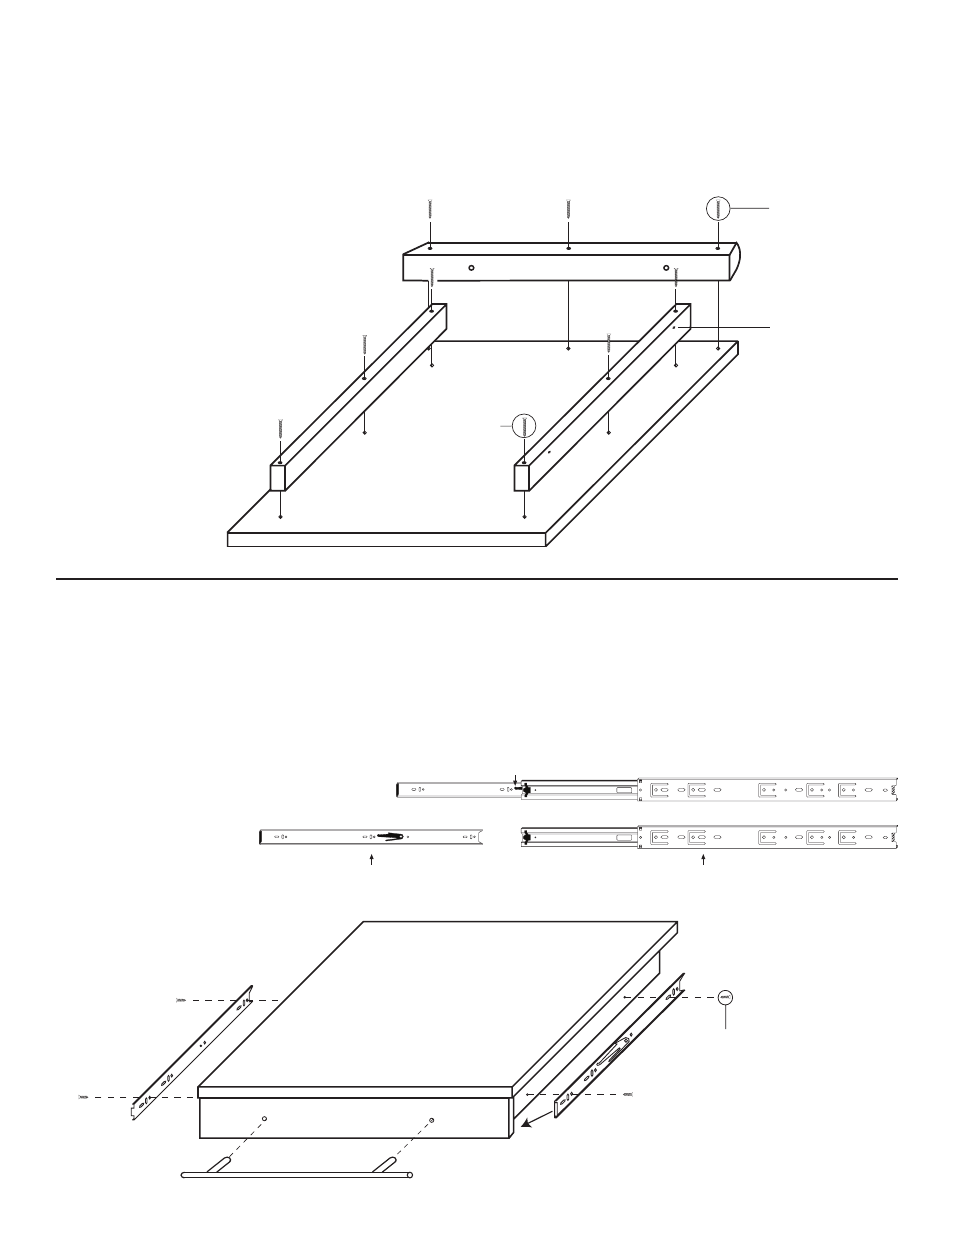
2 Pull Out Cutting Board Tops, 2 Cutting Board Fronts, 4 Cutting Board Sides.
Lay Pull Out Cutting Board Top on its
back so holes face up. Then attach
the Cutting Board Front to the Top,
so that the counter sunk holes face up,
using 2 1/2” #8 screws (the curved edge
should face outward). Now attach the
Cutting Board Side Rails to the Top
so that the glide holes face out
and the counter sunk holes
face up, using 1 3/4”
#8 screws.
STEP 1
Slide Out Cutting Board Assembly - Part 1
A. Take all of the glides and detach the inserts by fully extending the glides and pressing down on the
black tab and pulling them out.
B. Attach Glide Inserts to the sides of the Slide Out Cutting Boards using Two (2) 7/16” #6 Pan Head
Screws.
C. Attach Handles to the
Cutting Board Top
using M5-25 machine
screws. Glides should
be almost 1/8” to the front
edge of the
Sides.
STEP 2
Slide Out Cutting Board Assembly - Part 2
7/16” #6
Pan Head Screws
about 1/8”
from drawer
front
Note: Holes in glides sometimes vary.
Just make sure glides are about 1/8 inch
from front edge of the sides against inside
of Drawer Front.
Push down on the black tab and pull out
Gets attached to the Drawer Side
Gets attached to the Glide Support Brace