Step 8, Insert caster sleeves and cutting board glides – Catskill Craftsmen 1480DOR User Manual
Page 11
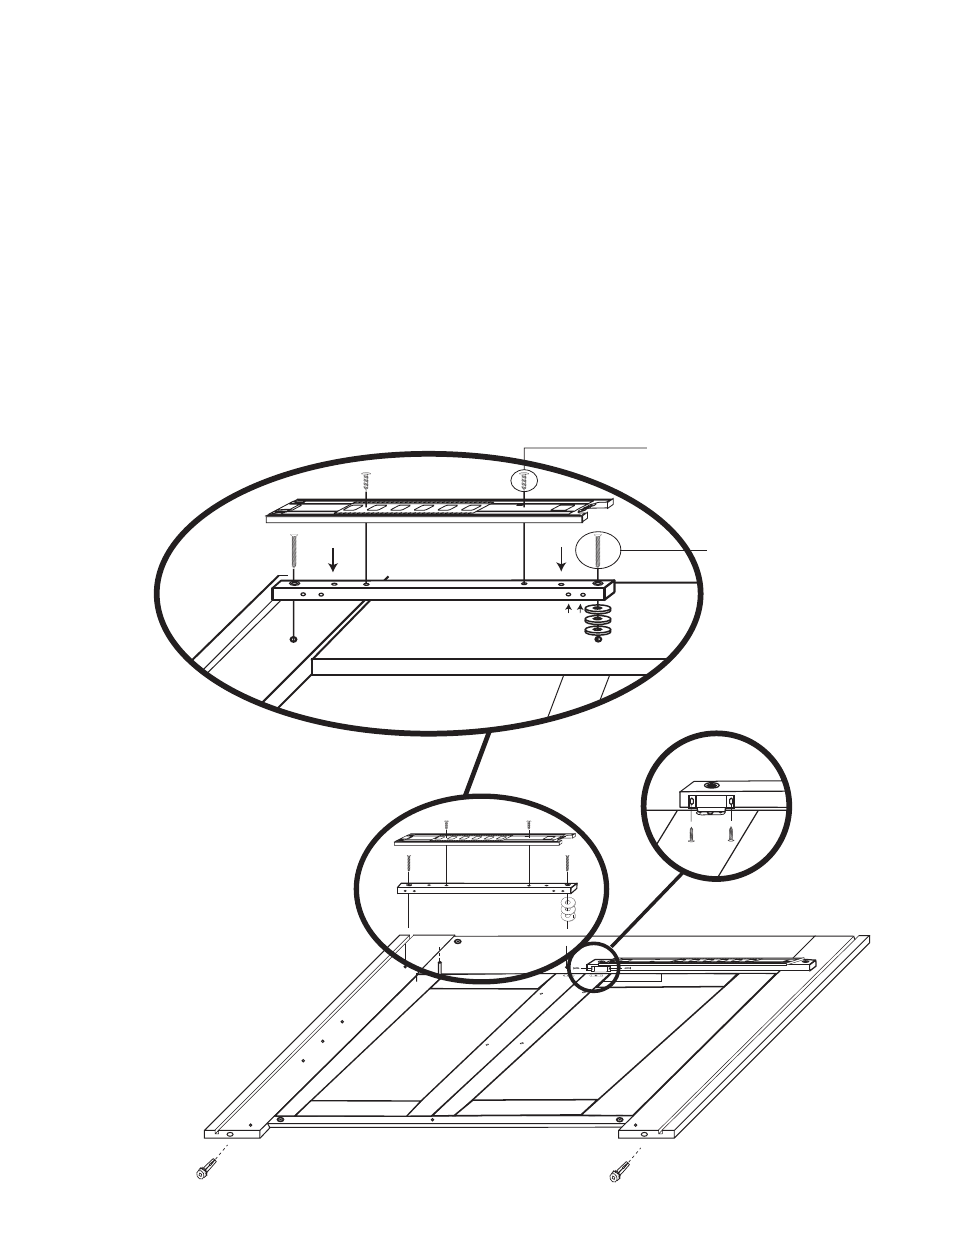
STEP 8
Insert Caster Sleeves
and Cutting Board Glides
A. Insert the Caster Sleeves into the holes in the bottom of the Legs and tap in with a hammer until
the teeth grabs the wood - don’t pound flat! Repeat for the front assembly.
B. Attach the Magnets to the bottom inside edge of the Glide Supports using the round head screws
included in the Magnet Pack.
C. Attach the Glide Supports to the Top Back Brace using 1 1/4” #8 screws. Be sure to insert 3
Washers between the Glide Support and the Top Back Brace as illustrated below.
D. Attach the Cutting Board Glides using 7/16” #6 Pan Head Screws to the Cutting Board Glide
Support so that they extend to the outside of the cart. The front edge of the Glide is almost flush with
the front edge of the Glide Support as in the illustration. Two holes in the Glide Support are not used.
7/16” #6 Pan Head Screws
1 1/4” #8 Screws
5/8” Pan Head Screws
Not Used
Not Used
Pilot Holes for Magnet
(Rounded)