Step 9, Brace prep – Catskill Craftsmen 1480DOR User Manual
Page 12
STEP 9
Brace Prep
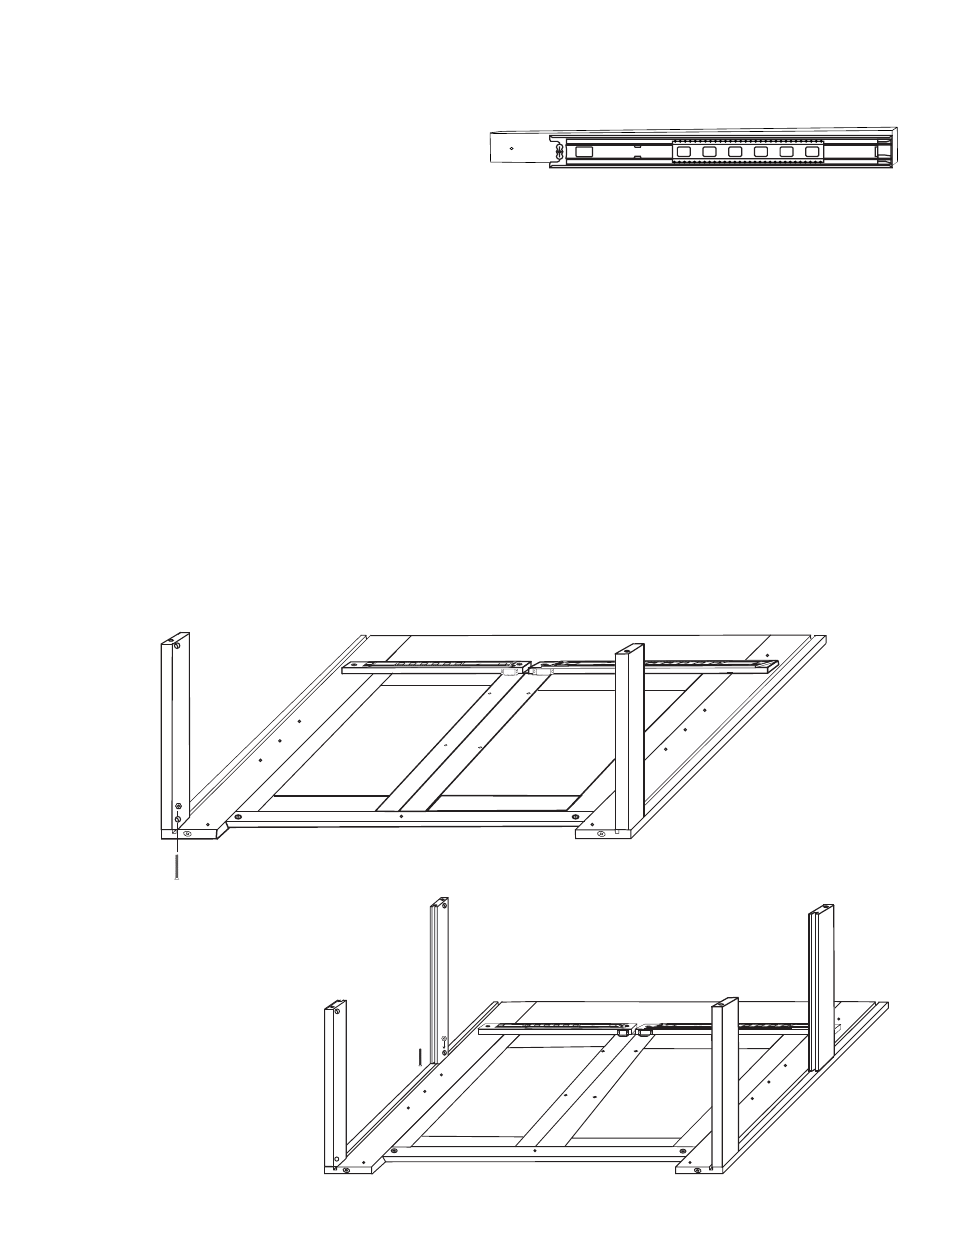
A. Attach the Drawer Glides to the Glide Support
Sticks using two 7/16” #6 screws. Slide top part
of glide to expose pilot holes in glide support sticks.
The front edge of the glide will overhangthe front edge of the
Glide Support Stick by 1/8 inch. See Illustration 9A.
The Glide Sticks have 6 holes - only 2 are used. The pilot holes should be facing down and the glide
is slightly below the long edge of the stick when positioned properly.
B. Attach Bottom Side Braces (illustration 9B), Middle Side Braces, (illustration 9C) Top Side Braces
and drawer glide support sticks (illustration 9D) to the back assembly using 1 3/4 machine screws
and nuts. Position braces as illustrated.
Note: This step requires access to both sides of the back panel in order to insert the machine screws
(bolts) from the front & attach the nuts/braces on the inside with help. The easiest way is to invert the
top on a table to that one side overhangs the table top giving you access from the bottom to the holes
in one of the legs. This allows you to insert the bolts through the holes in the front of the leg, through
the leg, into the ends of the bottom, middle and top braces. Secure with a nut. Repeat with the other
side. If you don’t have a suitable table, you can place the unit on the floor and prop up one side about
6” to allow you access to the bolt holes. With a friend, you can stand the back panel upright and work
from that position. The doors could swing free at this point so be careful not to mash your fingers.
Illustration 9A
1 3/4 machine screws
Hex Nut
1 3/4 machine
screws from
back side
Hex Nut
Illustration 9B
Illustration 9C
Note: See our
assembly video at
www.catskillcraftsmen.com
for tips on assembling this
cart alone.