WEN 70712 12 Sliding Compound Miter Saw User Manual
Page 22
ITEM 70712 OPERATOR’S MANUAL 22
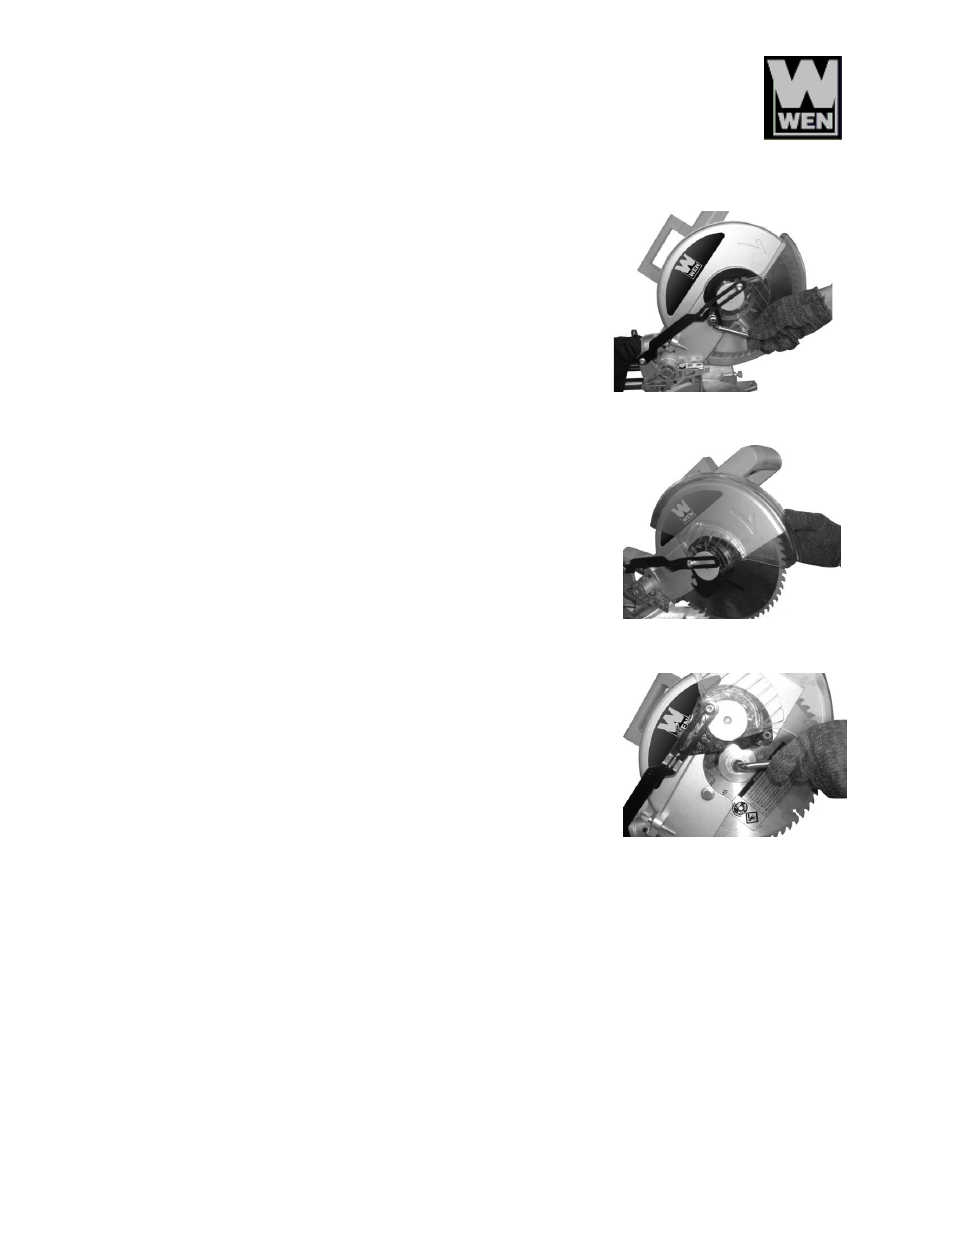
Blade Replacement
1. Unplug the tool from its power source.
2. Lock the Blade Assembly in the raised position by twisting
in the Locking Pin.
3. Use the supplied wrench to remove the Center Cover Fixing
Bolt holding the Center Cover in place by turning it
counterclockwise (Fig. 6).
4. Raise the Blade Guard and Center Cover (Fig. 7).
5. While holding in the arbor lock button (see page 13), use the
wrenches to loosen the Arbor Bolt by turning it clockwise.
(Fig. 8)
NOTE: The Arbor Bolt has a left hand thread, so it loosens by
turning clockwise.
6.
Remove the Arbor Bolt, Outer Flange and Saw Blade by
pulling them straight off the Arbor.
7. Reinstall a new blade on the Arbor. Be sure to match the
direction marked on the new blade with the direction marked
on the Saw Blade Housing.
8. Replace the Outer Flange and Arbor Bolt. Tighten the Arbor
Bolt securely using the Wrench by turning it counterclockwise.
9. Rotate the Center Cover back into place and tighten the
Center Cover Fixing Bolt using the Wrench by turning it
clockwise.
10. Release the Locking Pin.
Guide Fence Adjustment
1. The Guide holds the work piece in a fixed position while the Table and or the Blade
Assembly are adjusted in a miter or bevel angle.
2. To make accurate cuts, the Guide Fence must be perpendicular (at a 90º
angle) to the Saw
Blade.
3.
Before beginning work, make a test cut on scrap material with the Table set at 90º
.
4. Check the cut with an accurate square. You can also reverse the two pieces, hold the cut ends
together, and hold a good straight edge along the side of the pieces.
Fig. 6
Fig. 7
Fig. 8