WEN 70712 12 Sliding Compound Miter Saw User Manual
Page 18
ITEM 70712 OPERATOR’S MANUAL 18
5. Slowly rotate the blade by hand, checking the square's alignment with the blade at several
points. The edge of the square and blade should be parallel; however, if the top or bottom of
the blade angles away from the square's edge, an adjustment is needed.
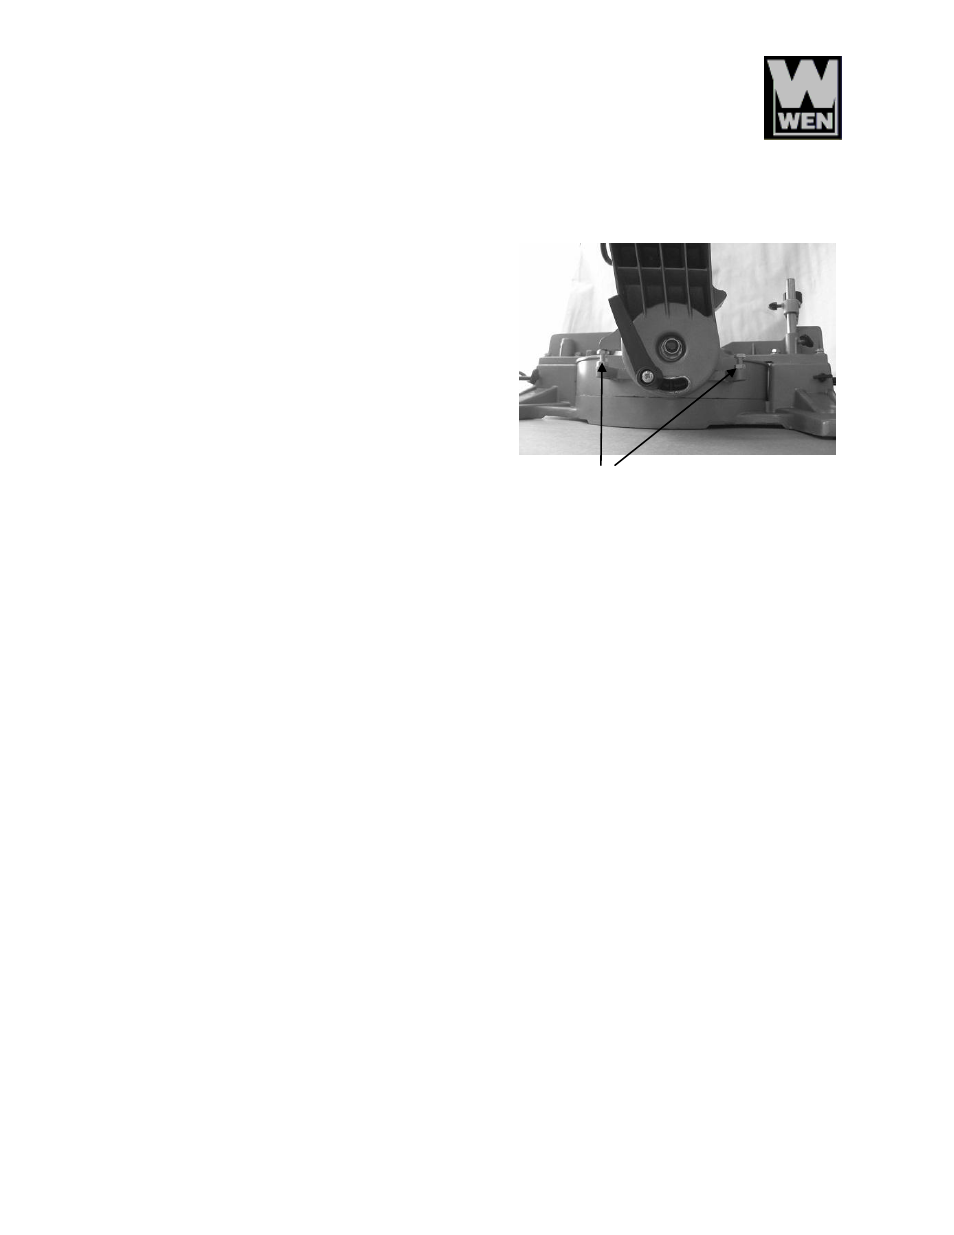
6. Using a wrench, loosen the Lock Nut (securing the positive bevel stop adjustment bolt in
place). The 0º
bevel adjustment bolt (Fig. 5) is
located on the rear right side of the Miter Table.
7. Use another wrench to turn the adjustment
screw and so that the blade is in alignment with
the square.
8.
Retighten the bevel adjustment lock nut.
Retighten the Bevel Lock Handle. Recheck the
blade to table alignment as in steps 4 and 5.
Making a Cut
1. Observe all safety and planning items discussed in this manual. Detailed instructions on each
of the following steps are discussed in this manual. Do not make any cuts until you have read
this entire manual and are familiar with the operation of this tool.
2. Release the Locking Pin to allow the Blade Assembly to come up. Check to be sure the Table
is fixed in place at the desired miter angle.
3. Blow any sawdust or debris away from the Guide Fence. Place the work piece against the
Guide Fence.
4. Make any necessary miter or bevel adjustments.
5. Align the marked location of the cut on the work piece with the Saw Blade. Be aware that the
Saw Blade will remove material from the cut equal to the width of the blade. This is the
“Kerf”. To prevent your work piece from being cut too short, align the edge of the blade with
your measured mark, keeping the Kerf on the waste side of the cut.
6.
Hold the work piece in place using the Hold Down Clamp. Never use more than one hold
down clamp. Ensure that the work piece is level and supported securely, using saw horses or
supports if necessary.
7. Grip the Saw Handle and squeeze the Trigger to start the Blade turning.
8. Pressing down lightly, move the Blade smoothly across the work piece to cut it. With narrow
material, you can press straight down “chopping” the material. With wider material you must
move the blade across the material to cut it. Do not bear down on the material, use light
downward pressure. If the material binds the blade, release the trigger. Keep your hands and
fingers away from the blade.
Fig. 5
Bevel Adjustment Bolt