Ft7000 edu a – Triton FT7000 EDU Installation Manual User Manual
Page 6
6
M
oDEl
Ft7000 EDU a
ssEMbly
F
iElD
i
nstallation
G
UiDE
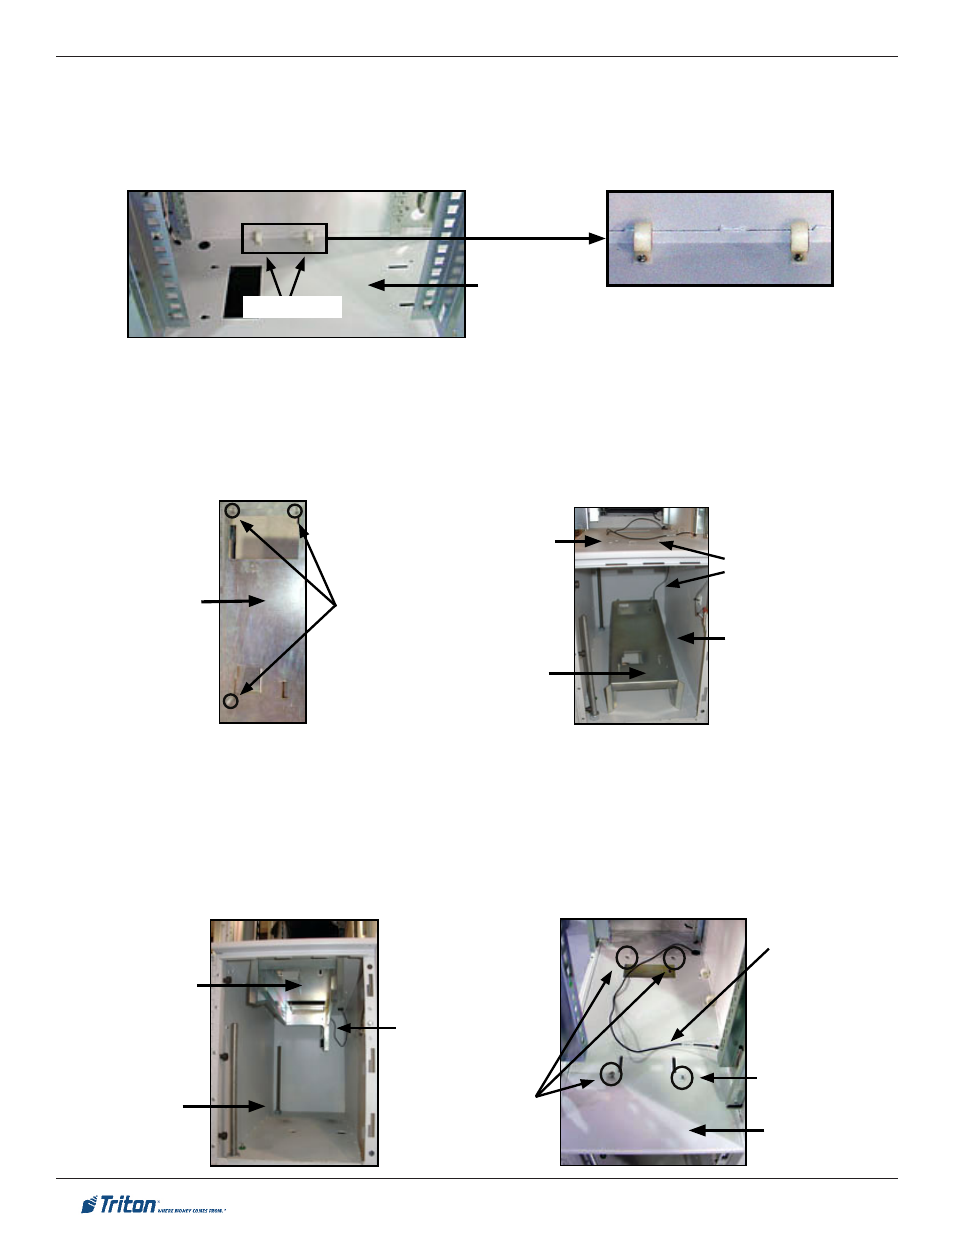
4. Refer to the Figures below. Hold the Depository Bin Mounting Bracket up against the top of the
Depository Bay so the three (3)” pre-mounted “positioning” screws protrude through the slotted
mounting holes in the bottom of the I/O Bay. Slide the bracket toward the rear of the cabinet until
the hole for the “fixed” mounting screw (back right corner) matches up with the corresponding
mounting hole in the bottom of the I/O Bay. Secure the Depository Bin Mounting Bracket to the
bottom of the I/O Bay with an #8-32 x 3/4” screw and tighten down the other three (3) mounting
screws.
1. Refer to the Figure below. Mount two (2) white cable hangers (the openings facing outward) to
the bottom of the I/O Bay with two (2) 4 mm x 12 mm pan head screws.
Installation of the EDU Depository Bin and Mounting Bracket Assembly
2. Refer to the Figures below. Pre-mount three (3) #8-32 x 3/4” screws to the top of the Depository
Bin Mounting Bracket (with the envelope chute to the front, the screws should be mounted at the
forward left/right corners and the back left corner) so they match up with the “slotted” mounting
holes in the bottom of the I/O Bay. Do not tighten the screws!
3. Set the Depository Bin Mounting Bracket in the EDU Depository Bay. Feed the Bin Present
Switch cable
UP through the opening to the I/O Bay.
EDU D
Epository
b
ay
Bin Present
Switch Cable
i/o b
ay
(l
owEr
)
D
Epository
b
in
M
oUntinG
b
raCKEt
Cable Hangers
i/o b
ay
(l
owEr
)
EDU D
Epository
b
ay
D
Epository
b
in
M
oUntinG
b
raCKEt
Bin Present
Switch Cable
i/o b
ay
(l
owEr
)
“Fixed” Depository
Bin Mounting Bracket
screw
Bin Present
Switch Cable
D
Epository
b
in
M
oUntinG
b
raCKEt
(3) Pre-mounted
“positioning” screws
(3) Pre-mounted “positioning”
screws on the Depository Bin
Mounting Bracket