Ft7000 edu a – Triton FT7000 EDU Installation Manual User Manual
Page 10
10
M
oDEl
Ft7000 EDU a
ssEMbly
F
iElD
i
nstallation
G
UiDE
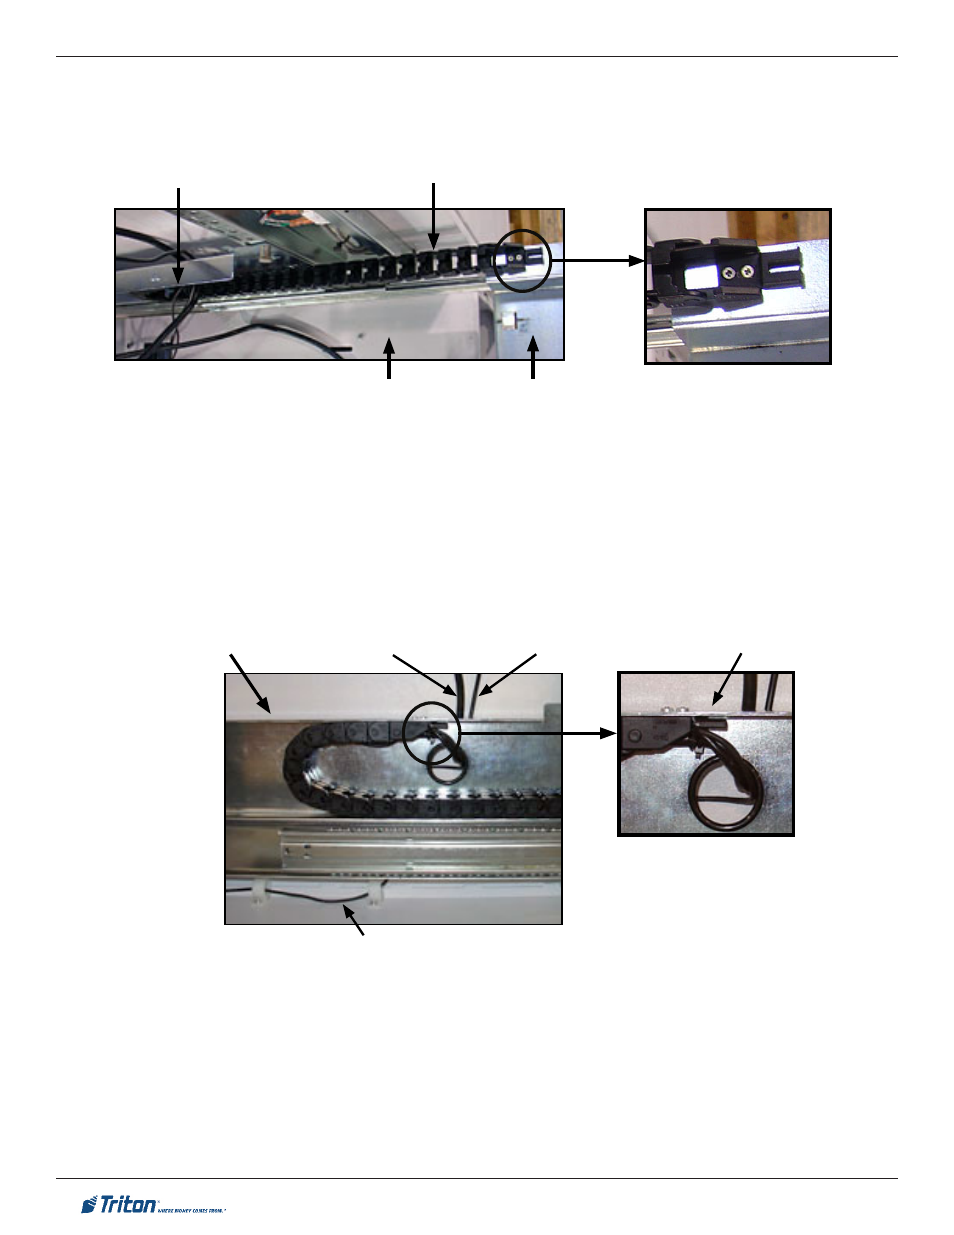
10. Refer to the following Figures. Ty wrap the UCV4 Ground and EDU Bin Present Switch cables
(together) to a hanger at the output of the E-Chain. Secure the UCV4 Ground cable to the stud
at the front right corner of the EDU Tray (just past where it comes out of the E-Chain) with a #8-
32” nut.
11. Ty wrap the EDU Comms/Power cable (individually) to a hanger at the output of the E-Chain.
Press the EDU Comms/Power cable into the two (2) white cable clips along the right side of the
tray.
6. Refer to the Figures below. Secure the E-Chain (cable bundle track) to the front right corner of
the tray with two (2) #4-40 x 1/4” stainless steel screws.
i/o b
ay
(l
owEr
)
EDU
t
ray
UCv v
ErtiCal
a
ssEMbly
E-C
Hain
(C
ablE
t
raCK
)
7. Refer to the Figures below. Press the EDU Comms/Power, UCV4 Ground, and the EDU Bin
Present Switch cables into the E-Chain (cable track).
8. Ty wrap the UCV4 Ground and EDU Bin Present Switch cables (together) to a hanger at the
entrance to the of the E-Chain.
9. Ty wrap the EDU Comms/Power cable (individually) to a hanger at the entrance to the of the
E-Chain.
EDU Comms/
Power Cable
UCV Ground
Cable
EDU Bin Present
Switch Cable
UCv v
ErtiCal
a
ssEMbly
Cable Ty
Hangers
E-Chain Connection to
the EDU Tray