Operation / adjustment, Maintenance – Agri-Fab Tine De-Thatcher 45-02951 User Manual
Page 6
6
OPERATION / ADJUSTMENT
Regular removal of thatch is critical to maintenance of a
healthy lawn. Thatch is a layer of stems, clippings, run-
ners, roots and leaves that have not decayed. Excessive
thatch prevents air, water and fertilizer from reaching the
roots. The de-thatcher effectively dislodges excessive
thatch from your lawn. Read these instructions to help
avoid improper adjustment and operation.
Proper adjustment of the tine shield and spring tines
is important for effective performance. Refer to the
following steps for the proper adjustment before
operating the de-thatcher.
1. Move the towing vehicle onto a level surface, such
as a driveway or garage floor and attach the tine
dethatcher to the vehicle hitch. See figure 10.
2. To adjust the spring tine shield, lower the de-thatcher
into operating position using the lift handle. Loosen
the two hex nuts and carriage bolts which fasten the
rear of the hitch mount arms to the hitch arm mount
brackets. Adjust the tine shield until it is level and both
the front and rear spring tines are in contact with the
ground. Retighten the hex nuts. See figure 10.
FIGURE 10
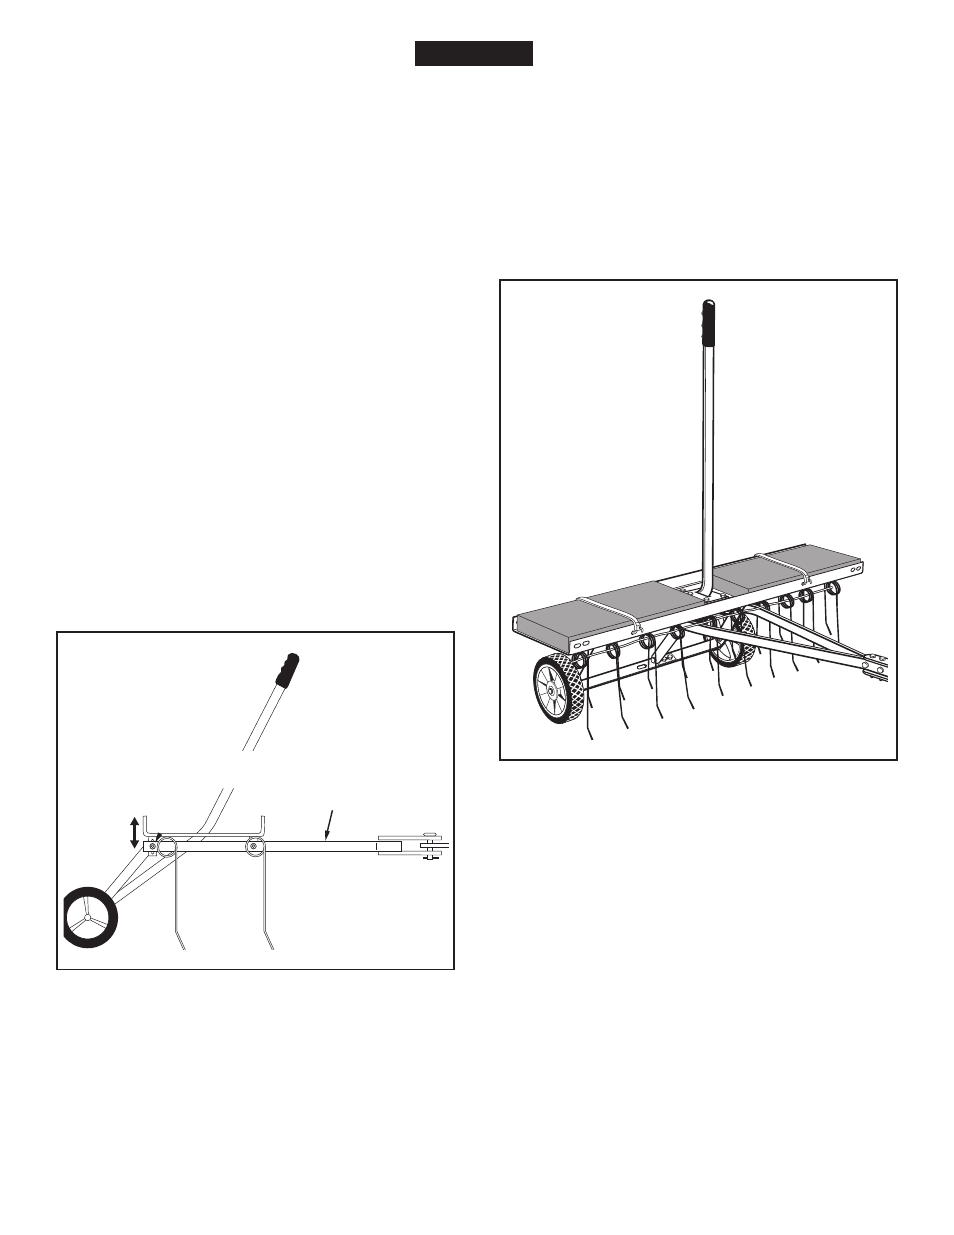
5. If the de-thatcher appears to be "jumping" during
use, then extra weight should be added to the tine
shield. In most conditions extra weight will be needed.
Concrete patio blocks are recommended for weight
because of their low profile; however any type of
weight is suitable if it can be tied down to the shield.
Secure weight by using suitable binding material
such as rubber tie down straps or wire, fastening to
the holes in the shield flange. See figure 11.
3. Vary the vehicle's forward speed until the best
dethatching action is achieved.
4. For best results, use a crisscross pattern on your
lawn.
MAINTENANCE
1. Before each use check all nuts and bolts for
tightness.
2. Lubricate wheels as needed.
3. If rust appears on the shield or spring tines, sand
lightly and coat with enamel paint.
4. Always store in a dry area, and coat exposed metal
with light oil when not in use.
FIGURE 11
HITCH
MOUNT
ARMS
CARRIAGE BOLT
& NYLOCK NUT
ENGlISH