Sata quickport pro lan, Examples of use – SHARKOON SATA QP Pro LAN (Giga) User Manual
Page 17
www.sharkoon.de
sata qUICKpORt pRO lan
9. Examples of use
9.1 Local use
User A only wants to operate the SATA QuickPort Pro LAN at his local computer.
Thus he connects the included USB and/or the delivered eSATA cable to the respective connectors at his computer.
Into the HDD docking bay he inserts a SATA HDD, to the USB front connectors he plugs a USB stick and into the card reader
he inserts a SD card.
User A switches on the SATA QuickPort Pro LAN. Afterwards the HDD is addressed over eSATA and installed on the local
computer with OS drivers. USB stick and SD card are accessed via USB and also installed.
After successful installation all three memory devices are available from the local computer, no additional software needs to
be installed.
Alternatively user A can also connect the SATA QuickPort Pro LAN solely over USB. In this case all three connected devices
will be available.
Please note: When connecting the device only via eSATA only the HDD will be available!
9.2 Network use (single user, iP address manually assigned)
User A wants to integrate the SATA QuickPort Pro LAN into his local network and connects the docking station to his router
using the included patch cable.
He plugs a SATA HDD and a USB stick to the SATA QuickPort Pro LAN; his IP addresses were configured manually; a DHCP
server is not activated.
Router: 192.168.10.1
Computer: 192.168.10.2
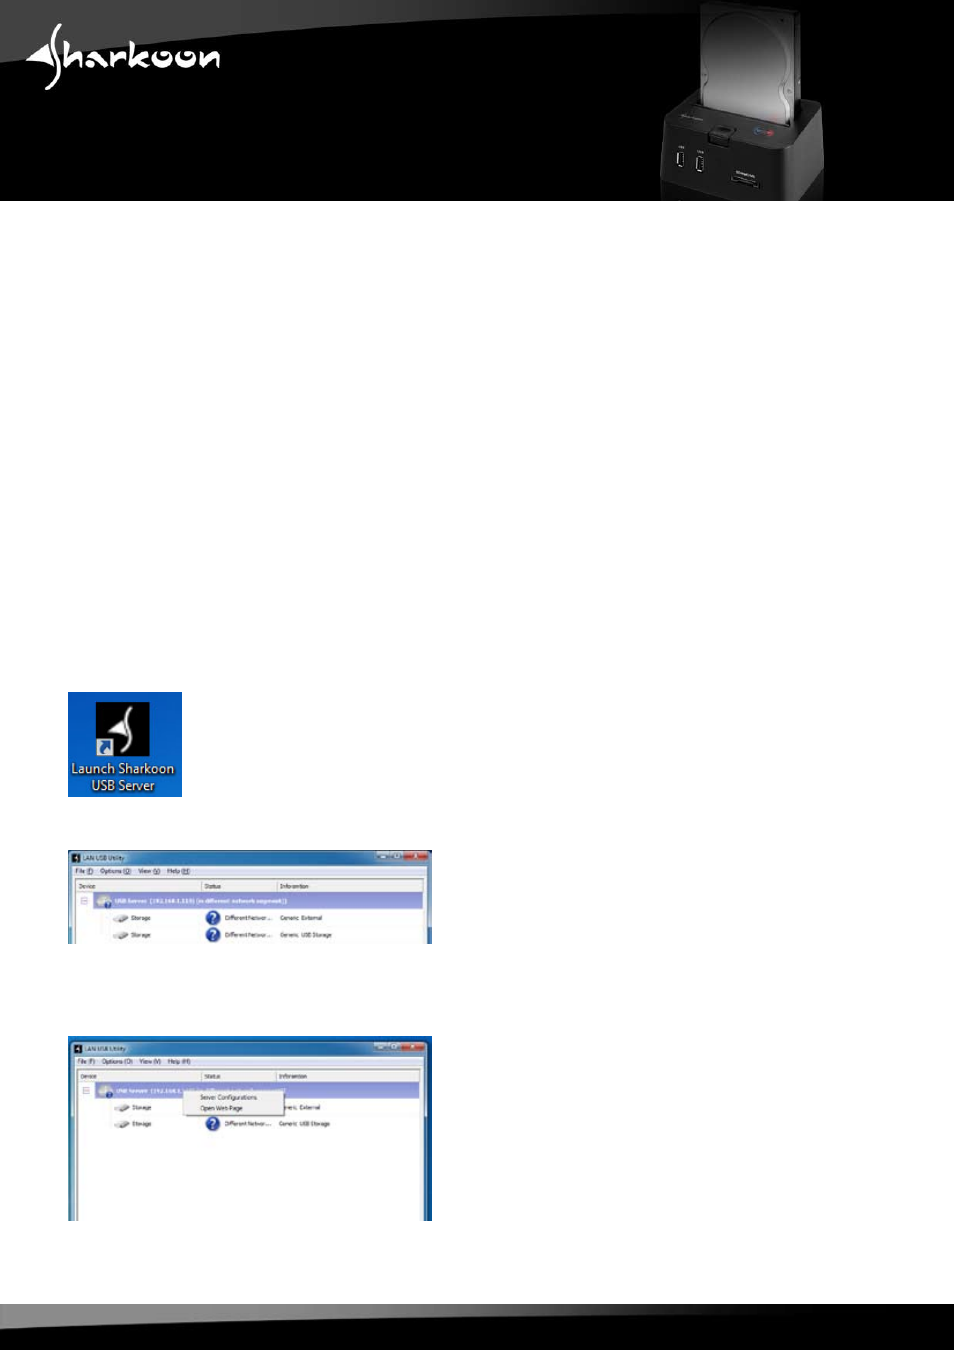
User A installed the included software on his computer and starts
it by double-clicking (left mouse button) on the desktop icon:
The server software’s user interface will display the USB server:
The software has detected the USB server and assigned it a standard IP address, but this address is from another address
range (error message: “in different network segment”).
The device may not be accessed yet; first the server must be assigned an IP address from the local network’s address
range.
Right-clicking the USB server’s entry inside the user interface brings up the server’s context menu: