Entering the custom transmits and macros – Rice Lake Condec UMC600IS User Manual
Page 4
4
Setting Up Custom Transmits (Smart I/O) for the UMC600IS/IQ700IS
NOTES:
•
When necessary, the start of text (STX)
character tells the printer that data is being
transferred for printing.
•
A macro doesn’t repeat the start of text
character. Only the main file has a start of text.
•
Macros can be called as many times as
needed in a print file.
•
The code 999 serves as END OF FILE as well
as RETURN TO MAIN PRINT FILE command.
•
Files and MACROS have a maximum of 30
lines each.
•
If the indicator is in the GROSS mode, it will
print File 7.1. If the indicator has a tare value
entered and is in the net mode, it will print File
7.2.
•
It is a good idea to write out the custom print
format you want on a worksheet, then enter it
into the indicator. Keep this in your records for
that indicator - if something happens to the
indicator, you will not have to recreate the
custom print format.
Depending on the type of printer that you are using,
you could also send special code sequences to the
printer itself as long as the ASCII codes are 127 or
lower. For example, with the Epson TM-295 printer,
you could include the code sequence to release the
paper (ASCII characters 27, then 113) after the ticket
is printed. Different printers have different commands
that are available using special codes like this. For
more information about printer codes, refer to the
documentation that was supplied with the printer.
There is one code that we have not discussed yet but
may come in handy if you are working with an older
printer, such as a Hecon tape printer: Code 700, which
the IS indicator interprets as “DELAY PER SETUP.”
Some older printers may have limited buffering
capability or memory enough for just a few lines of
text. Therefore, it is very easy to overrun the printer
and you can lose an entire line of text or get several
lines garbled together. To prevent this, insert a code
700 between the carriage return and the line feed. This
causes the indicator to pause for the amout of time
specified in parameter 14.2 (see manual). A delay of 1
or 2 seconds should be adequate for most of these
printers.
Entering the Custom Transmits and Macros
Now that we have seen some examples of planning
custom transmits and macros, let’s enter the first two
example files and see what we get.
Follow the chart in Section 2 of the indicator manual
to connect the printer through the I/O barrier to port 1
of the IS indicator.
NOTE: If the printer can not provide an active
current loop to retrieve the information from the
barrier, you must install an interface unit that can
and will output the format used by your printer.
Enable option 7 if it is not already enabled (as
described in the first section of this document
“Enabling Option 7”). You can then select the desired
custom transmit file (we will enter files 7.1 and 7.2
from the first example) using the
TARE
and
TARE
RECALL
keys. The
TARE
key takes you forward and
the
TA R E R E C A L L
key goes backwards. With
O P .7 o N
displayed, press the
TARE
key once to
bring up file 7.1 (you will see
7 . 1. O F F
displayed).
If you go too far, simply use the
TARE RECALL
key to
go backwards. Now turn on custom transmit by
pressing the
lb/kg CONV
key if it is not already
enabled.
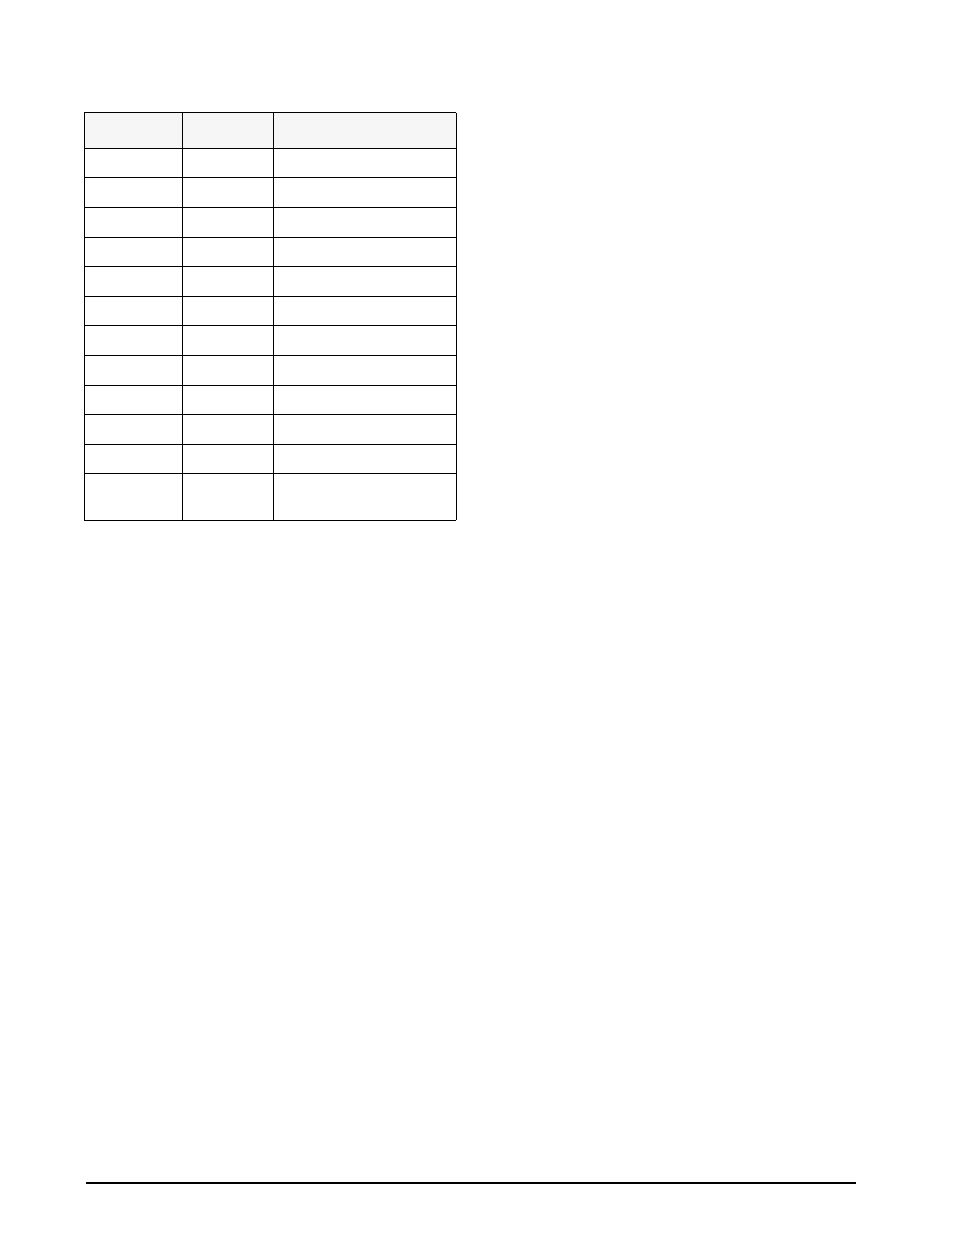
18
078
N alphabetic character
19
087
W alphabetic character
20
079
O alphabetic character
21
079
O alphabetic character
22
068
D alphabetic character
23
032
SP (space)
24
077
M alphabetic character
25
078
N alphabetic character
26
046
. (period)
27
013
Carriage return (CR)
28
010
Line feed (LF)
29
999
End of MACRO, return to
main file
Line Number
Code
Code Definition
Table 4. File 7.9 Macro 1 (Continued)