Attaching rear brackets to the switch, Installation procedure for mid-mounting the switch – Brocade Universal Two-Post Rack Kit Installation Procedure (Supporting VDX 6740T) User Manual
Page 8
8 of 12
Universal Two-Post Rack Kit Installation Procedure
53-1002943-01
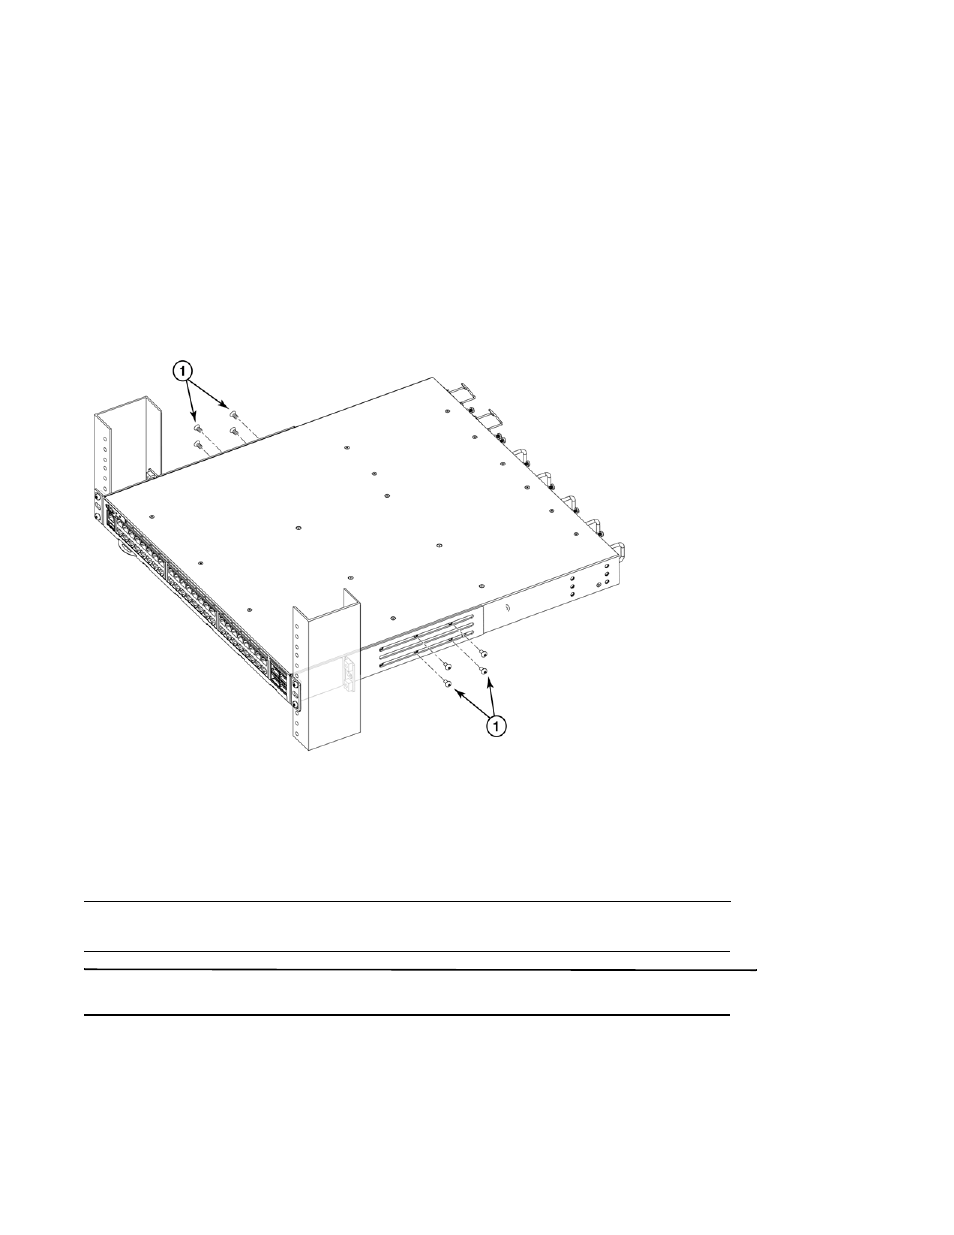
Attaching rear brackets to the switch
Complete the following steps to attach the rear brackets to the switch.
1. Align the right rear bracket to the right rear of the switch and using four 8-32 x 5/16-in. panhead screws, attach
the bracket to the switch as shown in
. Be sure to insert the screws through the upper and lower slots in
the bracket.
2. Align the left rear bracket to the left rear of the switch and using four 8-32 x 5/16-in. panhead screws, attach
the bracket to the switch. Again, use the upper and lower slots in the bracket.
3. Tighten all the 8-32 x 5/16-in. screws to a torque of 15 in-lbs. (17 cm-kgs).
FIGURE 5
Attaching the rear bracket to the switch
Installation procedure for mid-mounting the switch
NOTE
The illustrations for this procedure show a two-post rack with narrow posts (3- to 5-inch) as an example.
ATTENTION
The switch must be turned off and disconnected from the fabric during this procedure.
Complete these tasks to install the switch in a rack:
•
“Attaching front brackets to the switch”
•
“Attaching front brackets to the rack”
1
Screws, 8-32 x 5/16-in., panhead Phillips