Unpacking and installing the mid-mount hardware – Brocade VDX 8770-4 Two-Post Flush and Mid-Mount Rack Kit Installation Procedure User Manual
Page 5
Brocade VDX 8770-4 Two-Post Flush and Mid-Mount Rack Kit Installation Procedure
5 of 10
Publication Number: 53-1002670-01
ATTENTION
This hardware kit is a universal kit, and some hardware will not be used in this installation.
Unpacking and installing the mid-mount hardware
1. Unpack the rack kit hardware.
2. Loosen the two 10-32 adjusting screws securing the each sliding bracket to the saddle (see
and slide the brackets as far backward as possible.
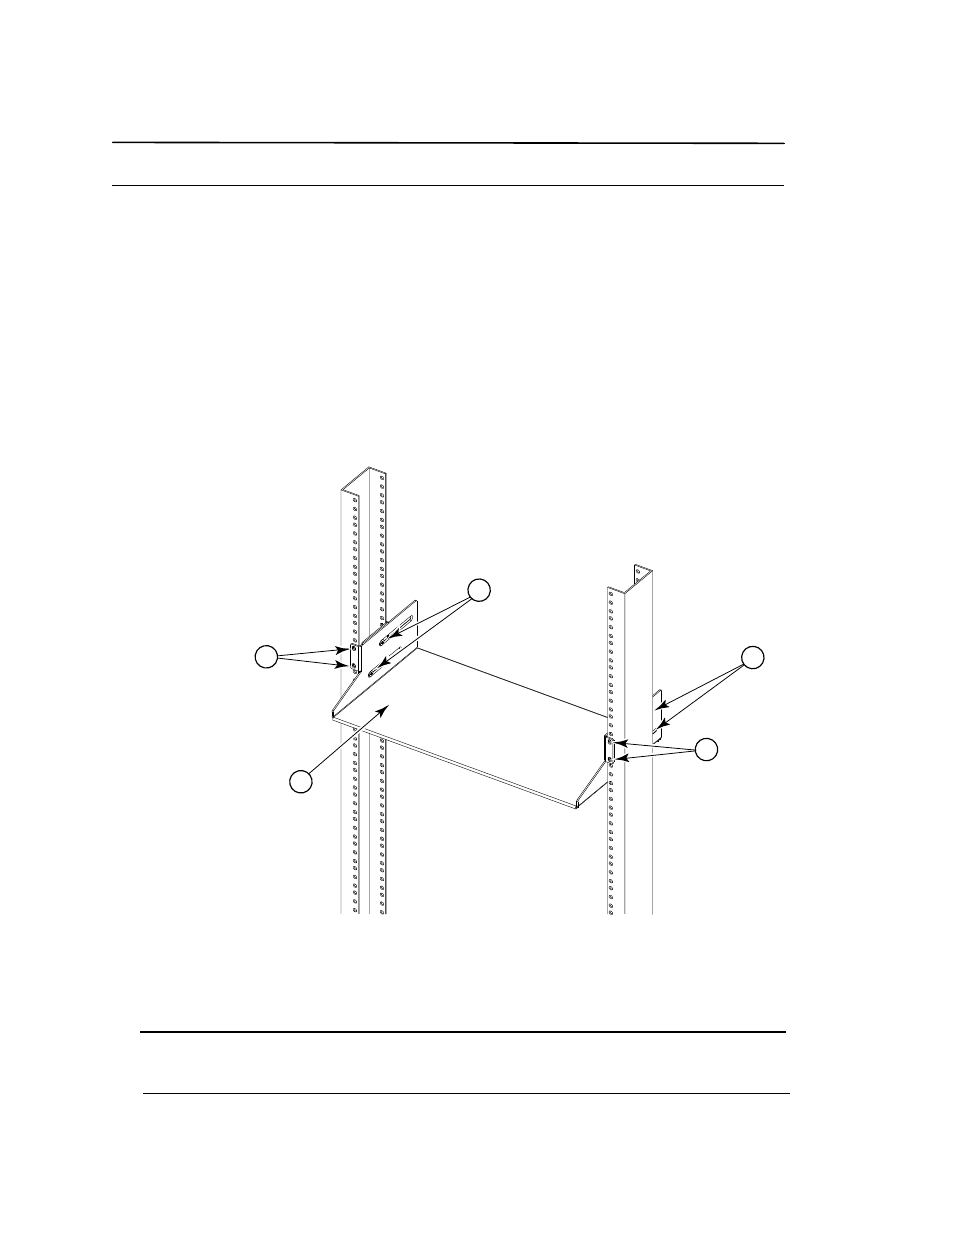
3. Install the saddle to the rack posts using the following steps while referring to
on page 5. Also refer to
on page 6 for details on securing screws to the rack.
a. Install the saddle with the angled portion facing the port side of the rack posts using four 10-32 screws with
square-cone washers on each sliding bracket. Tighten the screws to 32 in-lb (36.86 cm-kg).
b. Tighten the two 10-32 adjusting screws on each side of the saddle.
FIGURE 2
Saddle installed in equipment rack.
NOTE
For rails with round holes, use the clip nuts (see
) on the rack rails for securing 10-32 screws.
For rails with square holes, use the retainer nuts (see
). Also refer to
below.
1
Saddle
3
Adjusting screws (two on each side of the saddle)
2
10-32 screws with square-cone washers
2
2
1
3
2