Unpacking and installing the rack kit hardware – Brocade VDX 8770-8 Four-Post Flush and Recessed Mount Rack Kit Installation Procedure User Manual
Page 6
6 of 10
Brocade VDX 8770-8 Four-Post Flush and Recessed Mount Rack Kit Installation Procedure
Publication Number: 53-1002667-01
ATTENTION
This hardware kit is a universal kit, and some hardware will not be used in this installation.
Unpacking and installing the rack kit hardware
1. Unpack the rack kit hardware.
2. On each rail, loosen the four adjusting screws on the brackets and adjust the rails to the depth of your rack. You
may have to remove the screws and then reinsert them if the brackets won’t slide. Tighten the screws after
adjustment.
3. Noting that the rails are designated “Left” and “Right,” install each rail in the rack using eight M6 x 1.0 x 12
screws, four screws on each end of each rail. Refer to
. Left and right designations are from the front of
the rack.
•
For posts with round holes - use four M6 x 1.0 x 12 screws with blue Loctite on the threads on each end of
the rail assembly.
•
For posts with square holes - use the four M6 x 1.0 x 12 screws with blue Loctite on the threads and
alignment washers on each end of the rail assembly.
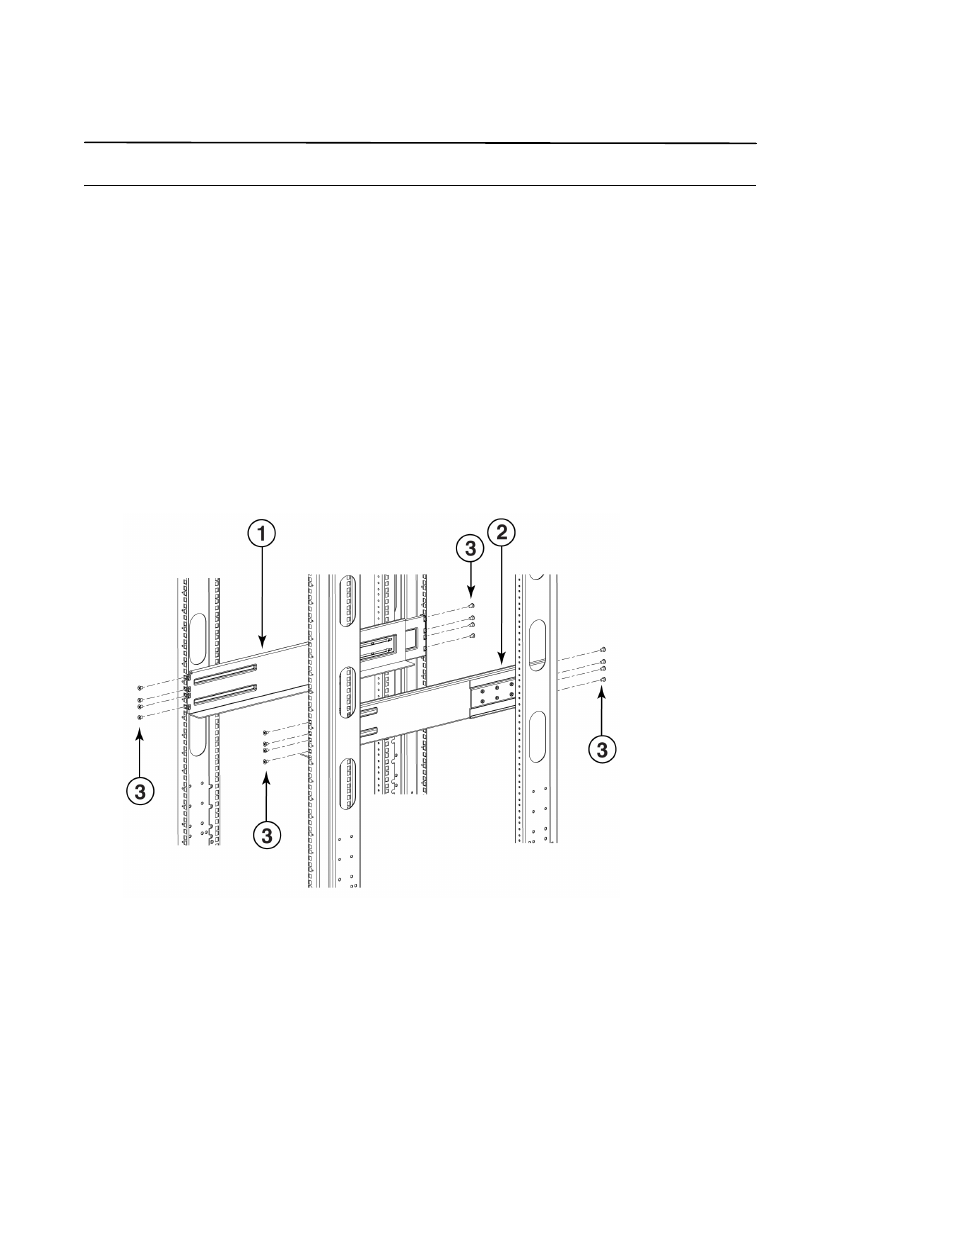
FIGURE 2
Rack mount rails installed in a four-post rack
4. Tighten the screws to a torque of 29.2 to 36.5 in-lb (33.6 to 42 cm-kg).
5. Install either clip nuts or retainer nuts depending on whether your rack has round holes or square holes.
These will allow you to secure the switch to the rack posts.
1
Left side rail
3
M6 x 1.0 x 12 screws
2
Right side rail