Overload protection (30 unit model), Moving your cart, Lock your cart – Anthro Standard Laptop Charging Cart LTSC20xx/xx, LTSC30xx/xx Owners Manual User Manual
Page 4: Anthro laptop storage cart owners manual
Questions? 1-800-325-3841
Overload Protection (30 Unit Model)
Charging 30 laptop computers at one time combined with the power demands of existing laptop battery technol-
ogy can overload a typical 15 amp circuit. Anthro’s 30 Unit Laptop Storage Cart is uniquely equipped with a built-
in timing device that automatically switches the AC power supply from one side of the Cart
to the other.
anthro.com
Moving Your Cart
1. Your Cart comes equipped with two directional casters (they have a green tab) and two locking casters (they have a
black tab). To successfully steer your Cart, make sure the black tabs on the locking casters are in an upright
unlocked position. Push the green tabs on the directional casters to the down position.
2. Make sure the T-handle on the door is recessed so it does not stick out or catch on door frames and corners.
3. When you reach your desired location, push all the tabs on the Casters to the down locked position.
Lock Your Cart
Your Cart comes equipped with a two point keyed locking system on the Doors and two Keys (one is a duplicate).
1. Shut the Door and turn the T-Handle 90 degrees.
2. Recess the T-Handle.
3. Insert one of the Keys and turn 180 degrees counter clockwise.
4. Repeat for other Door if necesary.
To Hook Up Your Cart to a Local Area Network
•
The Storage Cart comes equipped with a data port pass through located near the top and bottom of the unit. The
data ports are for network use only. The network receptacles allow the connection of a local area network (LAN)
to the base of the Storage Cart and the connection of a wireless networking hub near the top of the Storage Cart.
Anthro Laptop Storage Cart Owners Manual
Anthro
®
Corporation Technology Furniture
®
10450 SW Manhasset Drive Tualatin, Oregon 97062 anthro.com
POWER
PRIMAR
Y
SEC
ONDAR
Y
Key
Timer
Setting Minutes
How It Works:
When the Cart’s external control switch is set to internal power (to charge the laptops), the timer module will pro-
vide power to the Primary Panel (the side of the cart with the power cord) for the amount of time indicated on the
Timer Adjustment (shown right). When that time expires, the cart will provide power to the Secondary Panel (the
other side of the cart) until the time expires. The cart will continue to alternate sides until the external control
switch is changed or the cart is unplugged. Every time power is turned off and then restored to the cart, power goes
to the Primary Panel first. An indicator light on the Control Module (located on the bottom shelf inside the cart)
indicates which side of the cart is being charged.
The timer is factory-set on a 25-minute cycle. Laptops and equipment with fully depleted batteries will require more
than one cycle to fully charge.
When the cart's external control switch is set to external power, the cart provides power to the two external recep-
tacles located above the power cord.
Changing the fuse:
In some instances, the fuse will need to be replaced. Check with Anthro Customer Service if you believe that your fuse needs to
be replaced. Use an ABC15 (250V, 15A) fuse.
The fuse is located on the side of the timer, next to the power receptacle. Using a flat-head screwdriver, push the fuse
in and turn counter-clockwise until it stops. The fuse will release and pop up in the housing. Remove the fuse and
discard. Insert the new fuse. Use the screwdriver to push the fuse into the housing, and turn clockwise until it stops.
The front of the fuse should be flush with the housing.
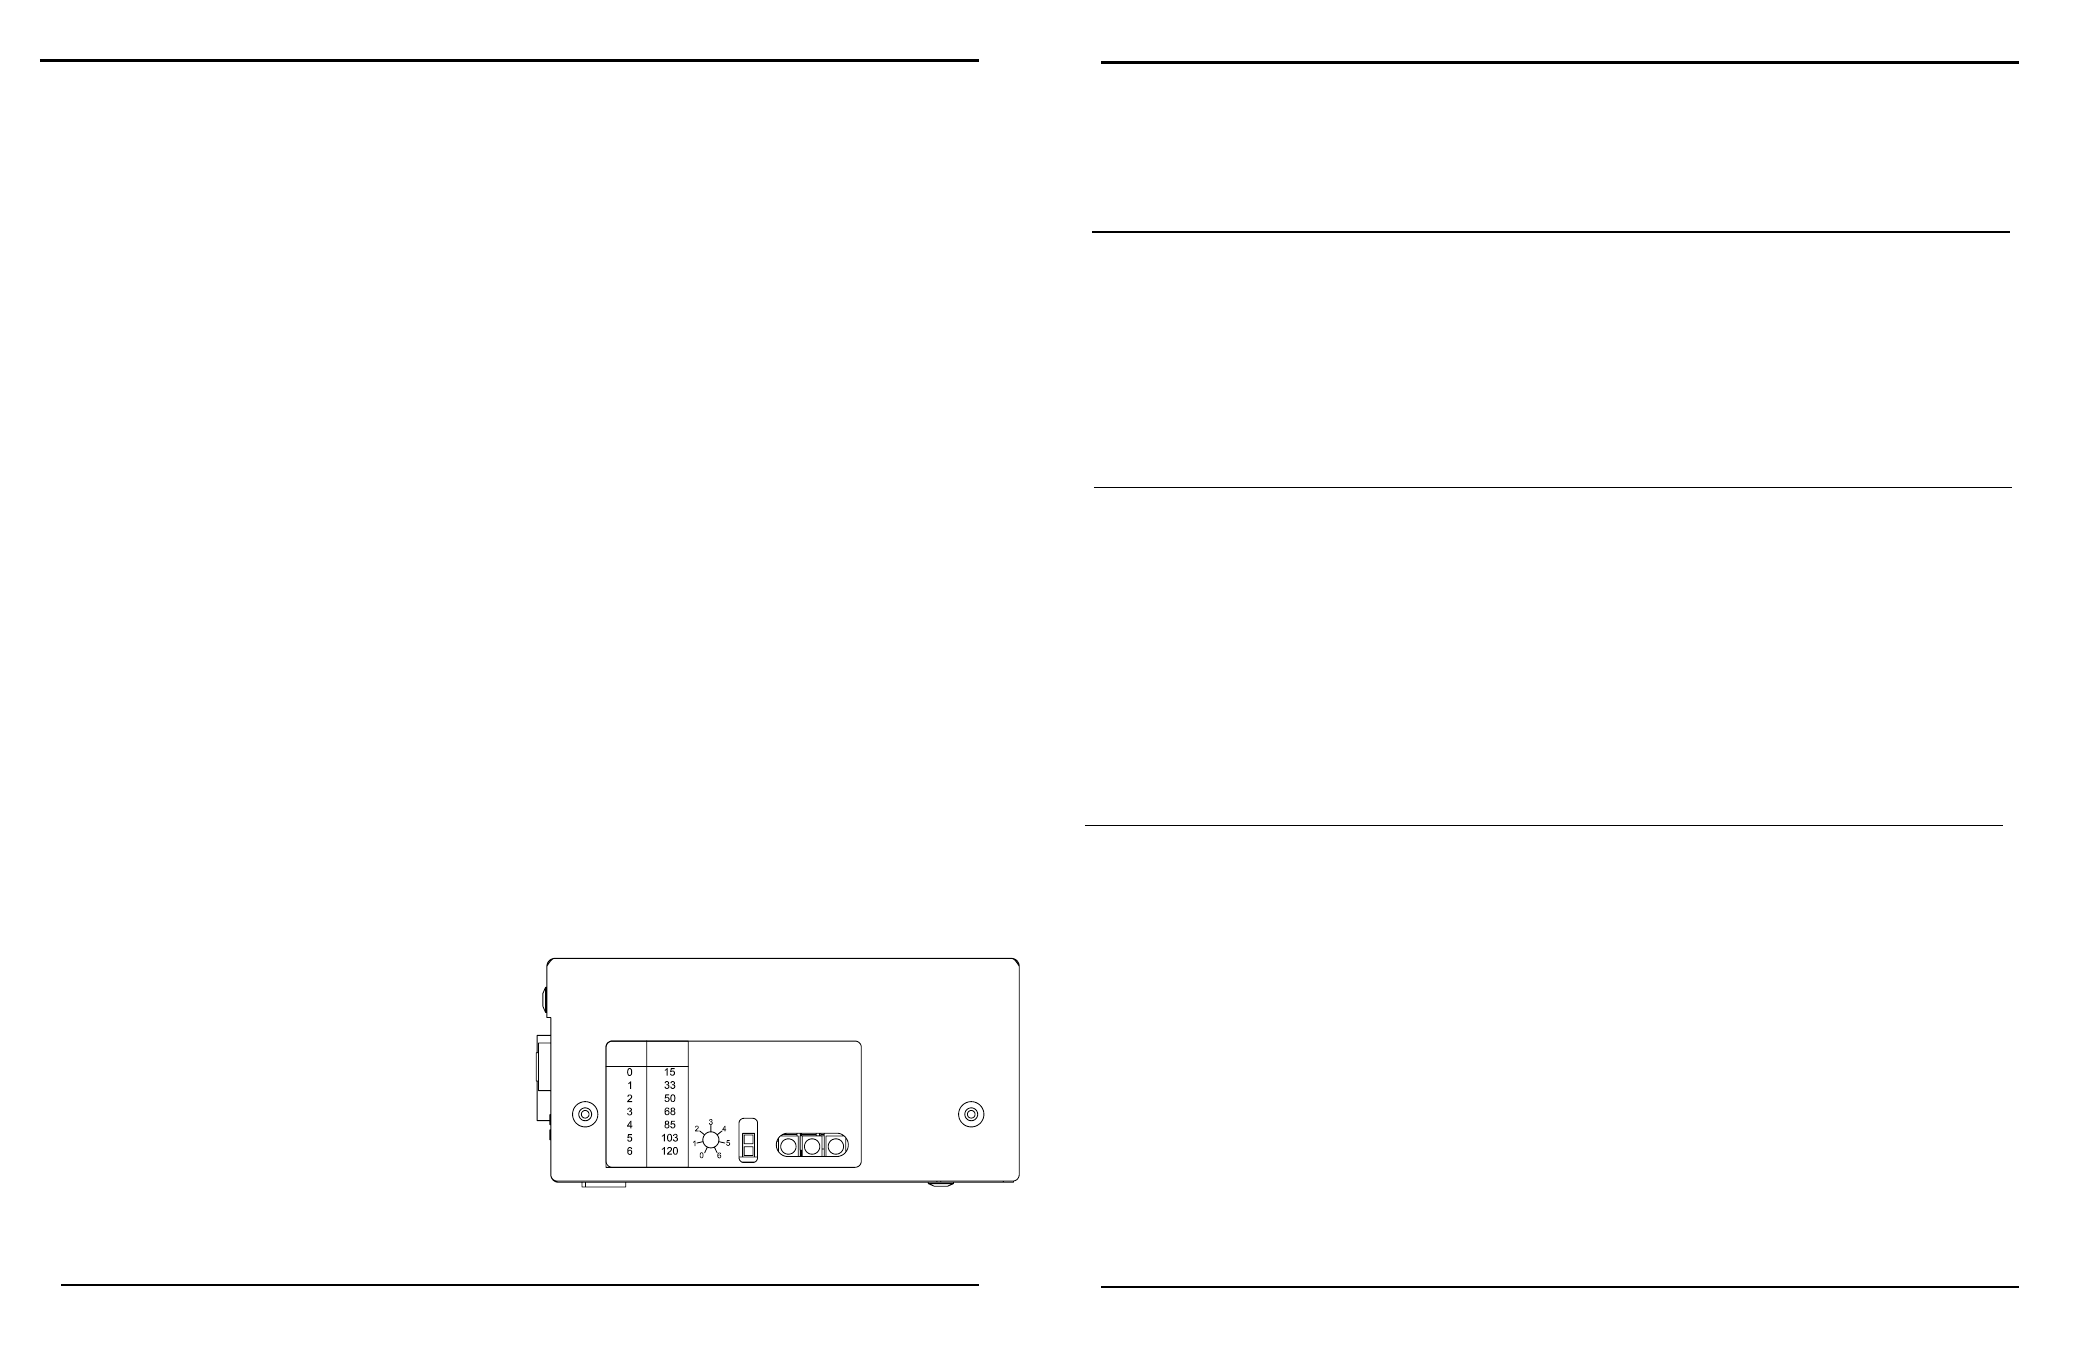
Control Box
Adjusting The Timer:
Use a flat head screwdriver no wider than 1/8” to make this
adjustment.
The 25 minute cycle should be optimum for most applica-
tions and we don’t recommend adjustment. If adjustment is
required, it can be done by a qualified maintenance person
following these provided instructions. The timer range is
from 15 to 120 minutes.
Using a flat head screwdriver, gently turn the timer dial
counterclockwise until it stops at position 0.
Adjust the dial clockwise to the desired setting.
Position 1 provides approximately 25-35 minute cycles. The
timer key to the left of the dial indicates the cycle length
for each setting.