Battery installation, Mounting – NcSTAR AQPFLS User Manual
Page 3
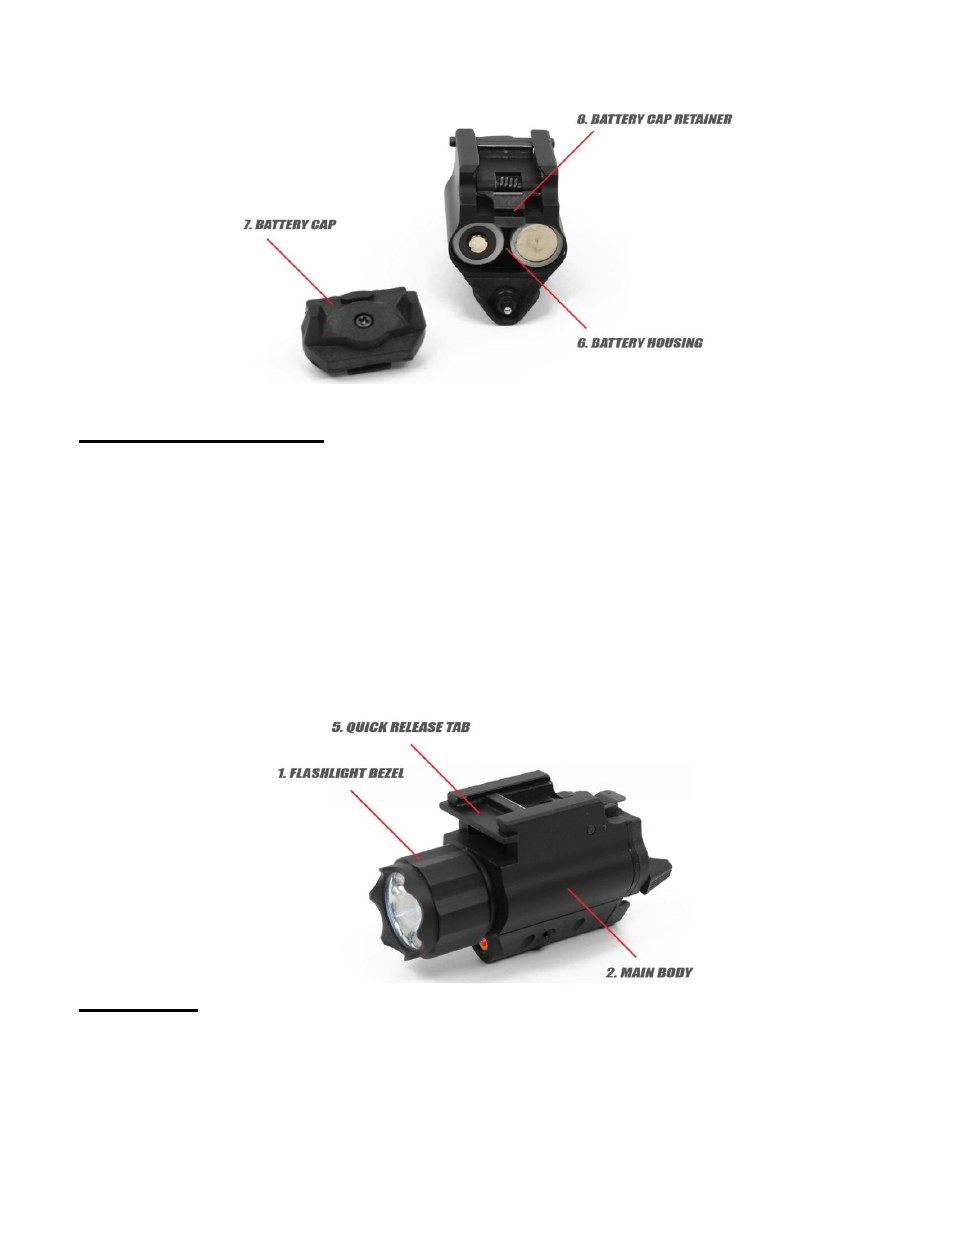
Battery Installation
Before you mount and use your flashlight/laser you must first insert the supplied CR123A
batteries. This is a very simple procedure that takes only a few moments. Begin by grasping the
main body in one hand, and push up on the
Battery Cap Retainer
(8) until it snaps out of place.
Remove the
Battery Cap
(7). Place the batteries inside the
Battery Housing
(6), making sure that
the left battery has the positive end facing out and the right battery has the positive end facing in.
Replace the Battery Cap (7), making sure that the tab on the bottom of the cap fits into the slot on
in the
Main Body
(2). Once the
Battery Cap
(7) is in place, use one hand to press down on it
firmly, while using the other hand to push down on the
Battery Cap Retainer
(8) until it snaps into
place. Do not use any tools for this procedure as this may cause damage to the unit. When it is
time to replace the battery, only use type CR123A Lithium.
Mounting
To mount your Tactical Flashlight/Laser onto your weaver style/Picatinny rail: Grasp the unit by
the
Main Body
(2). Position the unit in front of the rail so the
Flashlight Bezel
(1) is facing in the
same direction as the muzzle of the firearm. Align the grooves on the Tactical Flashlight/Laser
weaver style mount with the grooves on the rail of the firearm. Depress the Weaver Style
Quick
Release Tab
(5) and slide the Tactical Flashlight/Laser straight back and until the unit locks into
place. Your Tactical Flashlight/Laser is now securely mounted.