NcSTAR SRTR3942G User Manual
Page 3
MOUNTING PROCEDURE
MOUNTING PROCEDURE
Your scope mount is the link between your firearm and your optics. It is very important
to have a solid connection between the two in order to ensure proper function of all
components. NcSTAR has made installation fast and easy for the Rubber Armored Mark
III Tactical Series by incorporating the Quick Release System. You should place your
firearm on a secure platform, such as a gun vise, before performing any of the following
procedures.
CAUTION: CAREFULLY FOLLOW ALL OF THE MOUNTING PROCEDURES.
FAILURE TO DO SO CAN CAUSE DAMAGE TO YOUR SCOPE OR FIREARM
CAUTION: BE SURE THAT YOUR FIREARM IS UNLOADED AND POINTED
IN A SAFE DIRECTION. PRACTICE SAFE FIREARM HANDLING
PROCEDURES AT ALL TIMES.
Mounting to a Weaver/Picatinny rail
Follow these mounting instructions for All scopes in the Rubber Armored Mark III
Tactical Series:
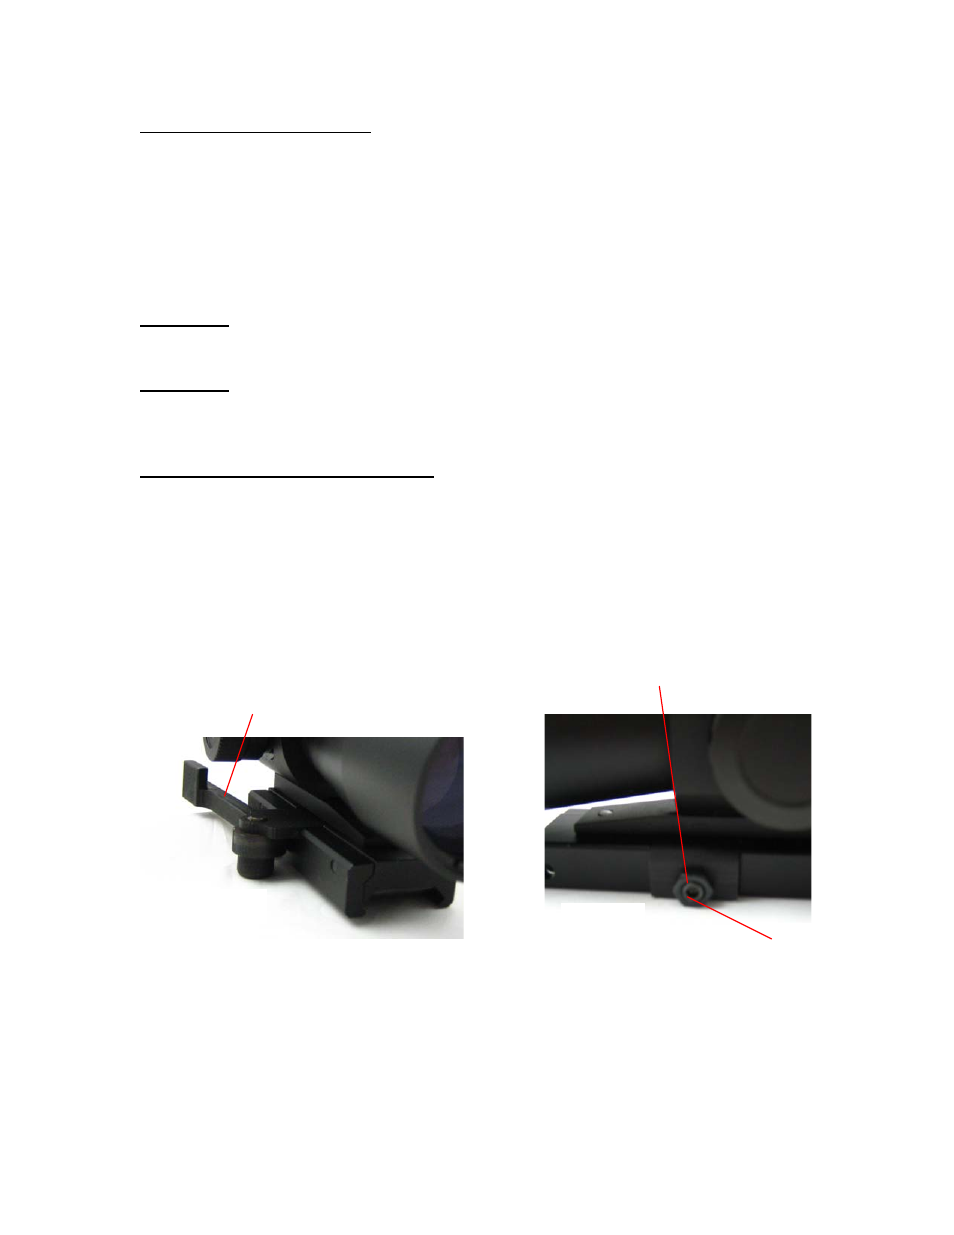
1. Begin by loosening the Locking Nut and the left side of the mount. To perform
this action be sure that the Quick Release Lever is in the closed position pointing
towards the eyepiece (Fig. 1). Using a wrench, turn the Locking Nut counter-
clockwise (Fig. 2).
Locking Nut
Quick Release Lever
Fig. 1
Set Screw
Fig. 2
2. Next, turn the Quick Release Lever to the open position pointing towards the
objective lens. Using the provided allen wrench, loosen the Set Screw in order to
fit the mounting unit to the rail on your firearm (Fig. 2). Seat the scope on top of
your firearm’s rail with the objective lens pointing towards the muzzle. Shoulder
your firearm and adjust the position of the scope until you have achieved the most
comfortable sight picture and maximum field of view. Once you have your scope