Synchronization – MAHLE RTI TechAlert User Manual
Page 9
8
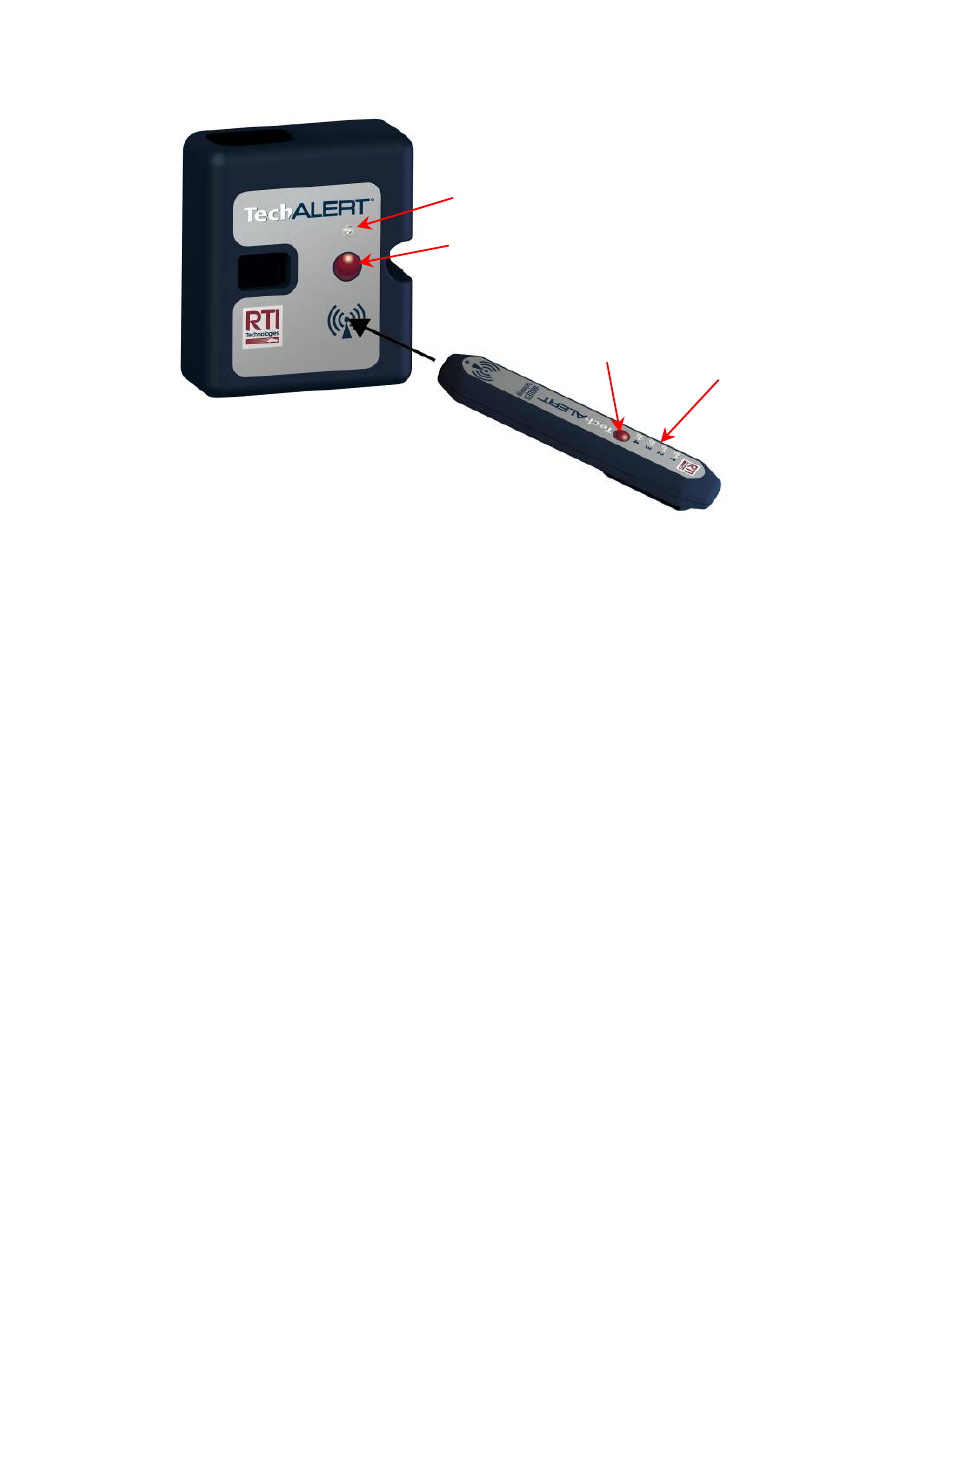
Remote LED’s
Remote PB
Base PB
Base LED
SYNCHRONIZATION
Communication between the Base Module and a Remote Module is
enabled through a synchronization routine. This is initiated by placing the
lower end of a Remote Module with the Base Module at the target. Each
unit has a picture of a target on the decal. The target on the Remote
Module has an arrow to indicate the actual sync point on the bottom of
the remote. Place the lower end of the Remote Module against the target
on the Base Module to activate synchronization.
Synchronization Steps
1. Make contact with the bottom of the remote and the target on the
Base Module. When the synchronization mode is activated, the
base LED will continually flash green for (1) second and then
pause for (1) second. It may be necessary to move the remote
around in a circle while contacting the target to initiate the
synchronization mode. Once activated, you have 20 seconds to
finish the synchronization procedure.
2. Press and hold the Remote Push Button for (4) consecutive
flashes of all 4 LED’s (the remote LED’s will alternate between
red and green flashes). Release the Remote Push Button. The
#1 LED will illuminate green indicating that you would like to
synchronize the Base Module to this remote in the #1 LED
position. If you would like to assign the unit to any other remote
LED position, press and hold the Remote Push Button for (1)
second and release to advance to the next LED position.
Repeat this advancing process until the desired LED is lit. Once
you locate the desired LED position, place the bottom of the
remote against Base Module target. Synchronization is
complete once the green LED on the Base Module stops
flashing.