Reelcraft Series 40 Hose Reels User Manual
Operating instructions, Series 40 hose reels, Important
IMPORTANT
Read this manual carefully before installing,
operating or servicing this equipment.
Operating Instructions
Series 40 Hose Reels
Reelcraft Industries, Inc. • 2842 E Business Hwy 30, Columbia City, IN 46725
Ph: 800-444-3134 / 260-248-8188 • Fax: 800-444-4587 / 260-248-2605
Customer Service: 855-634-9109 • [email protected] • www.reelcraft.com
Form# 261787 Rev: 6/2013
Series 40 with gear drive
Safety Precautions
Personal injury and /or equipment damage
may result if proper safety precautions are
no observed.
• Ensure that reel is properly installed
before connecting supply line (see
installation instructions).
•
• Before connecting supply line to reel,
ensure that supply line pressure does
not exceed maximum rated working
pressure of reel.
• Even low pressure is very dangerous
and cause irreparable damage or death.
•
• Do not wear loose fitting clothing while
operating reel.
•
• Be aware of other personnel and
machinery in work area.
•
• If a leak occurs in the hose or reel,
remove supply line pressure immedi-
ately.
•
•
•
• If reel is electric driven, check for
loose, frayed and broken wires before
operating.
•
• Treat and respect a hose reel as any
other piece of machinery, observing all
common safety practices.
•
• Even low voltage can cause irreparable
damage or death! Exercise extreme
caution while operating or servicing
this equipment.
Installation Instructions
Mounting
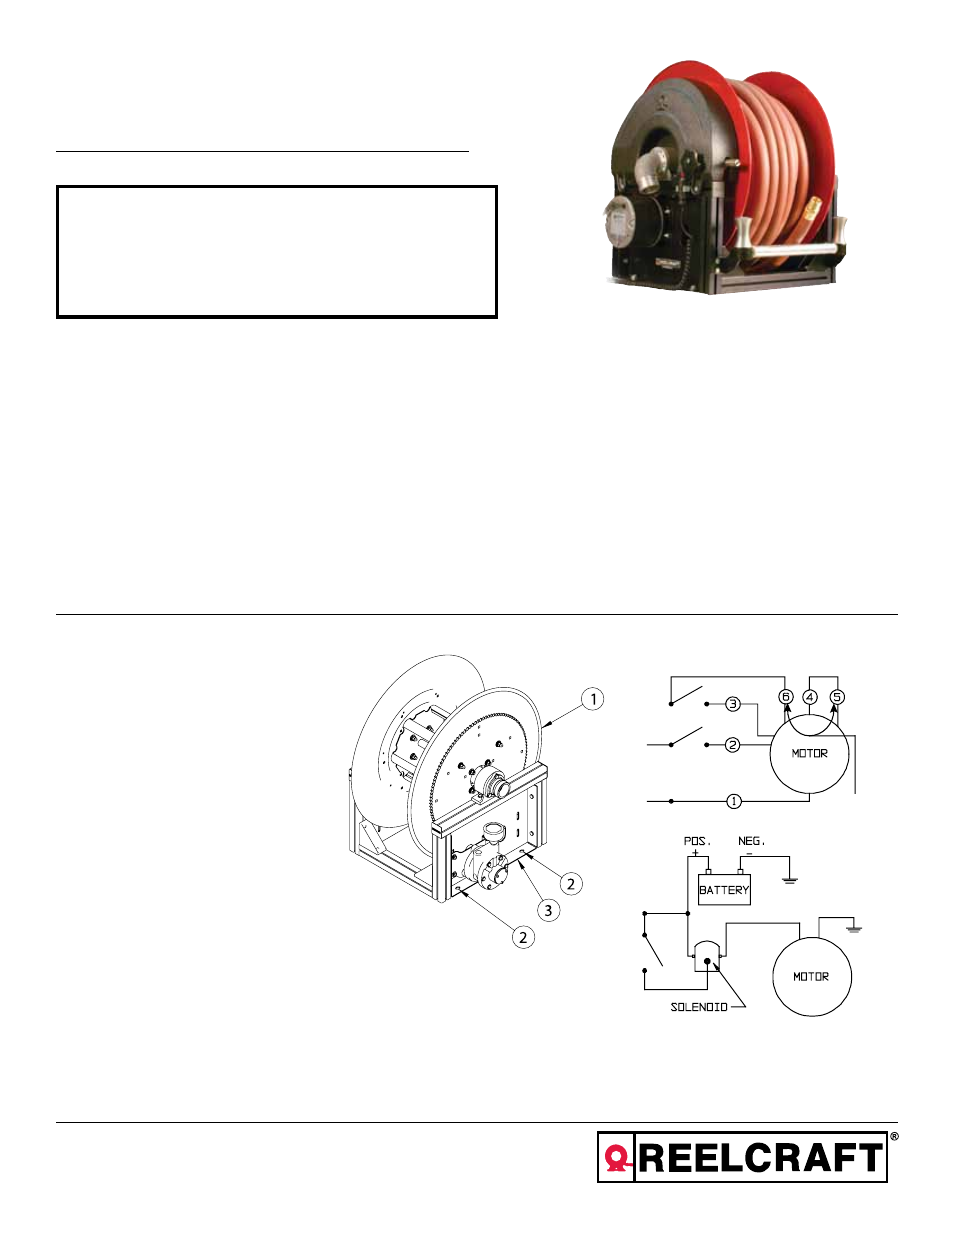
1. Unpack and inspect reel for damage.
Rotate sheave (1) to check for
smooth operation. Check for
completeness.
2. Ensure that mounting surface is flat
to prevent binding of reel after it is
installed.
3. Secure reel to mounting surface by
inserting four screws or bolts
(customer supplied) through the
four mounting holes (2) located in
reel base (3). Tighten securely to
ensure a solid, rigid attachment.
Manual Driven Reels
Additonal mounting instructions are not
required.
Hot
Neutral
SINGLE POLE SINGLE-THROW
DOUBLE POLE SINGLE-THROW SWITCH
Connection shown
gives counterclock-
wise rotation look-
ing at end of motor
shaft. To reverse
rotation interchange
Leads 5, 6.
12/24 VOLT D.C.
110 Volt A.C.