Figure 4-4: insert the socket lga775 cpu – IEI Integration IMBA-G412ISA v2.00 User Manual
Page 60
461/20/2012164
P a g e 46
IMBA-G412IS A ATX Mo th e rb o a rd
S te p 3:
Inspect the CPU socket. Make sure there are no bent pins and make sure the
socket contacts are free of foreign material. If any debris is found, remove it with
compressed air.
S te p 4:
Orientate the CPU properly. The contact array should be facing the CPU
socket.
S te p 5:
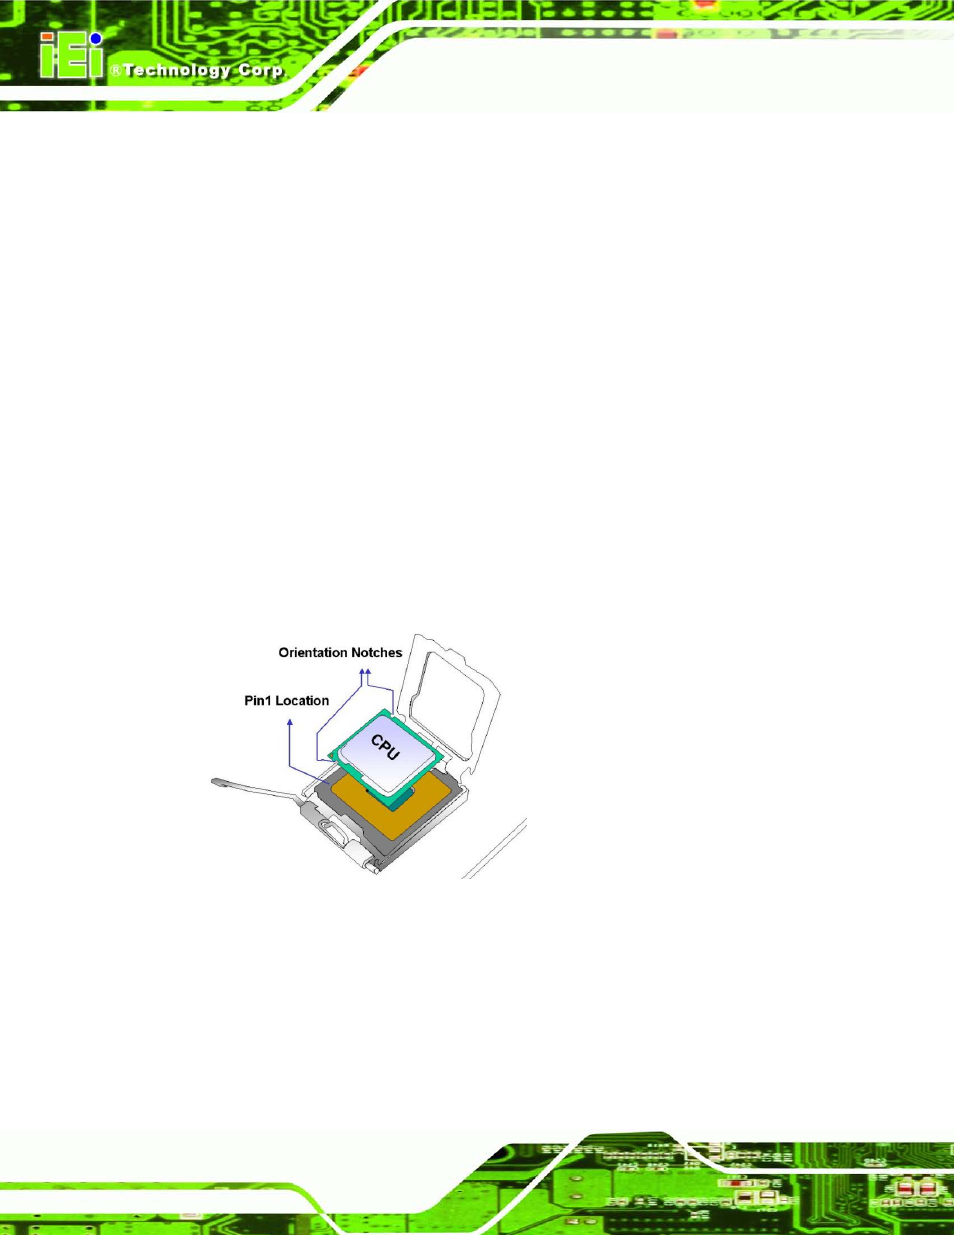
Correctly position the CPU. Match the Pin 1 mark with the cut edge on the
CPU socket.
S te p 6:
Align the CPU pins. Locate pin 1 and the two orientation notches on the CPU.
Carefully match the two orientation notches on the CPU with the socket
alignment keys.
S te p 7:
Insert the CPU. Gently insert the CPU into the socket. If the CPU pins are
properly aligned, the CPU should slide into the CPU socket smoothly.
Figure 4-4: Insert the Socket LGA775 CPU
S te p 8:
Close the CPU socket. Close the load plate and engage the load lever by
pushing it back to its original position. There will be some resistance, but will not
require extreme pressure.
S te p 9:
Connect the 12 V power to the board. Connect the 12 V power from the power
supply to the board.
S te p 0: