3 sata drive connection, Figure 4-11: 7.1 channel audio kit – IEI Integration PICOe-PV-D4251_N4551_D5251 v1.11 User Manual
Page 69
PICOe-PV-D4251/N4551/D5251 User Manual
Page 55
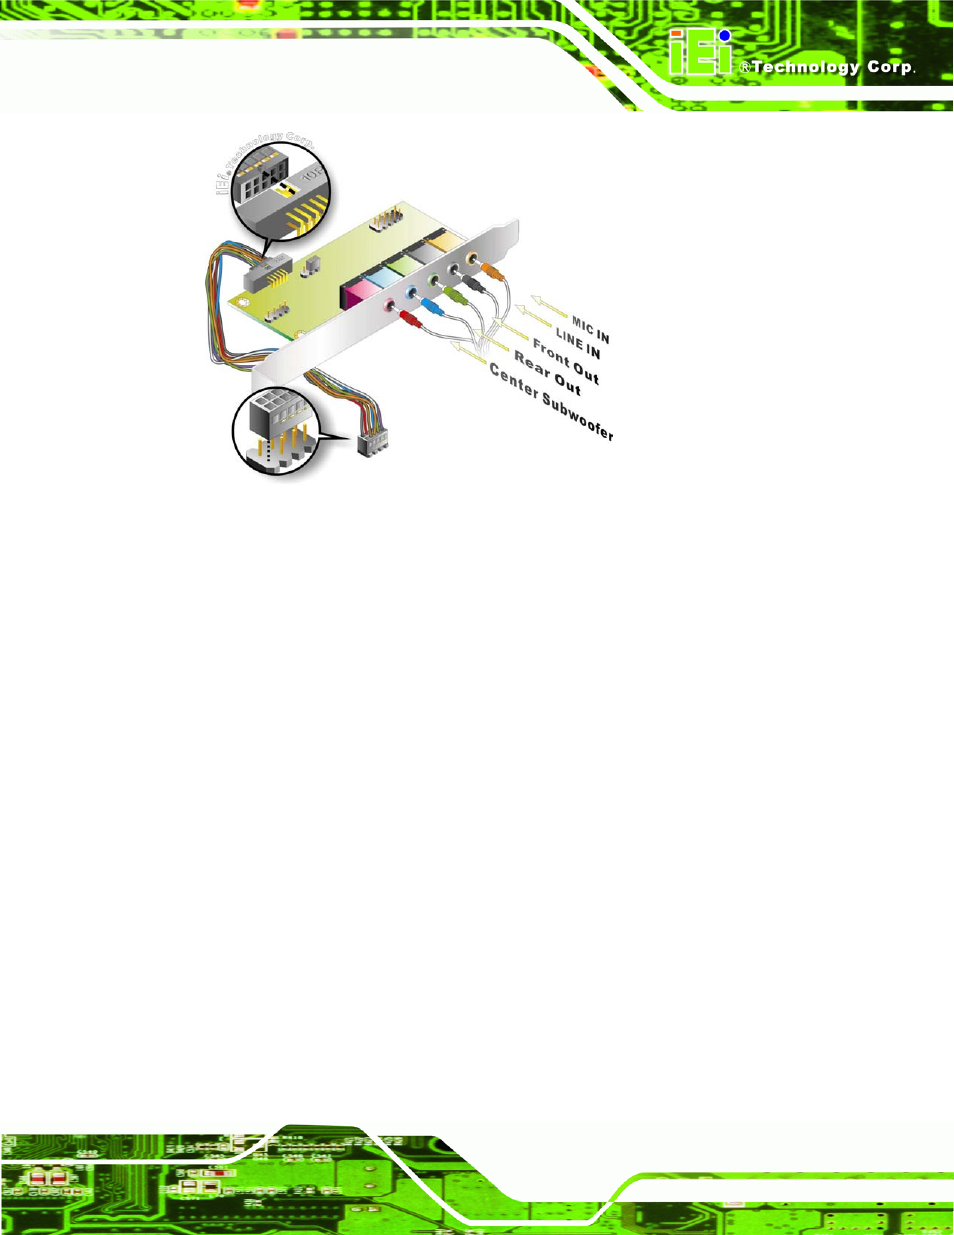
Figure 4-11: 7.1 Channel Audio Kit
Step 4:
Mount the audio kit onto the chassis. Once the audio kit is connected to the
PICOe-PV-D4251/N4551/D5251, secure the audio kit bracket to the system
chassis.
Step 5:
Connect the audio devices. Connect one speaker to the line-in audio jack, one
speaker to the line-out audio jack and a microphone to the mic-in audio jack.
Step 6:
Install the driver. If the 7.1 channel audio kit is used, the ALC883 Realtek
codec driver must be installed. Refer to Section 4.9 for driver installation
instructions.
4.7.3 SATA Drive Connection
The PICOe-PV-D4251/N4551/D5251 is shipped with two SATA drive cables and one
SATA drive power cable. To connect the SATA drives to the connectors, please follow the
steps below.
Step 1:
Locate the connectors. The locations of the SATA drive connectors are shown
in Chapter 3.
Step 2:
Insert the cable connector. Press the clip on the connector at the end of the