Installation instructions sdu-lon 3 installation, Check display, Replace front panel – TREND SDU-LON User Manual
Page 7: Check operation - monitor
SDU-LON Installation Instructions TG200599 Issue 2, 6/10/08
7
Installation Instructions
SDU-LON
3
Installation
(continued)
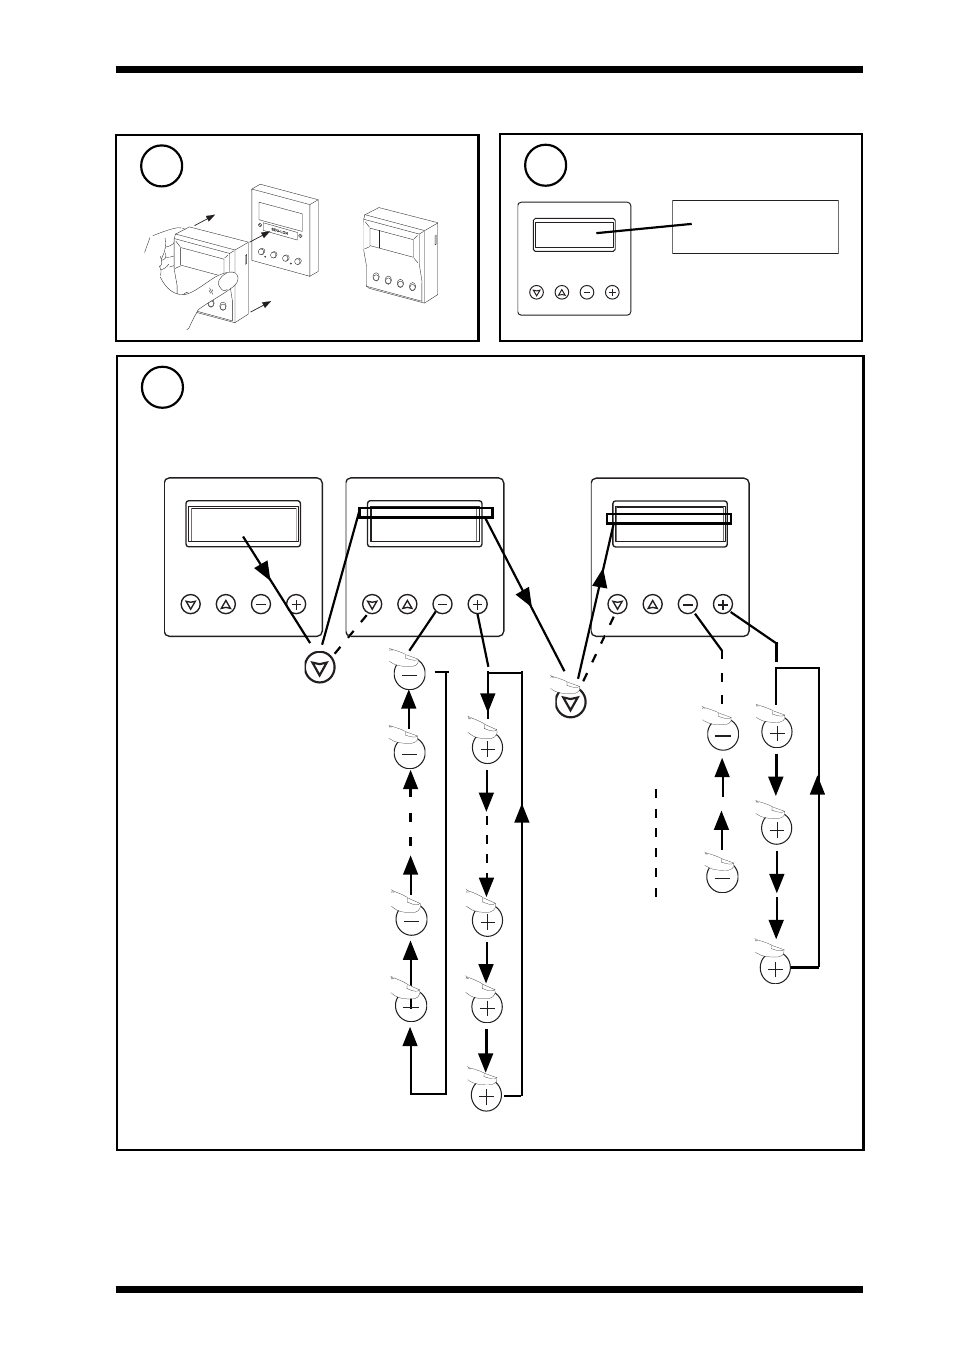
Check Display
16
1
2
3
4
S e n s o r 1
F l o o r 1 S p a c e T e m p
2 0 . 3 D e g C
Displays first labelled
sensor if set to
defaults
Replace Front Panel
15
Check Operation - Monitor
17
1
2
3
4
Sensor
S e n s o r 1
F l o o r 1 S p a c e T e m p
2 0 . 3 D e g C
Knob
Switch
Driver
Digital Input
Time Zone
Time
1
2
3
4
S e n s o r 1
F l o o r 1 S p a c e T e m p
2 0 . 3 D e g C
Sensor 1
Sensor 2
Sensor (last)
1
2
3
4
Calendars
Note that the full sequence listed below may only be shown in Unrestricted modes. The Restricted
modes show only those pages on the Restricted list. The Home page is optional (see step 6d).
Plant Room 1
20/03/02 08:04
Home page
Note that if there are no modules of
type (sensors, knob, switch, driver,
digital input) set up with a label it will
jump to the next type display.
Note that only modules with labels (not
necessarily sequential) will be displayed.