Sdu-lon installation instructions, 3installation, Mount unit – TREND SDU-LON User Manual
Page 6: Install on l, Management tool, Associate sdu with its iql, If other iq system devices on l, Are installed on l, See l, Network management tool manual. see iq system l
SDU-LON
Installation Instructions
SDU-LON Installation Instructions TG200599 Issue 2, 6/10/08
6
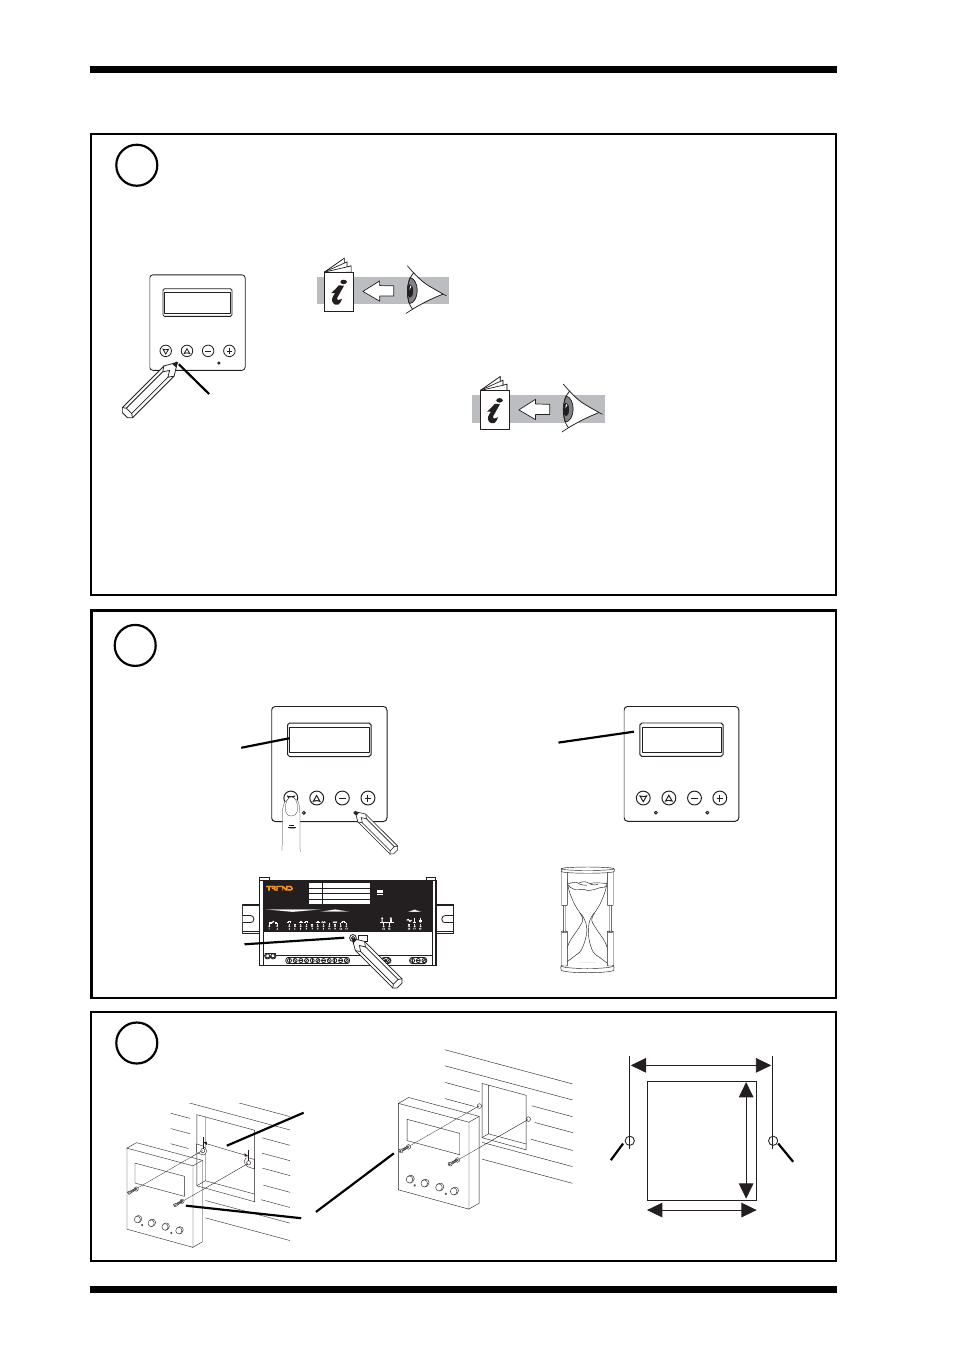
Mount Unit
14
Standard UK pattress wall box
or panel
60 mm
46 mm
50 mm
Ø 4 mm
(M3.5
screw)
Ø 4 mm
(M3.5
screw)
60 mm
2 off (M3.5 x 35 mm)
screws provided
Install on L
ON
W
ORKS
Management Tool
12
If other IQ System devices on L
ON
W
ORKS
are installed on L
ON
W
ORKS
Management Tool (LMT).
When installing SDU-LON on L
ON
W
ORKS
Management Tool, push service pin button when
requested.
S P
E N G
1
2
3
4
See L
ON
W
ORKS
network management tool
manual. See IQ System L
ON
W
ORKS
Products
Engineering Manual (TE200292). L
ON
W
ORKS
System integrator must have L
ON
W
ORKS
engineering expertise.
SDU Data Sheet TA200559
for L
ON
W
ORKS
network
variables (NVs)
The SDU must also be associated with its IQL using the LMT
The following network variables need to be set up using the LMT:
nciInstallState: set to CFG_EXTERNAL
nciHostNodeAddr: set to associated IQL LonWorks node address
nciSubnetAddr: set to associated IQL LonWorks subnet address
nciMsgCode: set message code of associated IQL
nciDomainIndex: set to domain index of associated IQL
service pin button
Associate SDU with its IQL
13
a
b
not if installed on L
ON
W
ORKS
Management Tool
SP
ENG
1
2
3
4
Connect to IQ
“Connect to IQ”
SP
ENG
1
2
3
4
Press IQL Service PIN
“Press IQL
Service Pin”
c
d
4 secs
Either use IQLTool2 running in SET and connected to a
L
ON
W
ORKS
network using LCI or use buttons as follows:
3
Installation
(continued)
2 4 V a c
I Q
L
+
O / S
L A N
L O N
N I D
S t r a t e g y
: : : : :
D O 1
I N 1
D O 2
D O 3
~
D O 4
D O 5
I N 2
I N 3
2 4 V
C O M
2 4 V
C O M
~
C O M
service pin button