Jitkit gating, Gating – Teledyne LeCroy JitKit User Manual
Page 11
Operator's Manual
JITKIT Gating
Using gates, you can narrow the span of the waveform on which to perform jitter measurements,
allowing you to focus on the area of greatest interest. You have the option of dragging the gate posts
horizontally along the waveform, or specifying a gate type. There are three gate types:
l
Division - specify a position down to the hundredths of a division. The default starting positions of
the gate posts are 0 div and 10 div, which coincide with the left and right ends of the grid. The
gate, therefore, initially encloses the entire waveform.
l
Number - limit the number of jitter measurement results per acquisition by setting a maximum
limit.
l
Waveform - specify values based on the waveform state (for example, when the waveform state is
High or when the level is a specified percentage.
You can define shared gate settings that apply to all measurements or you can define individual gates for
each measurement. If you choose to define individual gates, you define the gate settings on the Measure
dialog for each measurement.
Note: If you apply gating, subsequent jitter domain views will only be applied on measurement values in
the gated area.
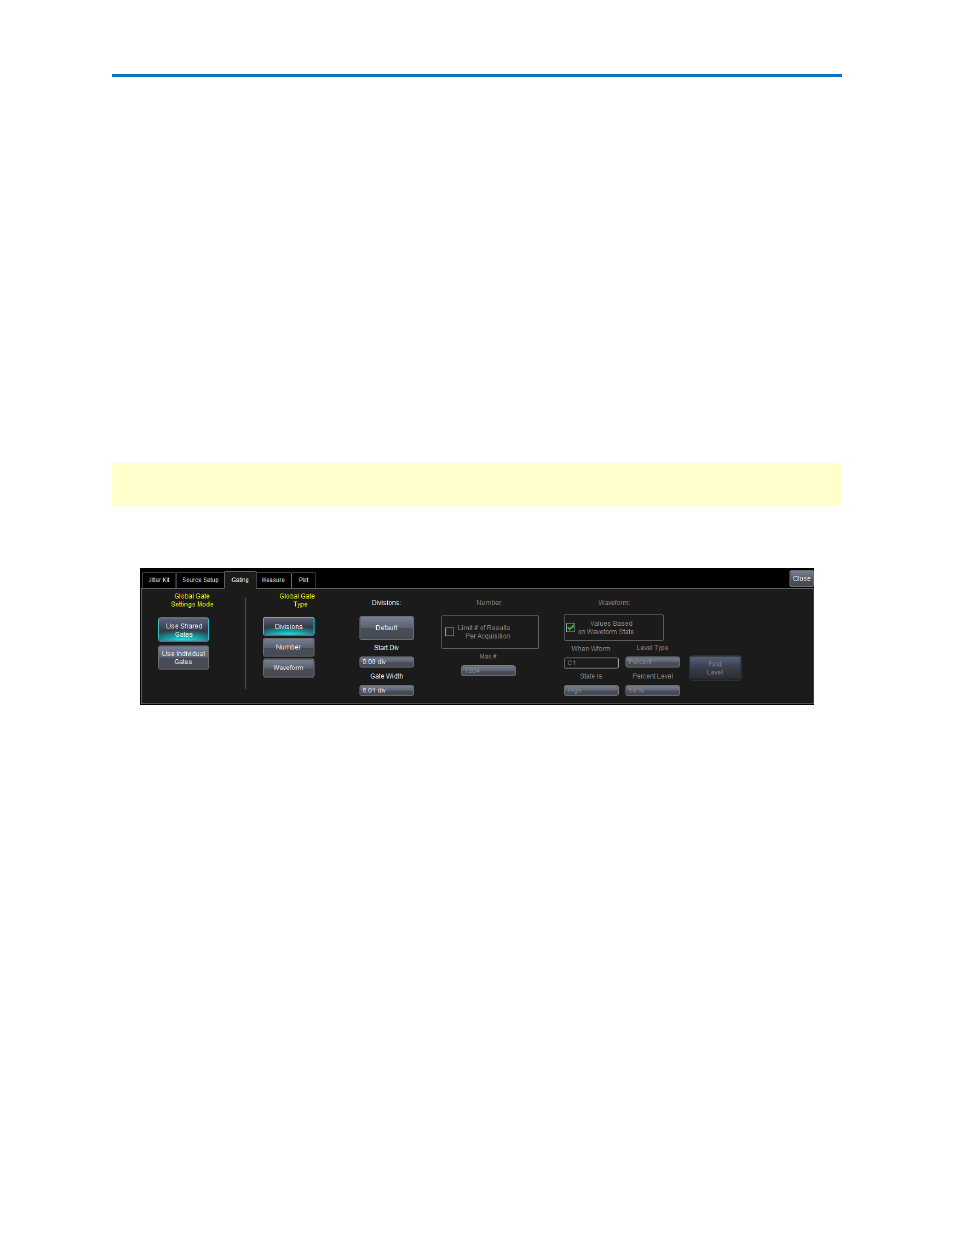
1. Touch Analysis → Jitter Kit... on the menu bar , then touch the Gating tab to access the Gating
dialog.
2. Under Global Gate Settings Mode, select a mode:
l
Use Shared Gates - applies the gate settings on this dialog to all measurements.
l
Use Individual Gates - lets you configure individual gate settings for each measurement. If
you choose to configure individual gate settings you can define the gates on the Measure
dialog.
3. Under Global Gate Type, touch Divisions, Number, or Waveform. The corresponding area of the
dialog becomes available.
4. If you want to specify gate divisions, in the Divisions area of the dialog touch inside the Start Div
data entry control and enter a value. Touch inside the Gate Width data entry control and enter a
value.
5. If you want to specify a limit, in the Number area of the dialog place a checkmark in the box next to
Limit # of Results per Acquisition. Touch inside the Max # data entry control and enter a maximum
value.
6. If you want to specify values based on the waveform state, in the Waveform area of the dialog place
a checkmark in the box next to Values Based on Waveform State.
922810 Rev A
9