Steelcraft Automotive 32210 TAILLIGHT GUARD User Manual
Installation instructions
PARTS LIST:
PROCEDURE:
1. REMOVE CONTENTS FROM BOX. VERIFY ALL PARTS ARE PRESENT. READ
INSTRUCTIONS CAREFULLY.
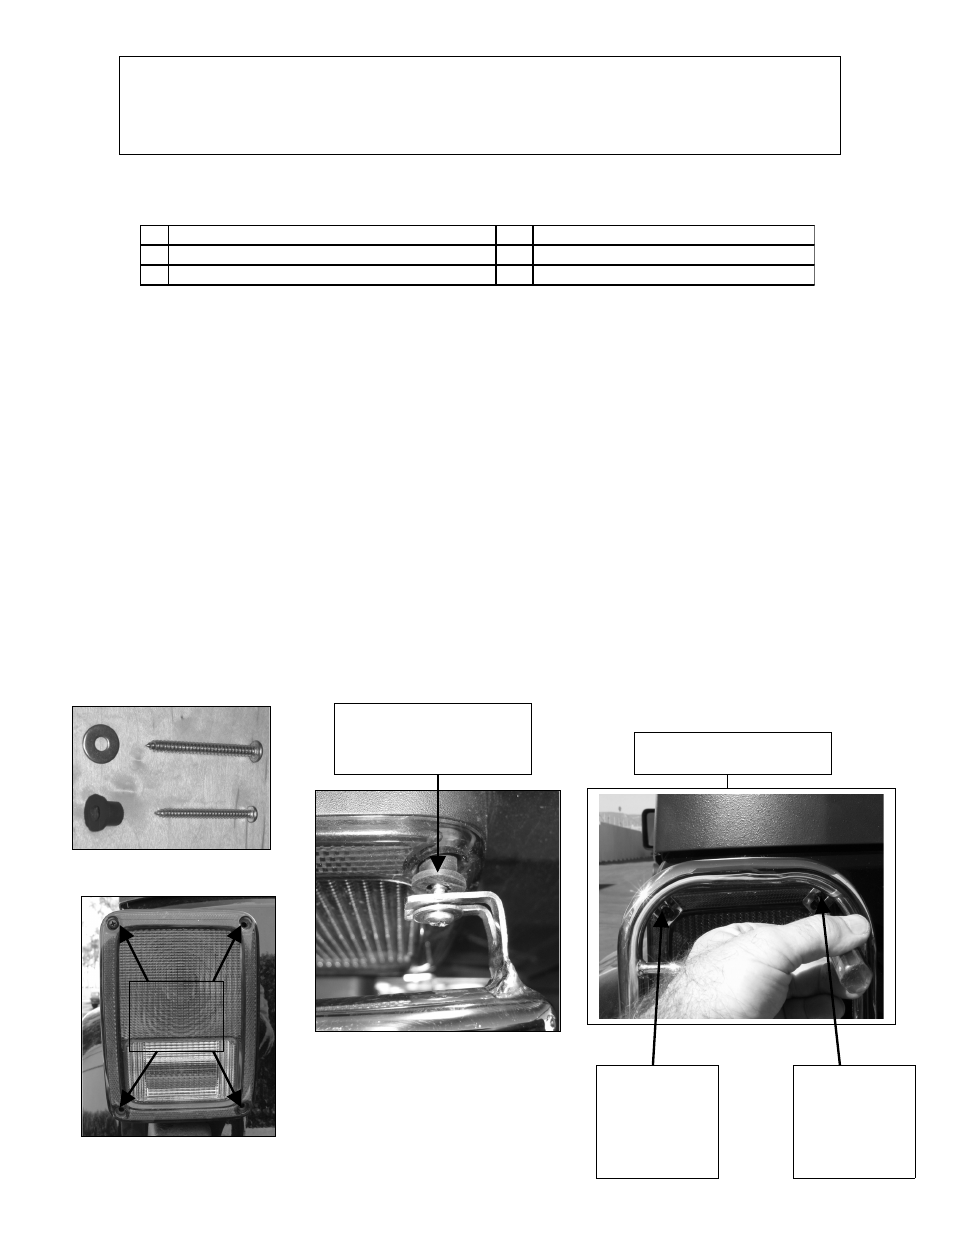
2. Using a Phillips screwdriver remove the screws from the driver side taillight lens (Figure 2). Note
that inner factory screws will be replaced by #6 x 45mm Sheet Metal Screws and the outer factory
screws with #8 x 50mm Sheet Metal Screws provided in the Hardware Kit. See figure 1.
3.
Place Rubber Spacers between the taillight lens and the Tail Light Guard, then position Tail Light Guard
onto lens (Figure 3).
4. Position the guard while inserting the screw into its hole in the lens. NOTE: Taillight Light Guards
will fit either side, left or right. Install the screw tightly enough to keep the guard in place.
5. Install he other three screws. Align the guard with the top of the lens and tighten the screws using
a Phillips screwdriver (Figure 4). Warning! Avoid over tightening to prevent damage
6. Repeat operation with the other side of the vehicle and check that the two guards are parallel to
each other.
PART# 32210 / 32217
Page 1 of 1
12/27/06 (AM)
2 Tail Light Guards
8 Rubber Spacers
4 #6 X 45mm Sheet Metal Screws
8 #8 Flat Washers
4 #8 x 50mm Sheet Metal Screws
INSTALLATION INSTRUCTIONS
07 JEEP Wrangler 2Dr and 4Dr Taillight Guards
PART NUMBER 32210 / 32217
Place Rubber Spacer
between taillight lens
and Tail Light Guard
(8 pcs)
(8 pcs)
(4 pcs)
(4 pcs)
Figure 1
Remove
these
screws
Figure 2
Figure 3
Figure 4
Driver Side Shown
#8 x 50mm
Sheet Metal
Screws on
Left Top &
Bottom
#6 x 45mm
Sheet Metal
Screws on
Right Top &
Bottom