Test cable before embedding, Step 7: install the floor sensor, Step 8: apply scratch coat – King Electric FCM Floor Mat User Manual
Page 17: Scratch coat application
King Electrical Floor Heating Mat Installation Manual
17
Test cable before embedding
7.3 Use a fish tape or pull string to pull the sensor
wire to the electrical box, but not in the box.
IMPORTANT TEST 1: Test the cable resistance, cable
insulation and floor sensor now that the cable is installed
on the floor. Record the readings on the cable label and
the data table on page 6.
STEP 7: Install the floor sensor
Position floor sensor halfway
between the heating cables
7.1 The floor sensor must be positioned exactly halfway between two
heating cables to accurately read the floor temperature. Place the
sensor bulb at least 12” into the heated area. Mark the spot on the floor
where the sensor bulb will be located.
7.2 To make sure the sensor bulb will not create a high spot in the
floor, chisel a .25” channel into the floor and lay the sensor bulb into the
channel. Apply
hot glue to secure the bulb into place.
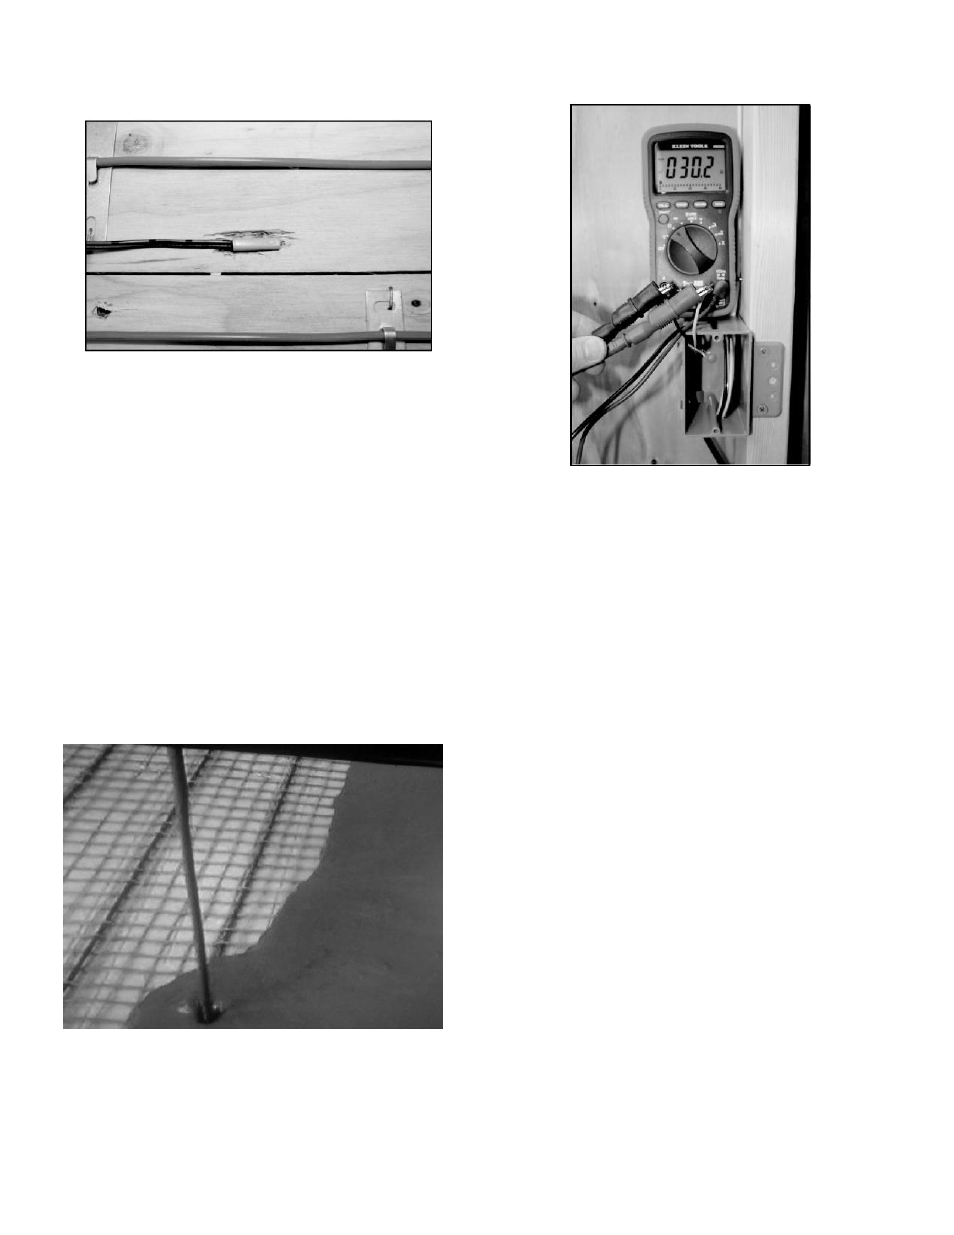
STEP 8: Apply scratch coat
8.1 Apply a scratch coat of thin-set or self-leveling mortar
uniformly over the entire floor area. Make sure the heating
cables are completely embedded. Follow the compound
manufacturer’s instructions.
8.2 Use a plastic straight edge trowel and cover the entire
areas that don’t have cable to maintain uniform height.
8.3 Apply the mortar in the same direction of the cable runs
to minimize lateral movement.
IMPORTANT TEST 2: TEST THE CABLE
RESISTANCE, CABLE INSULATION AND FLOOR
SENSOR RESISTANCE TO BE SURE NO DAMAGE
OCCURRED DURING THE THIN-SET
APPLICATION. RECORD THE READINGS ON THE
CABLE LABEL AND IN THE DATA
LOG ON PAGE 6.
Scratch coat application